
How Microsoft Power Platform is helping to modernize and enable...
In this webinar, our experts showcase a variety of demo use cases of how different components of the...
Released in the October 2018 update, the Playbook tool in Dynamics 365 for Sales is designed to enforce a series of defined activities that should be triggered in the event of specific scenario, or within the context of a process. Click here for a more comprehensive definition of playbooks. The tool enables the capability of automating sales activities, and this automation will help sales teams streamline their sales processes. Let’s take a look…
Requirements:
Once the two requirements are met, here’s how it works:
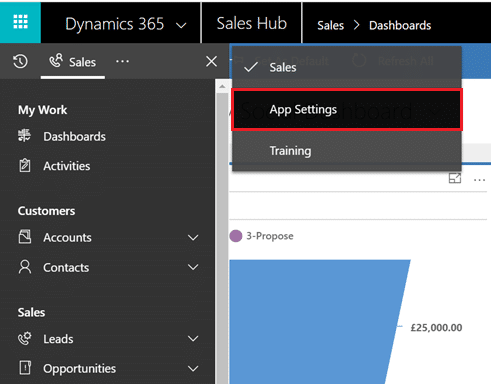
1. From the Sales Hub sitemap select App Settings.
2. Under Playbook Management heading select Playbook categories.

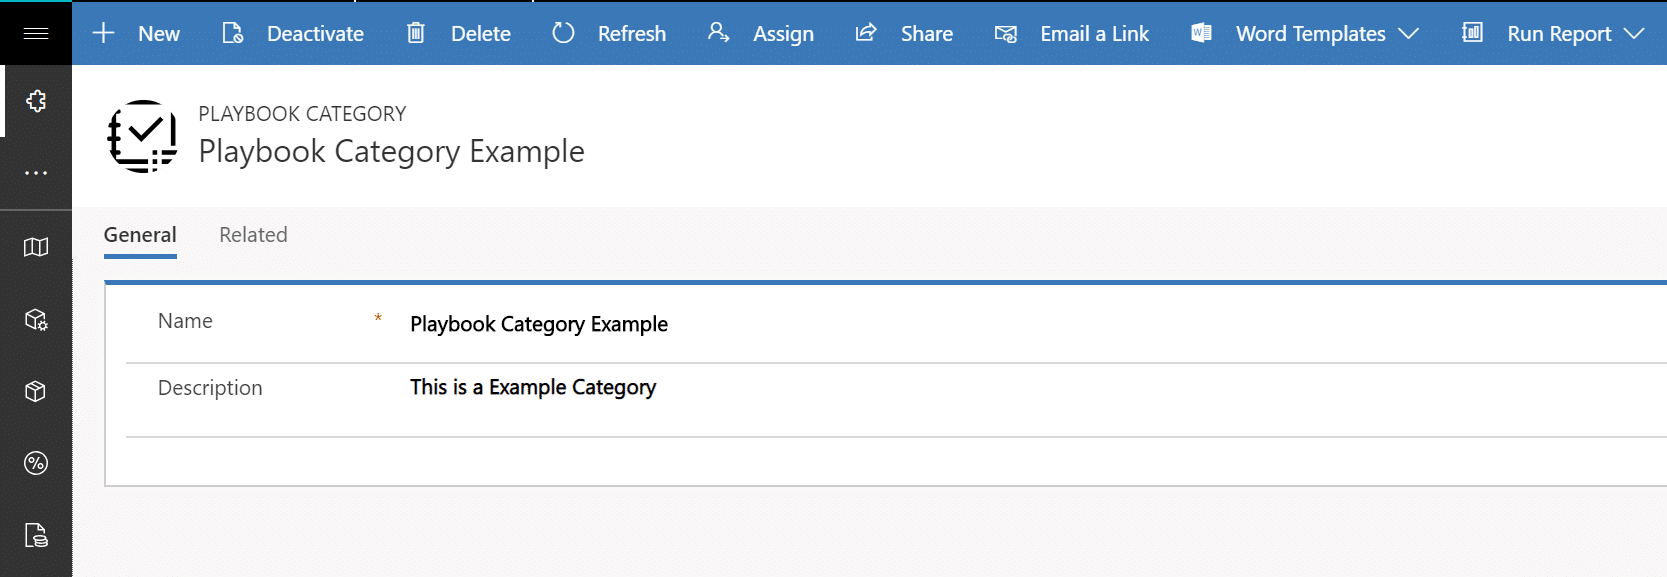
3. Next, we’ll create a Playbook Category. Playbook categories are used to classify different playbooks. For this example, we’ll create a category called Playbook Category Example.
4. Once the Playbook Category has been created, we return to Sales Hub > App Settings > Playbook Management. This time select Playbook templates to create a new template.

Playbook templates is where much of the configuration for your playbook will take place:
For the purposes of this walkthrough, we will leave this as Yes.

5. In the Select record types that this playbook applies to section, use the arrows to move your desired records from the Available column to the Selected column. Note that currently the Playbook feature is only available only for Opportunities, Leads, Quotes, Orders, and Invoices. In our example, we will select only the Opportunity record type.

6. In the Playbook Activities section, click on + Add activity > Appointment to open the Quick create: Playbook Appointment form.

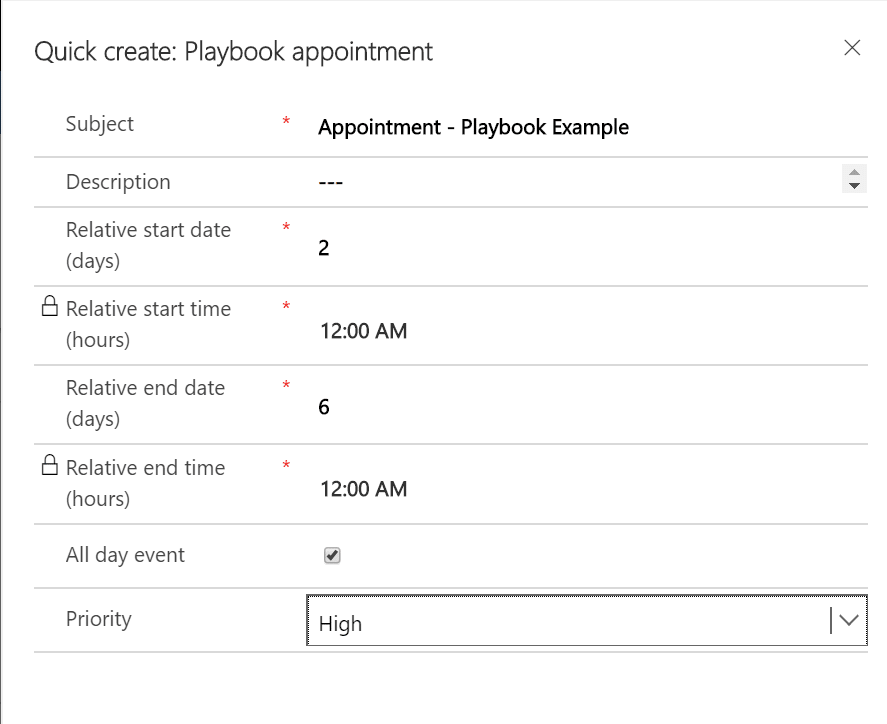
7. In the Quick create: Playbook Appointment form, enter the following information:
8. Before Playbook Template Example will be available to users, it must be published. On the command bar, click Publish.

9. This playbook is now available to be launched from the command bar of any opportunity record, as shown below:

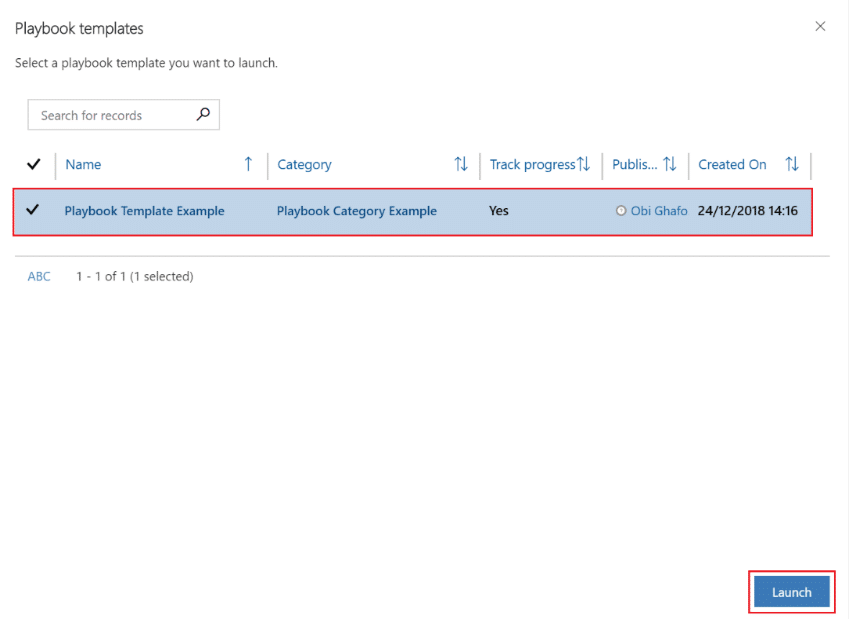
10. All of the available playbooks will be listed on the Playbook templates screen. Select the one you want to open and click Launch.
You’ll receive the following confirmation that the playbook launched successfully:

11. To view the activities created from launching the playbook, select the Playbooks tab on the Opportunity from which you launched the Playbook, as shown. (Alternatively, select the related tab and click Playbooks.)

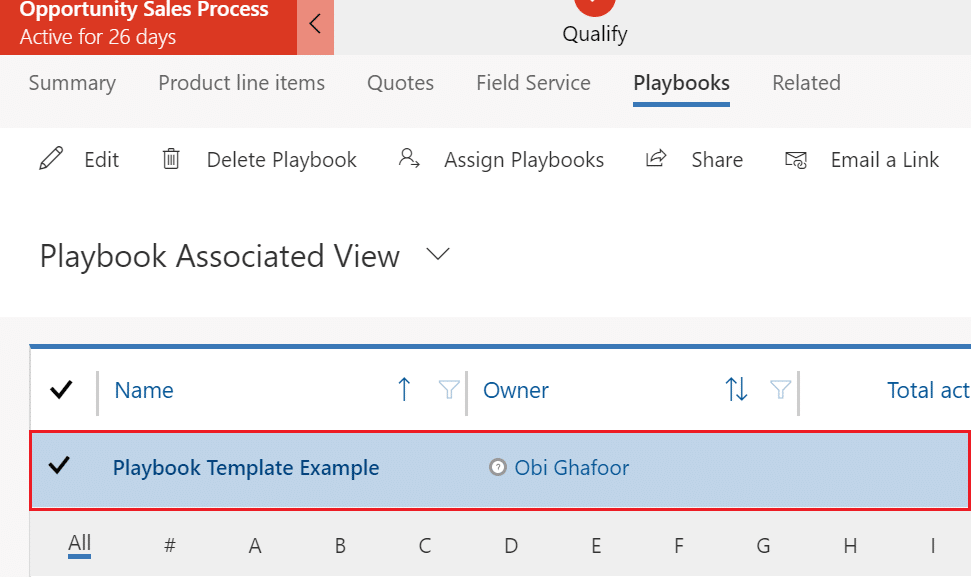
12. On the Playbook Associated View screen, open the desired playbook – in our example, we’ll open Playbook Template Example.
13. This Playbook record displays all the details about the Playbook and its associated activities.

In the Playback activities section, all activities related to the playbook are visible. If you mark these activities Completed, that status will be visible here.
Note: You may be wondering why the activities are recorded against the Playbook record as opposed to the Opportunity record. Recall that this adjustable setting is determined by your Track Progress selection in Step 4. Had we selected No instead of Yes, activities would have been recorded on the Opportunity record and displayed on the timeline of the Opportunity record.
14. Once all activities are completed for the Playbook, it must be marked as completed using the Complete as button. In our case, we’ll select Successful.

The Playback will now be marked as successful and set to read-only.
As stated at the beginning, playbooks have a lot of potential to streamline sales activities. So, if you’re running Dynamics 365 for Sales, you’ll want to learn about them as soon as you can.
Happy Dynamics 365'ing!


