
How Microsoft Power Platform is helping to modernize and enable...
In this webinar, our experts showcase a variety of demo use cases of how different components of the...
When working with cases, often there is a need to create child cases for various departments and users in the organization to help resolve the cases. In today’s blog, we’ll share how it can be done through Data Import.
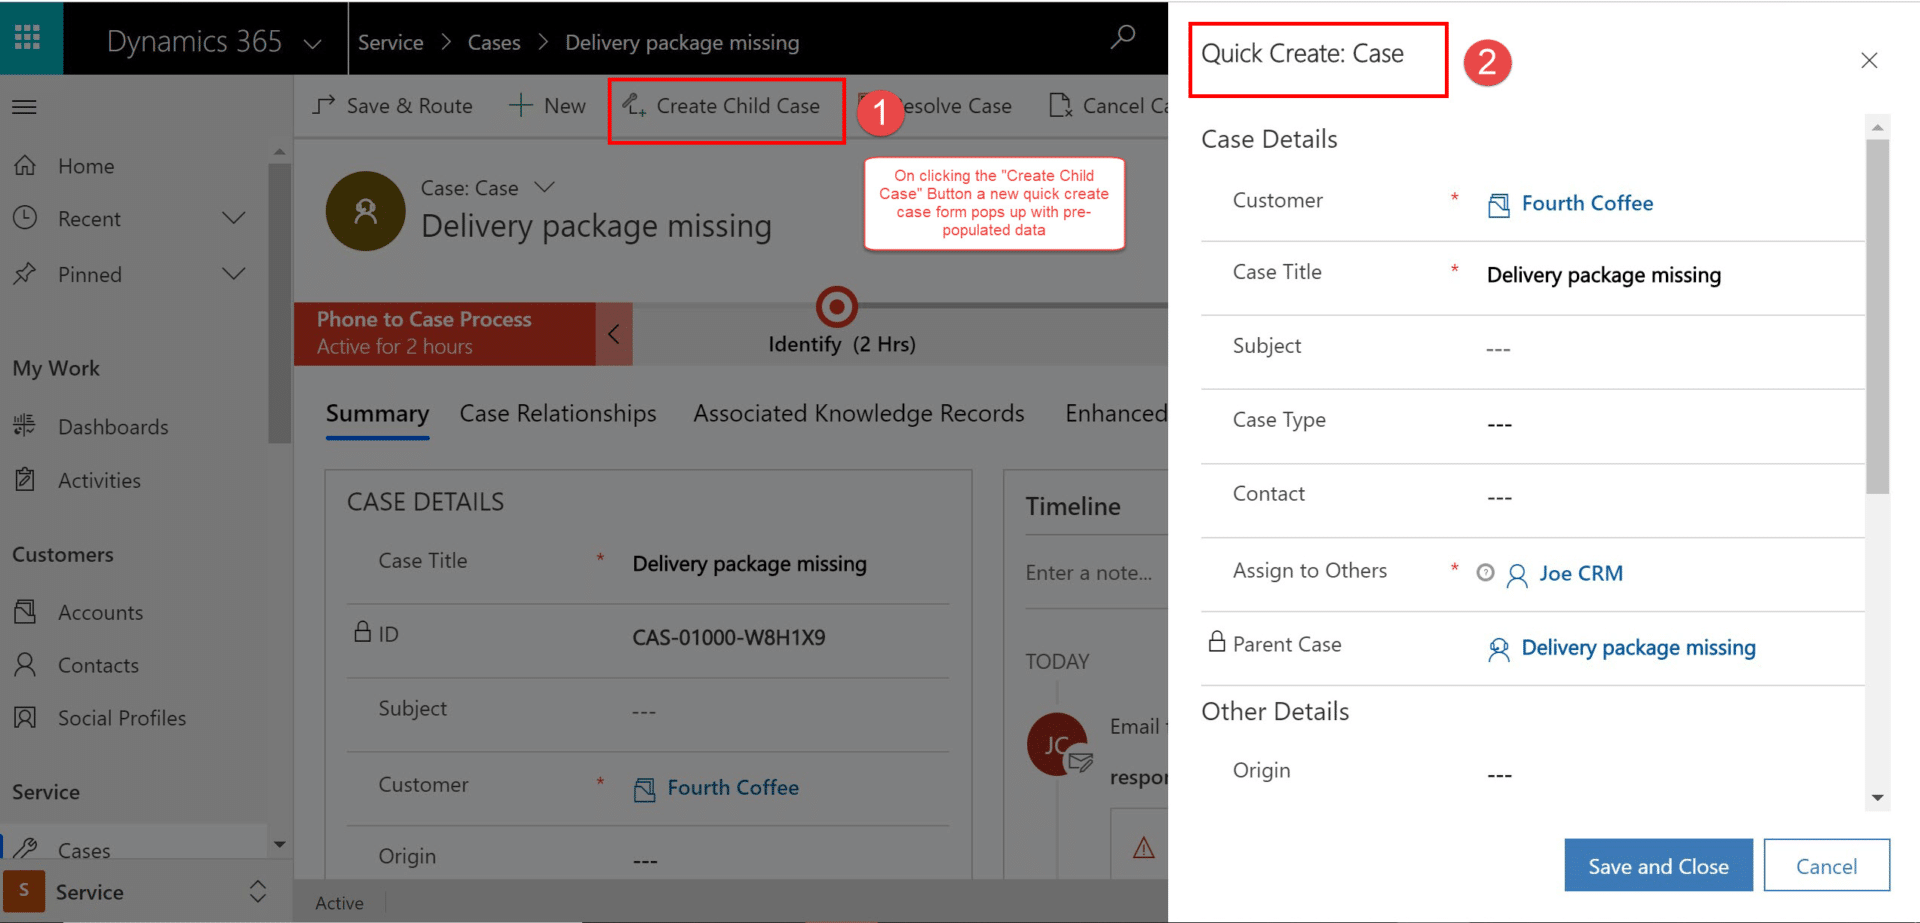
Child cases can be created by clicking the Create Child Case button on the Case Form. This is an extremely useful feature as it creates a child with data already populated in the Customer, Case Title, Assign to Others, and Parent Case fields. Users generally don’t have to fill in the basic details as Dynamics 365 does it for them.
But, let’s consider a scenario in which a large number of child cases (say, 50 or more) need to be created. Creating such a huge number of child cases is possible by using the Create Child Case button, but it would certainly be a tedious and time-consuming process to undertake. To simplify the creation of multiple child cases, Data Import functionality is available in Dynamics 365.
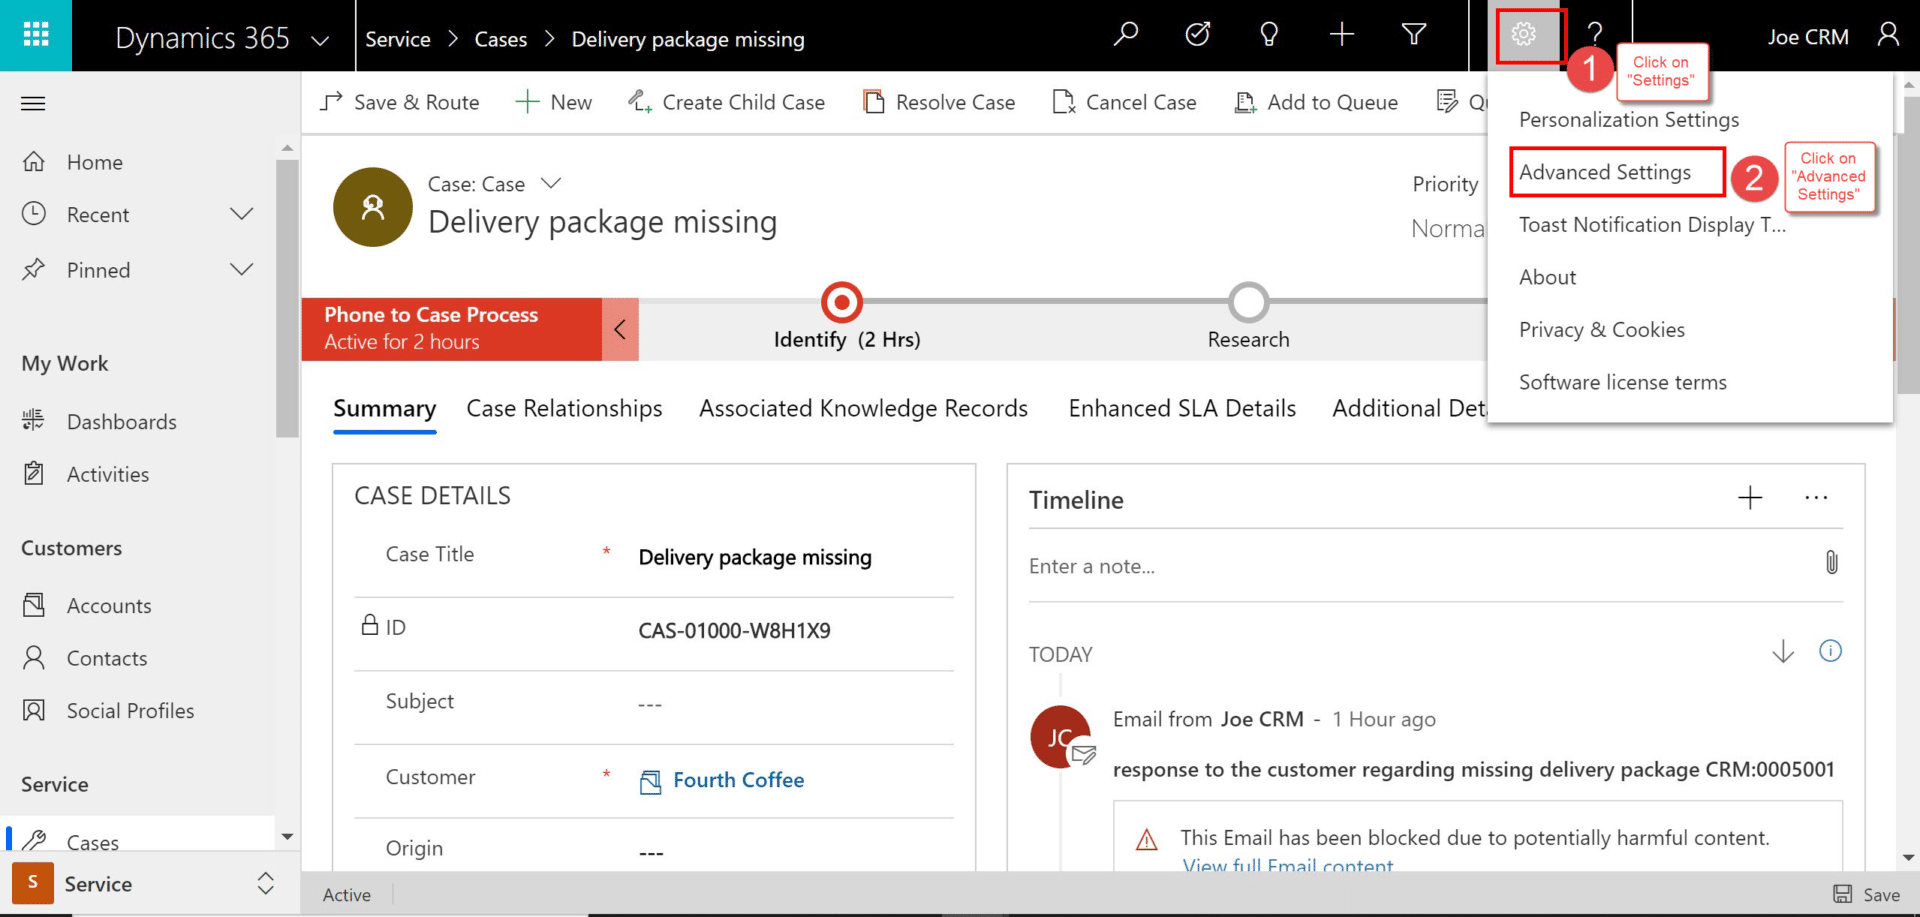
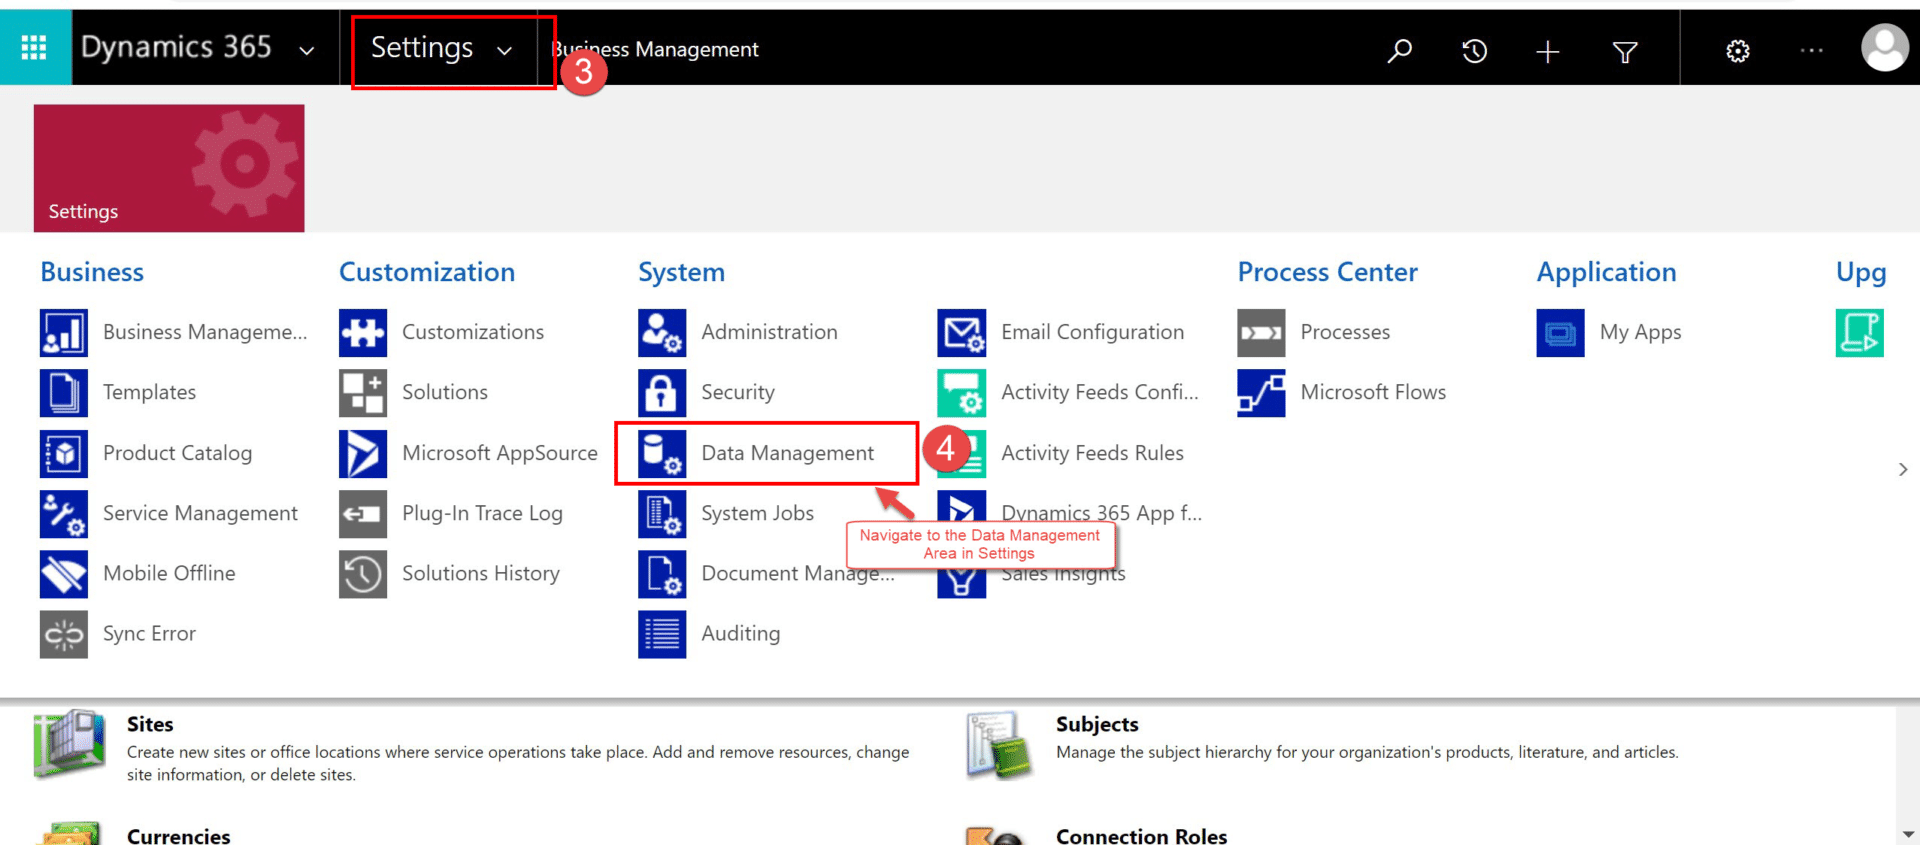
To utilize the out-of-the-box Data Import utility in Dynamics 365, navigate to Settings > Advanced Settings > Data Management.
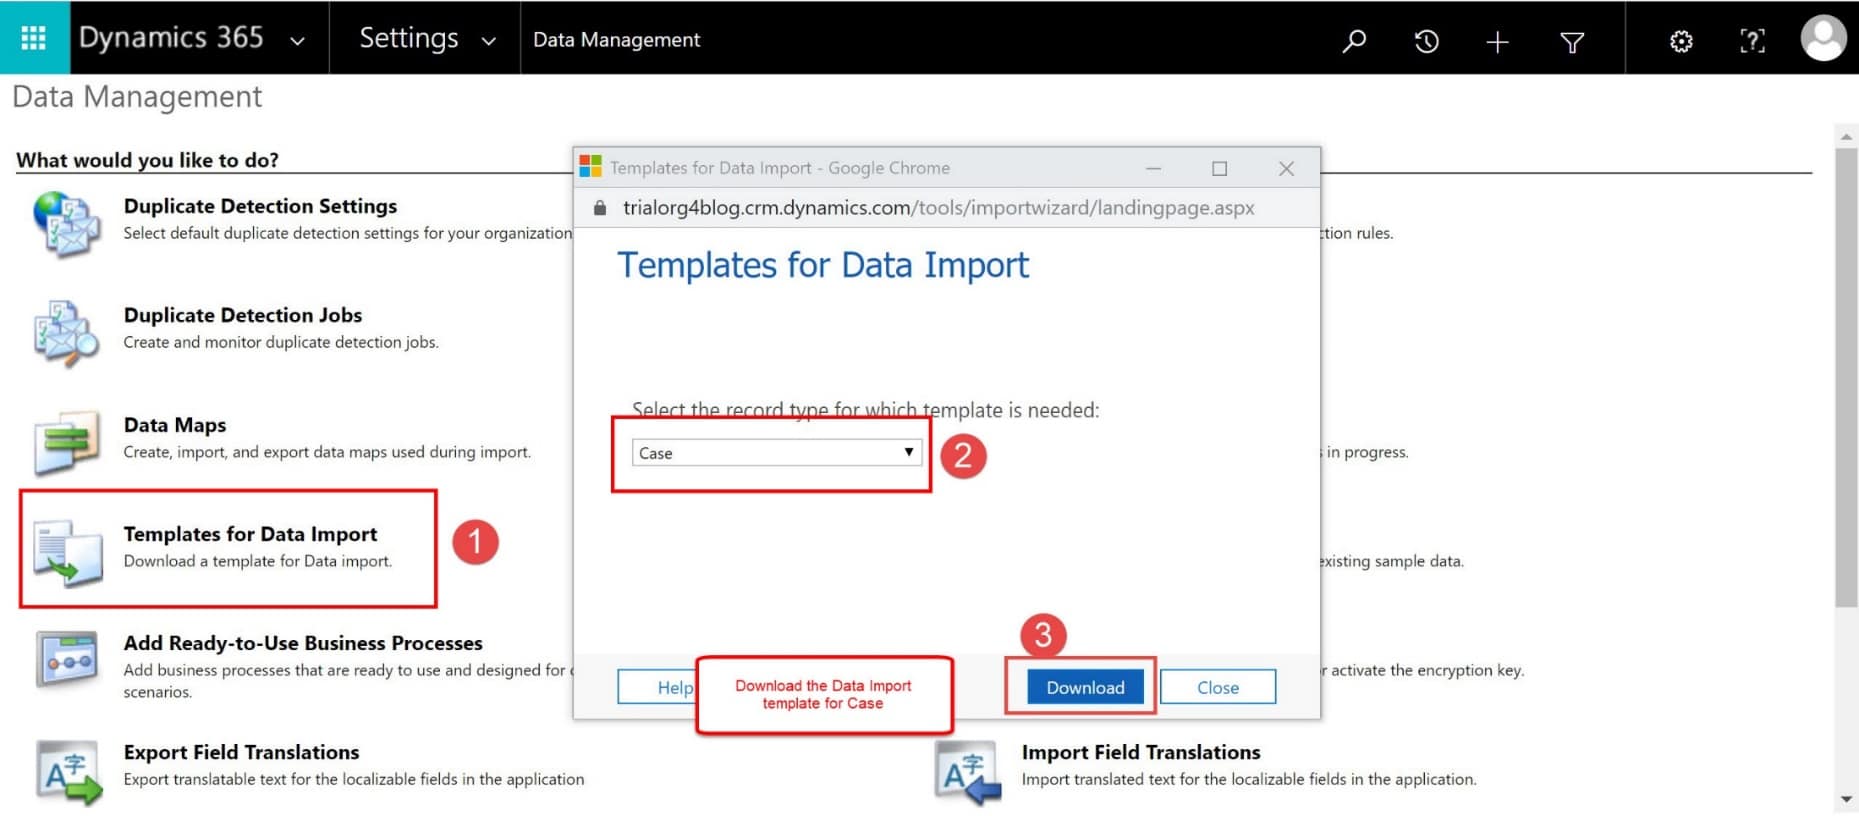
To start the import of child cases, click on Templates for Data Import, select Case from the dropdown menu, and click Download.
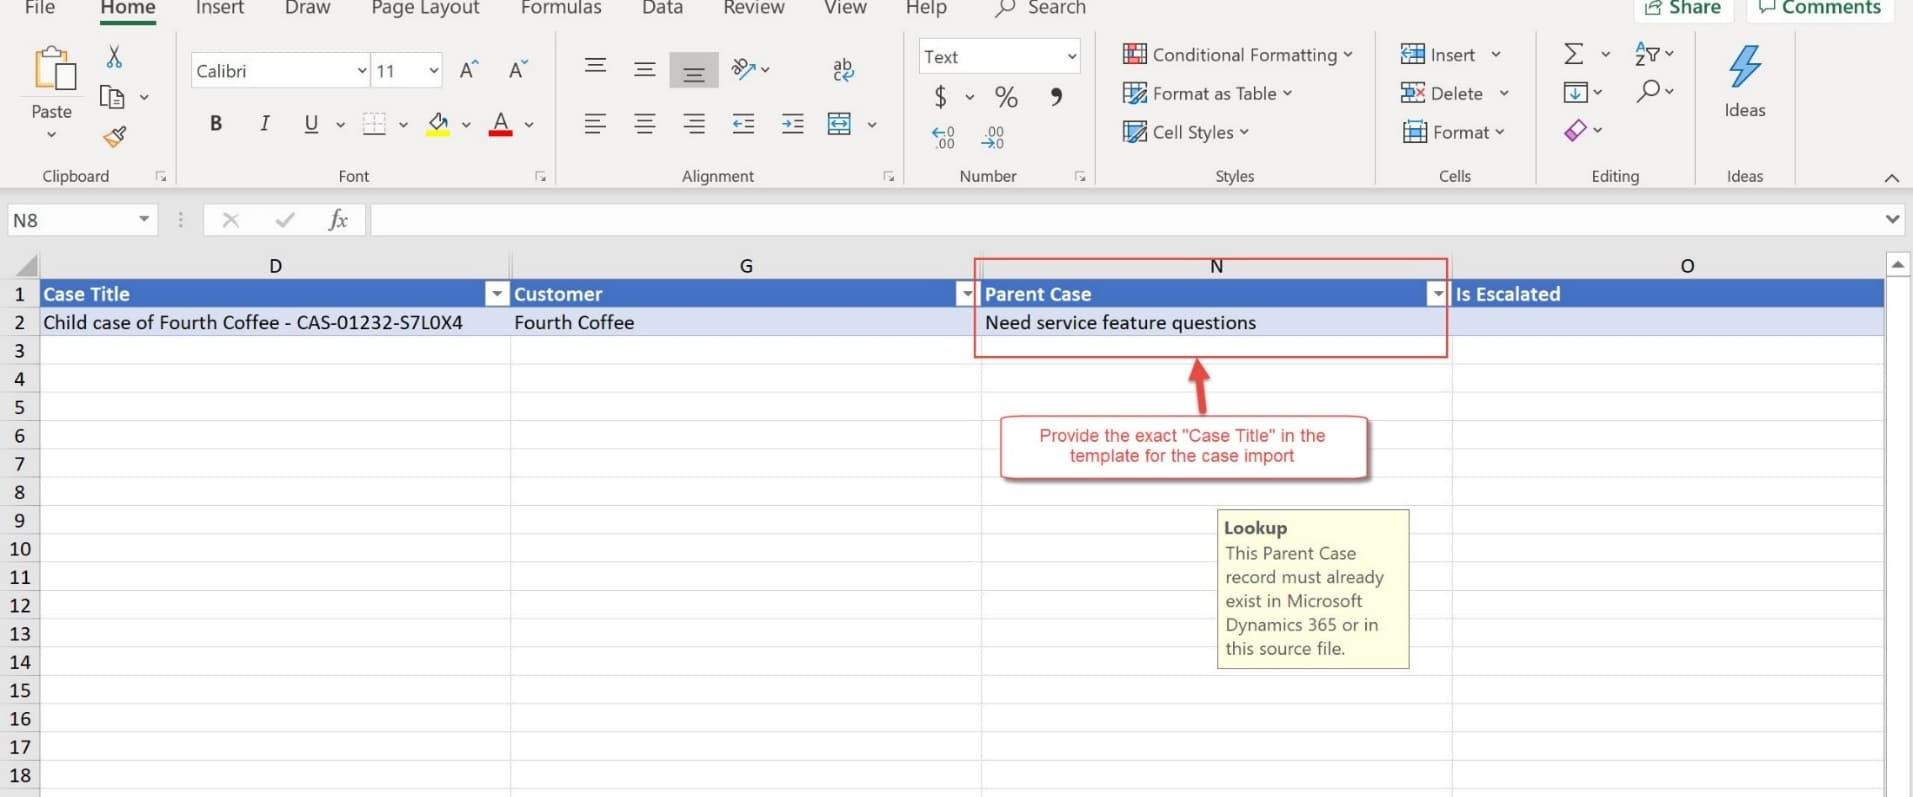
Update the import template for cases with the details needed for creating the child cases. Provide information for all the fields that are required in Dynamics for the case. It is important to ensure that the Parent Case field on the Excel sheet matches exactly with the Case Title of the parent case in Dynamics 365.
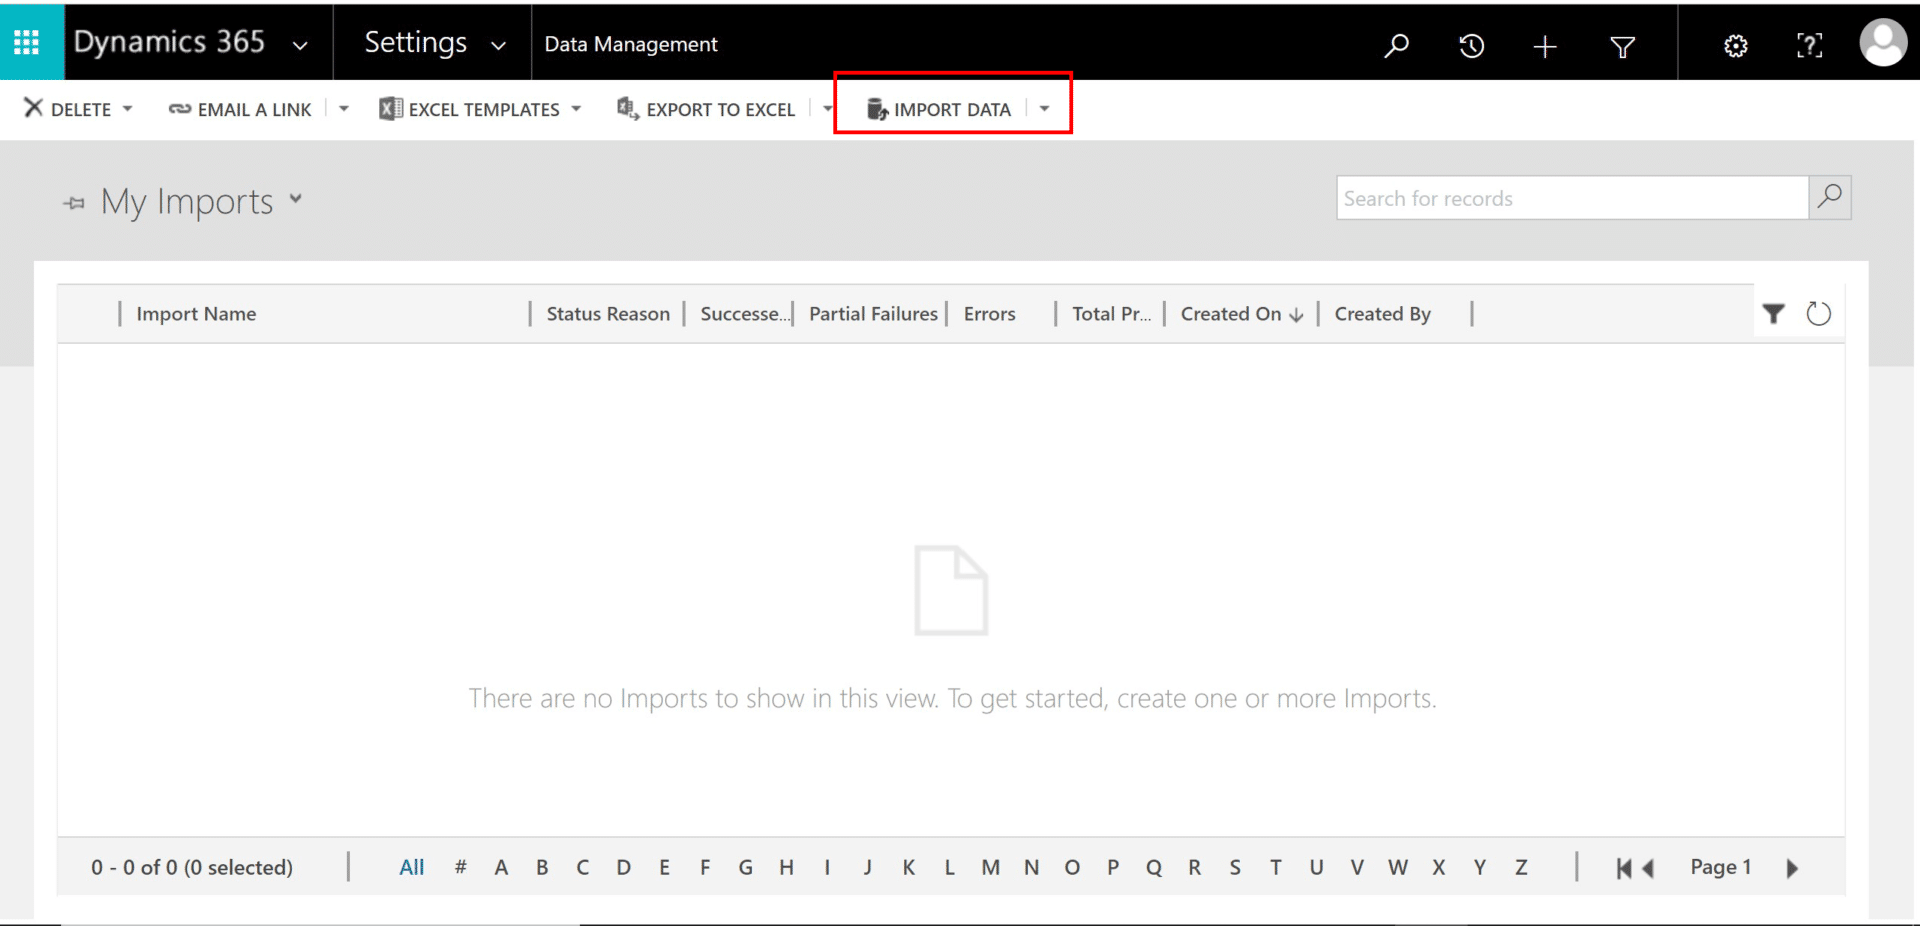
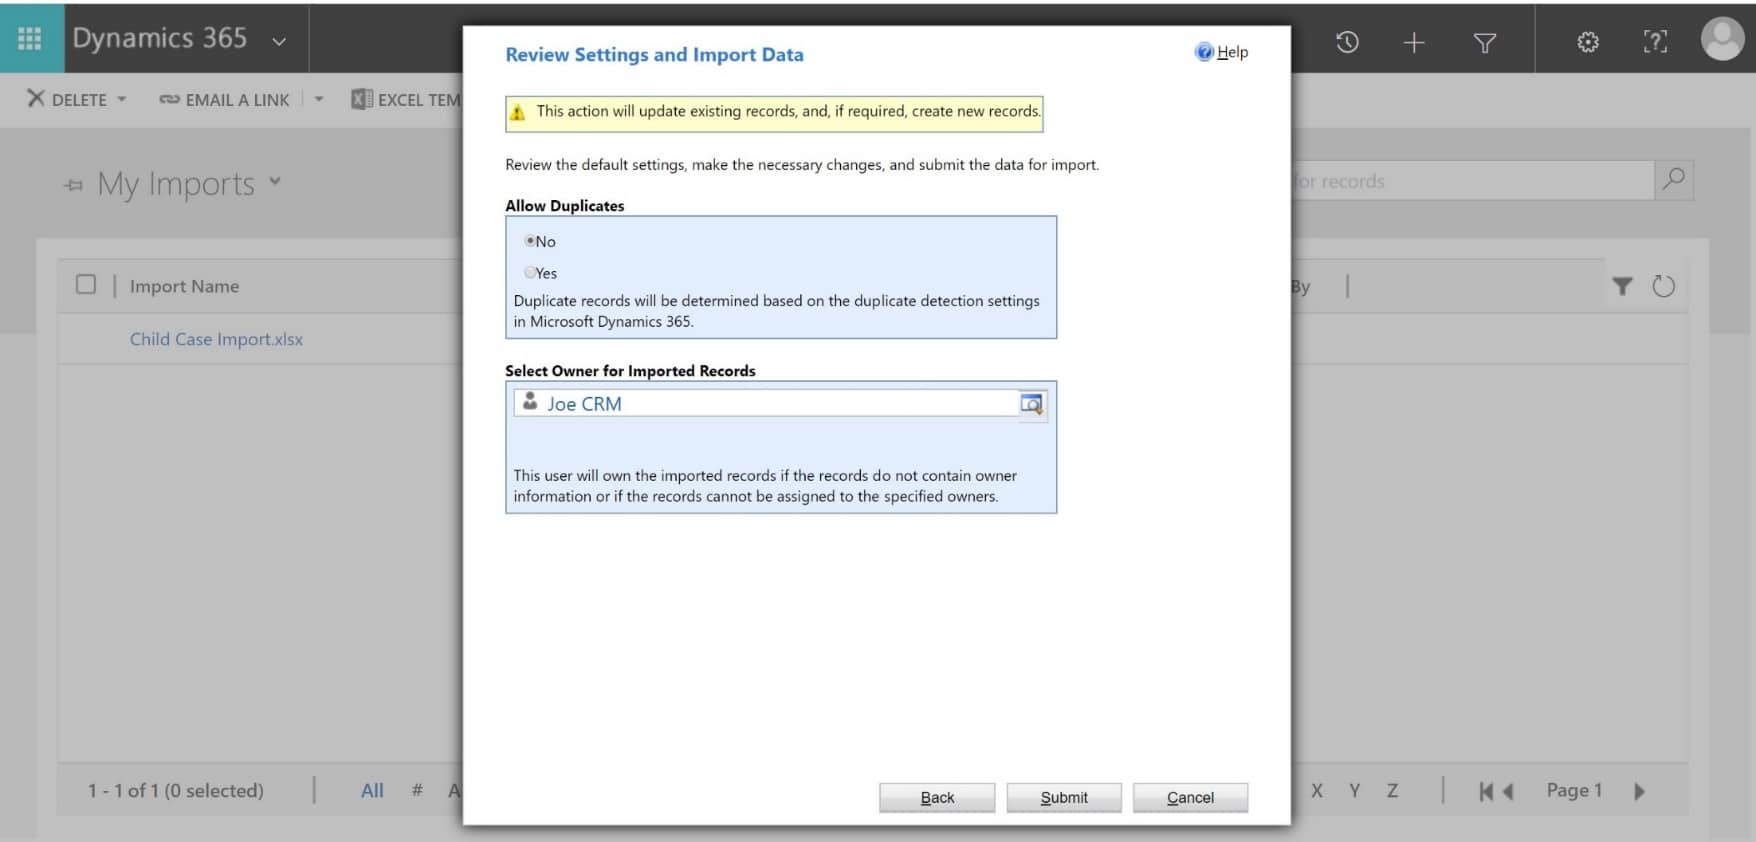
Once the Excel sheet is ready with the child case data we need, it is time to import it to Dynamics 365 to create the cases. To do this, click on IMPORT DATA on the command bar and follow the instructions on the import wizard.

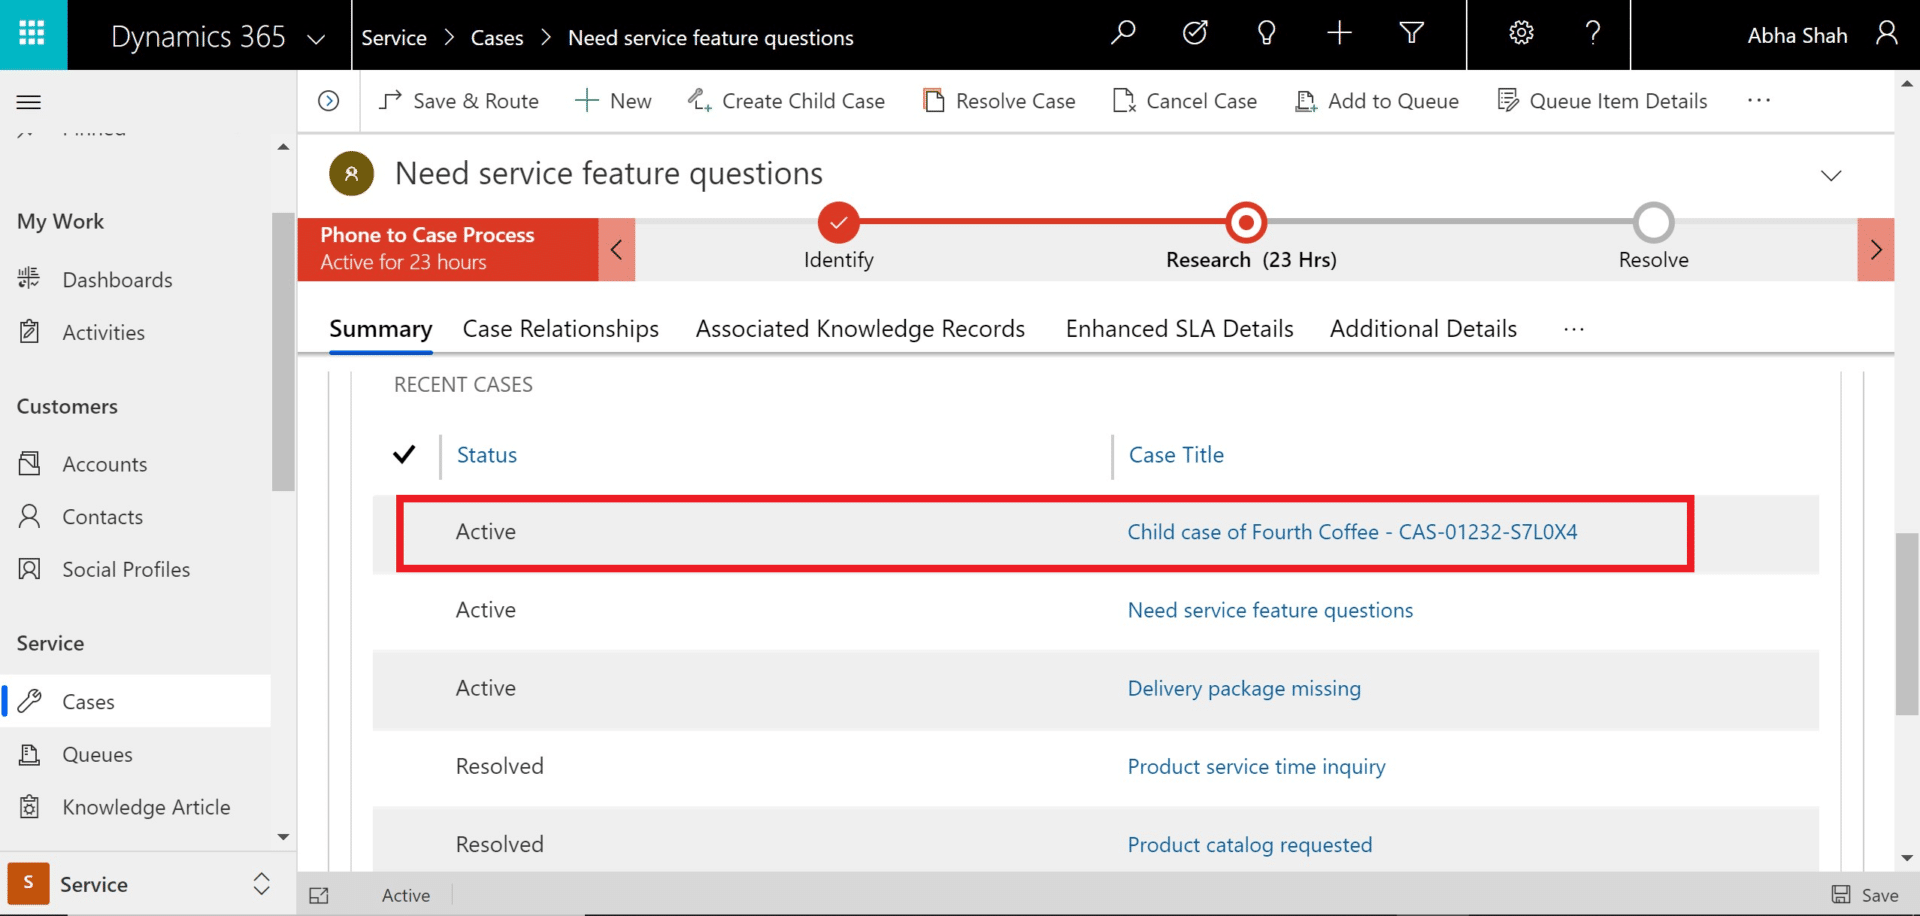
Voila!! The Excel file is successfully imported, and the child cases are created in Dynamics 365. The imported child case is visible in the RECENT CASES grid on the parent case record.
Need more information on child cases? Check out these fun reads next:
These posts are a few years old now, but the information is still valid. Happy Data Importing!


