How Microsoft Power Platform is helping to modernize and enable...
In this webinar, our experts showcase a variety of demo use cases of how different components of the...
If you are like a lot of D365 users, you have probably run into an issue with storage space one time or another. This has been a tricky problem to solve in the past, but with Microsoft’s introduction of Power Automate, users now have the ability to not only move attachments over to SharePoint more easily, but also to automate and customize this process.
In this post, we’ll not only show you how to use Power Automate to automatically move email attachments from your D365 environment over to SharePoint, but we will also make the process even easier by providing you with a pre-built flow to import into your org.
Let’s get started!
Prerequisites:
Create SharePoint site and provide access to all in the organization:
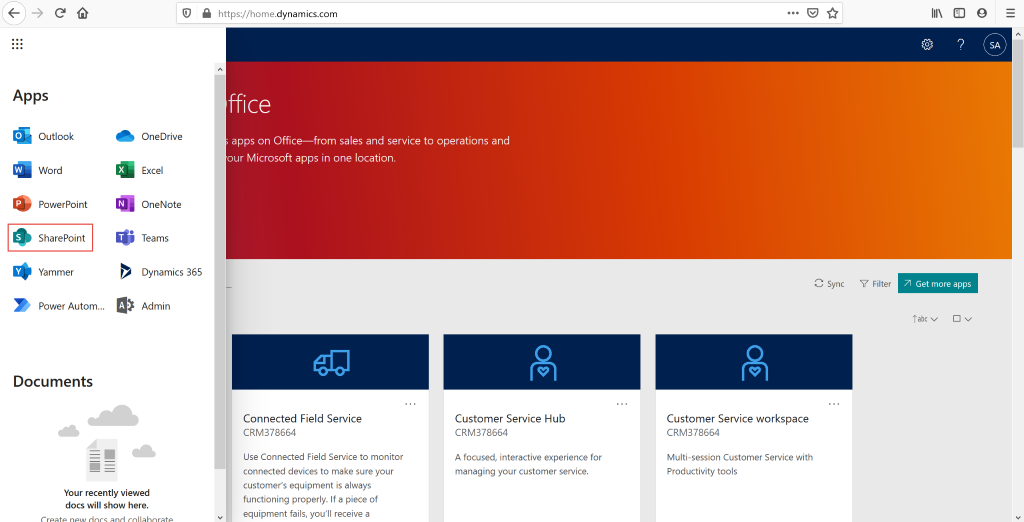
1. Open Office 365 Login | Microsoft Office and Sign in and Navigate to SharePoint.
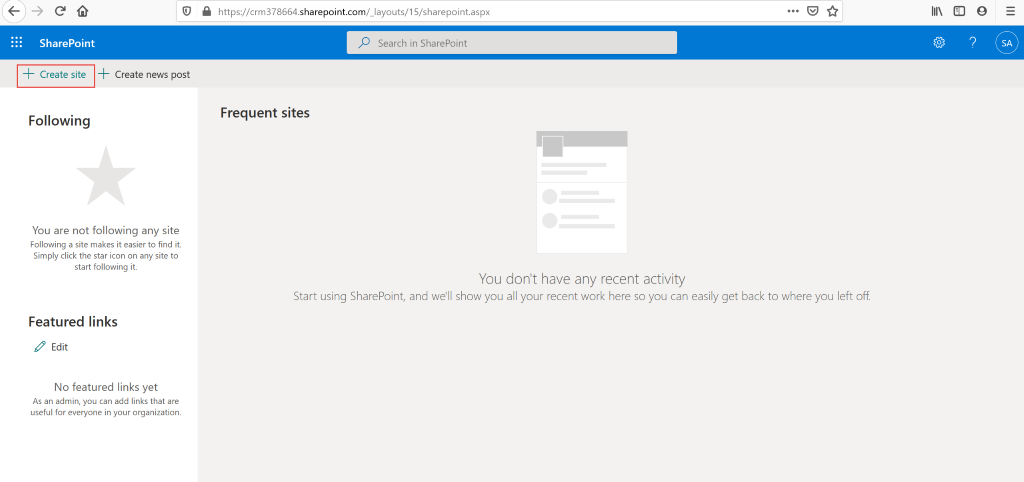
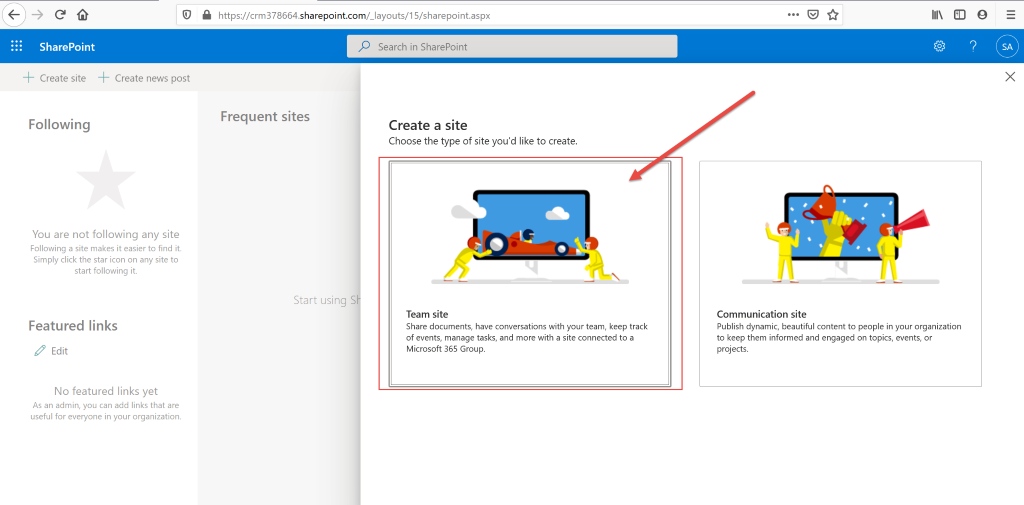
2. Create Site in SharePoint.
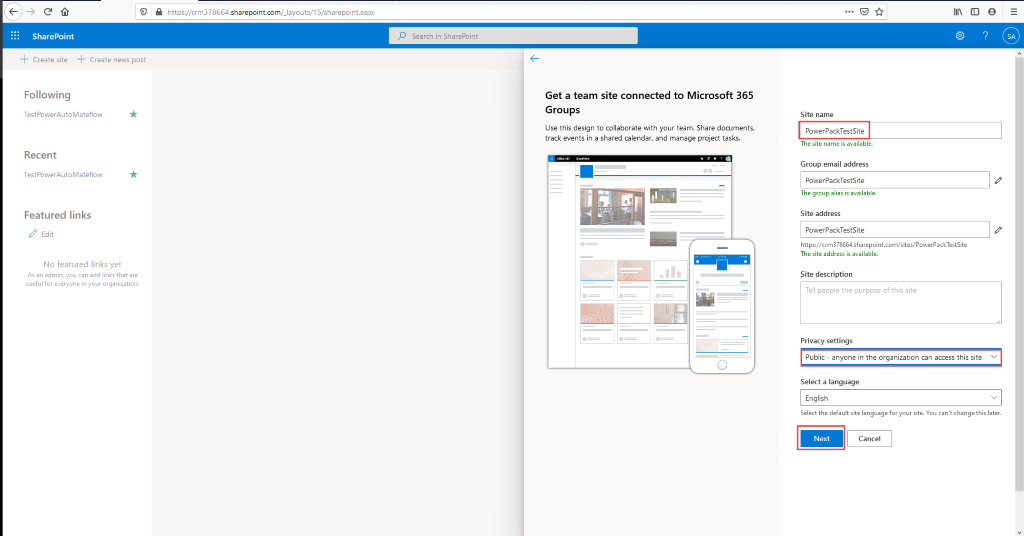
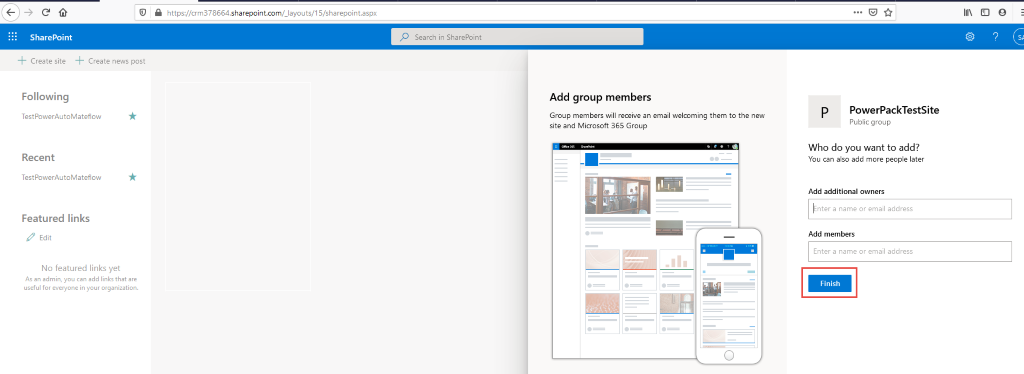
3. Provide Site Name and select Privacy settings to Public - anyone in the organization can access this site and click Next.
4. Click Finish.
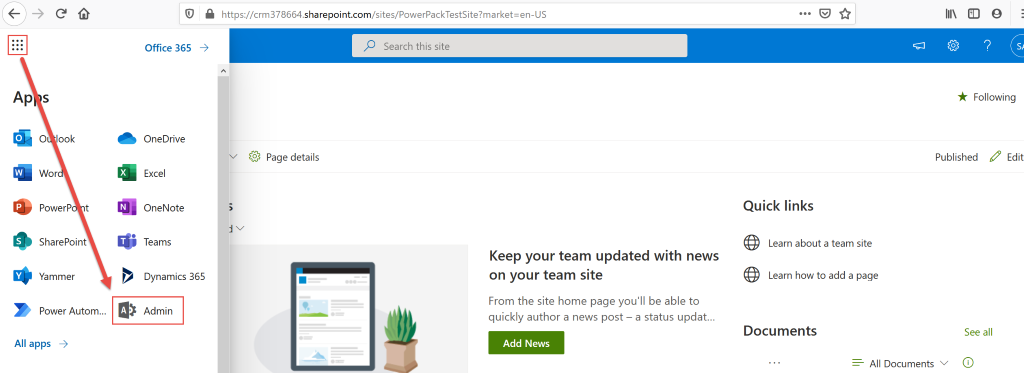
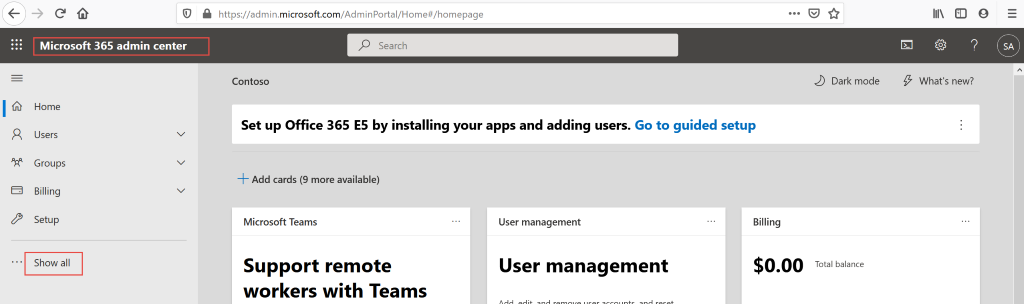
5. Open Microsoft 365 Admin Center and click Show all Left Pane.
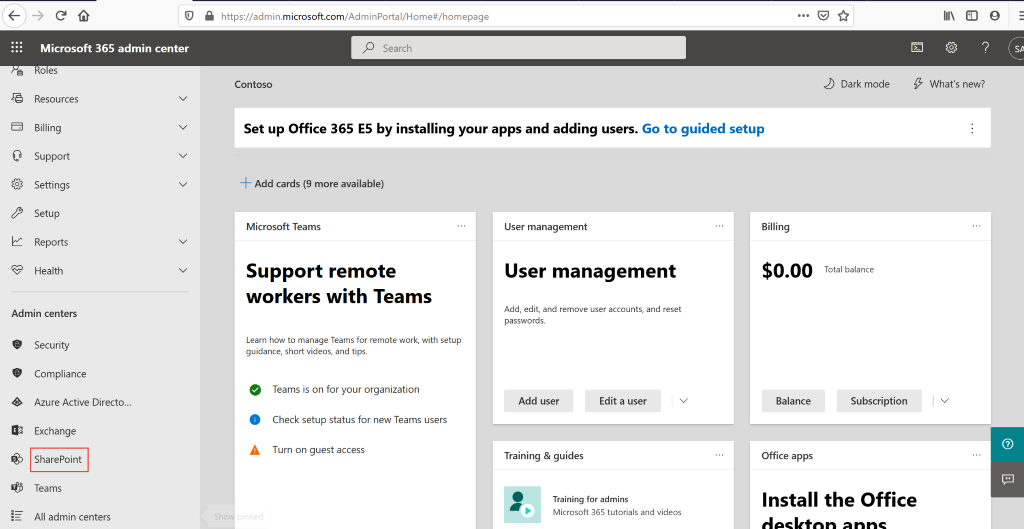
6. Click on SharePoint.
7. In SharePoint admin center select Sites > Active Sites.
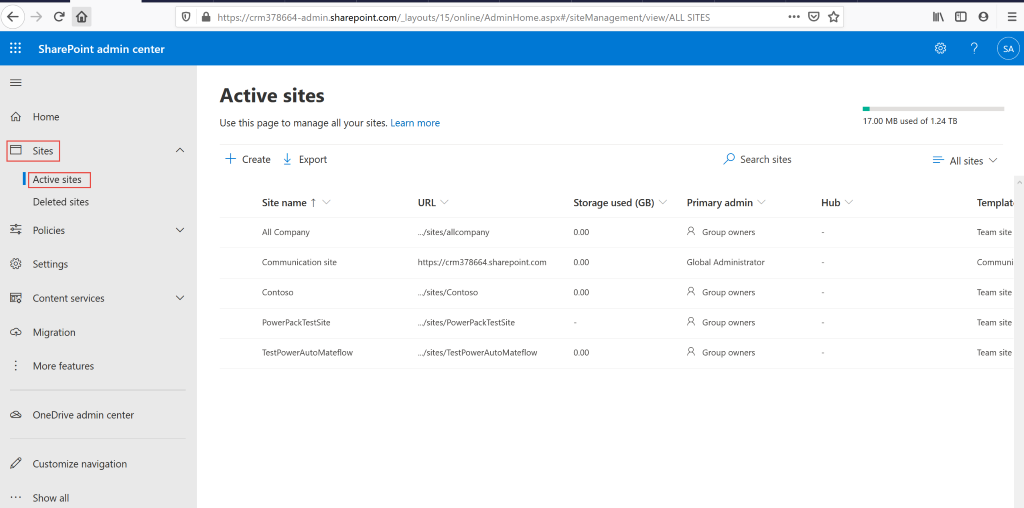
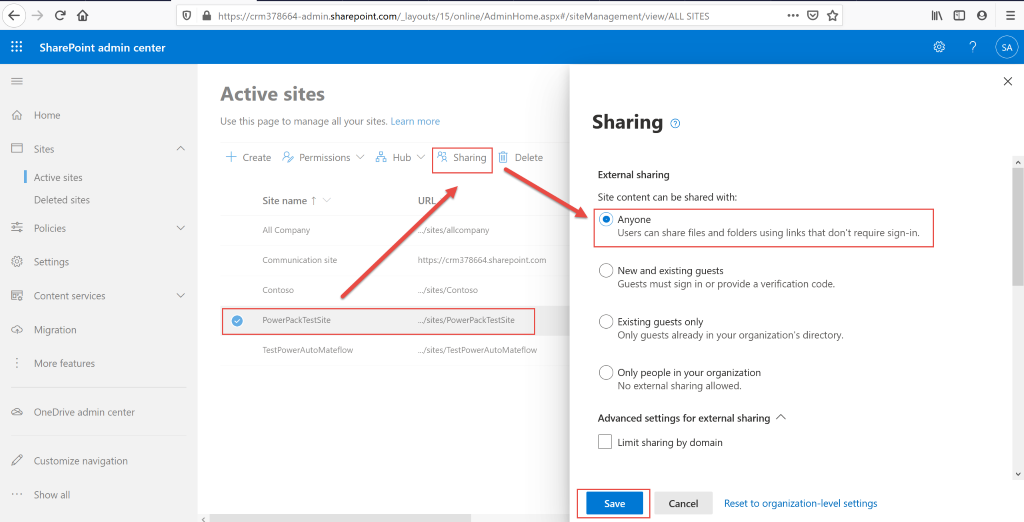
8. Select the site you just created and click on Sharing > Anyone > Save.
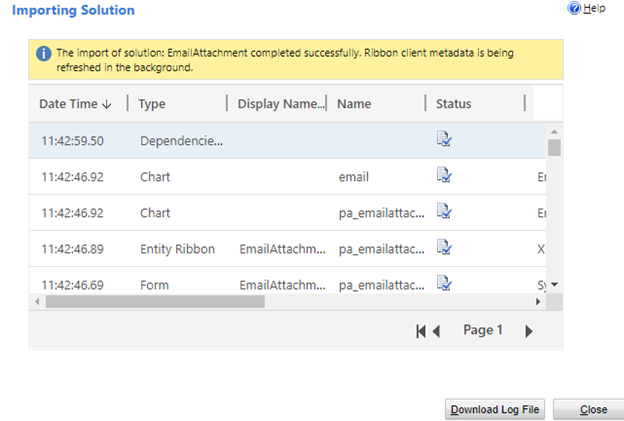
You will then need to import a solution we’ve created into your Dynamics 365 system, which has the custom entity “Email Attachment” and has created the entity as a Sub-Grid in the Email Entity. Download this here.

Once you have set up the SharePoint site with the appropriate settings and permissions and have imported the EmailAttachment solution, you will need to import the flow for moving email attachments to SharePoint.
Start by navigating to https://flow.microsoft.com/ and sign up for a trial version of Power Automate (or subscribe).
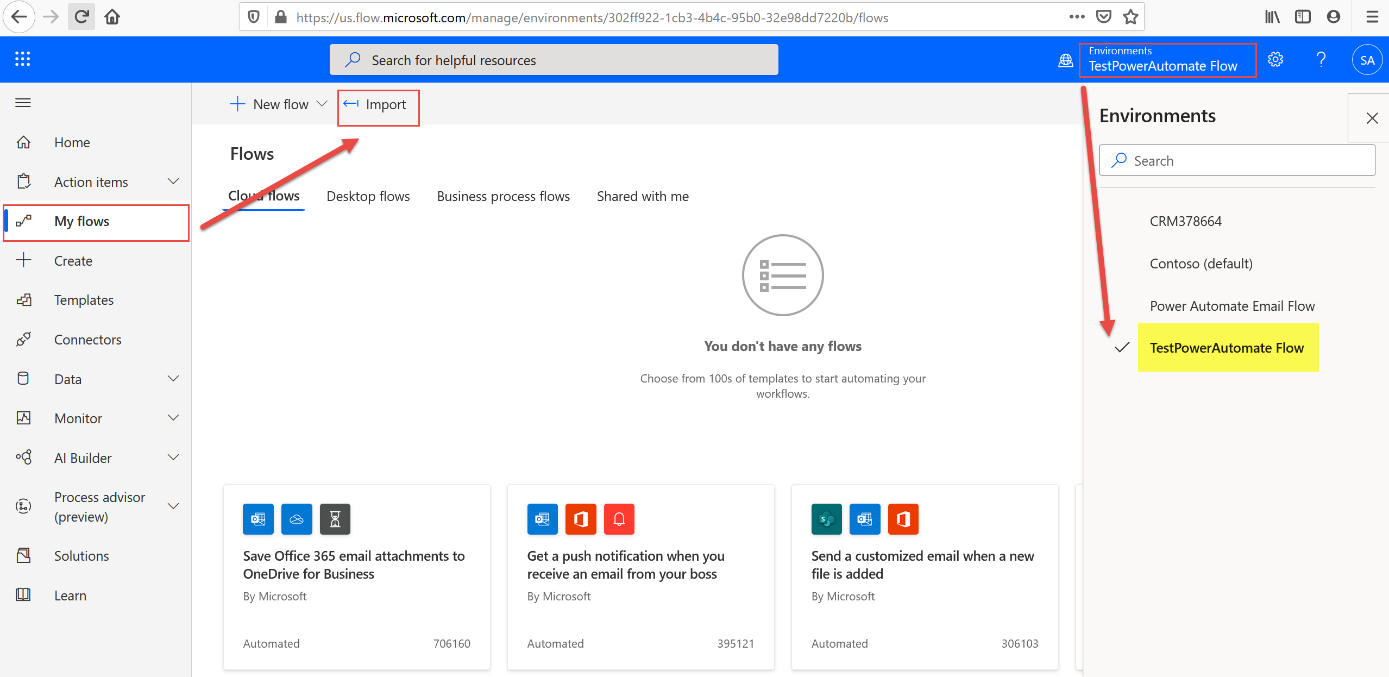
1. After you log in to Power Automate, make sure you have the correct environment selected. Then click on MyFlows from the left navigation pane and then select the Import button.
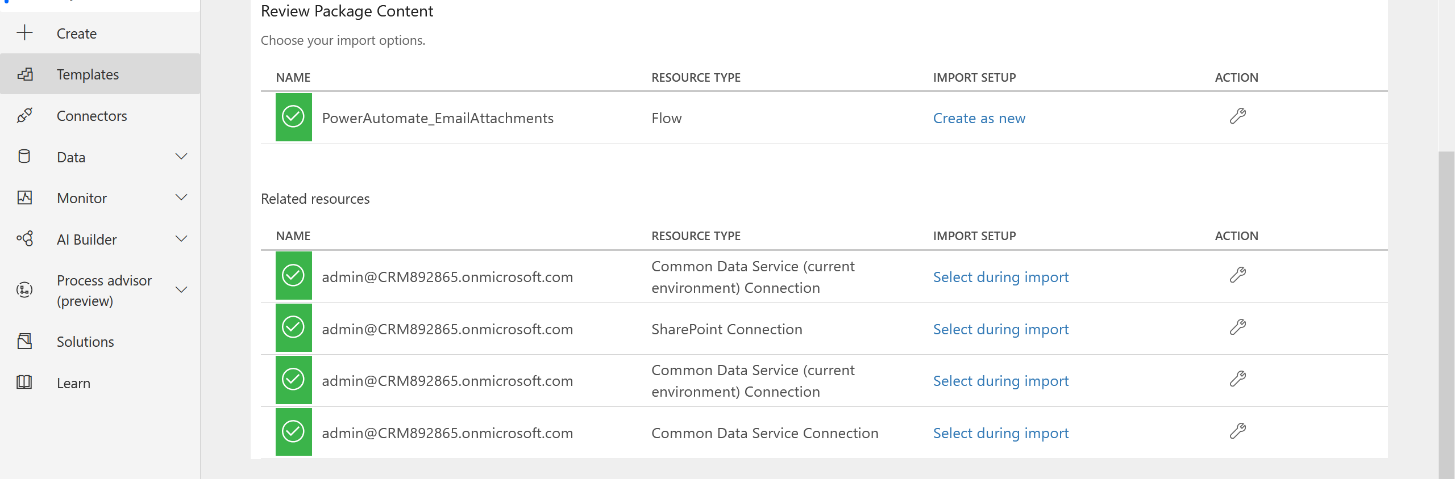
2. From there, click on Upload>Select the zip file you just downloaded (PowerAutomateEmailAttachmentToSharePoint.zip)


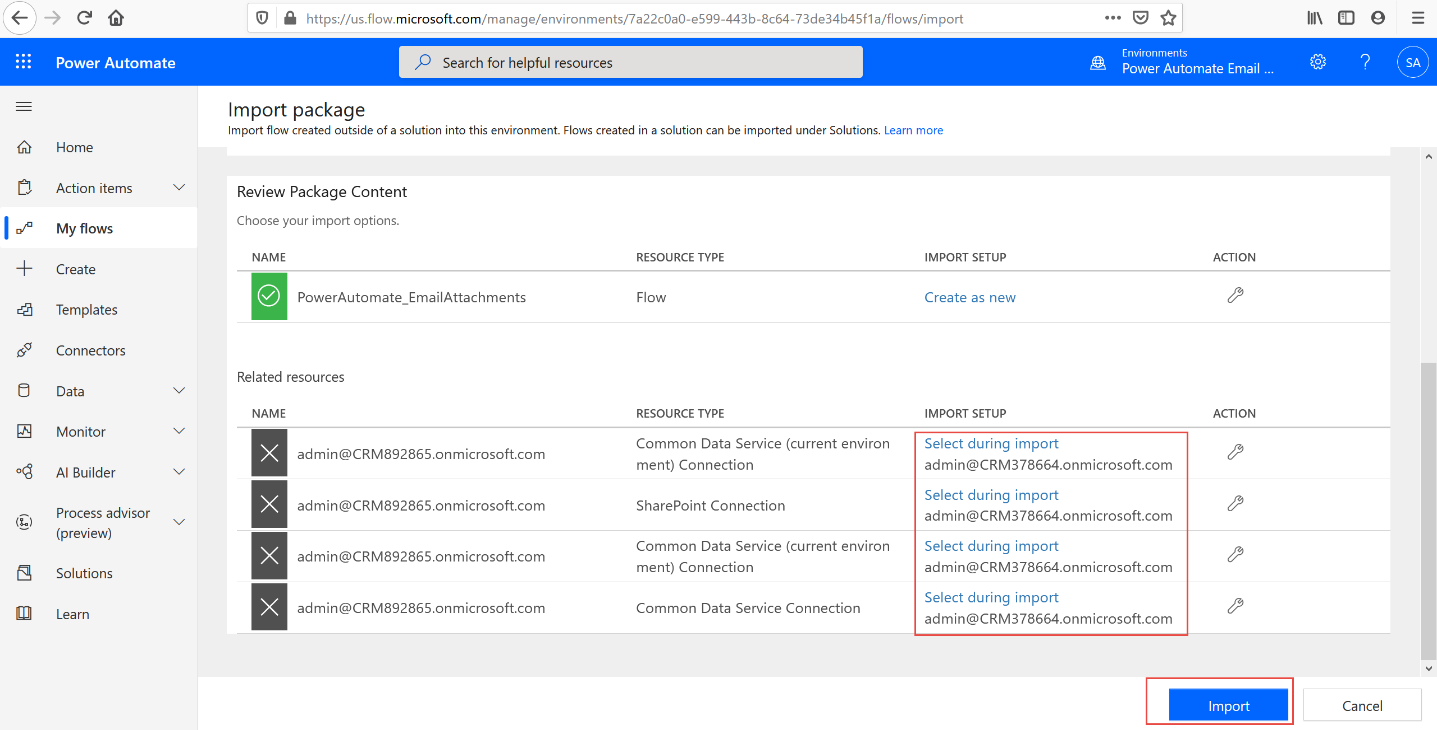
3. Scroll down to Related resources > Import Setup and click on Select during import for the first resource (Common Data Service current environment connection).
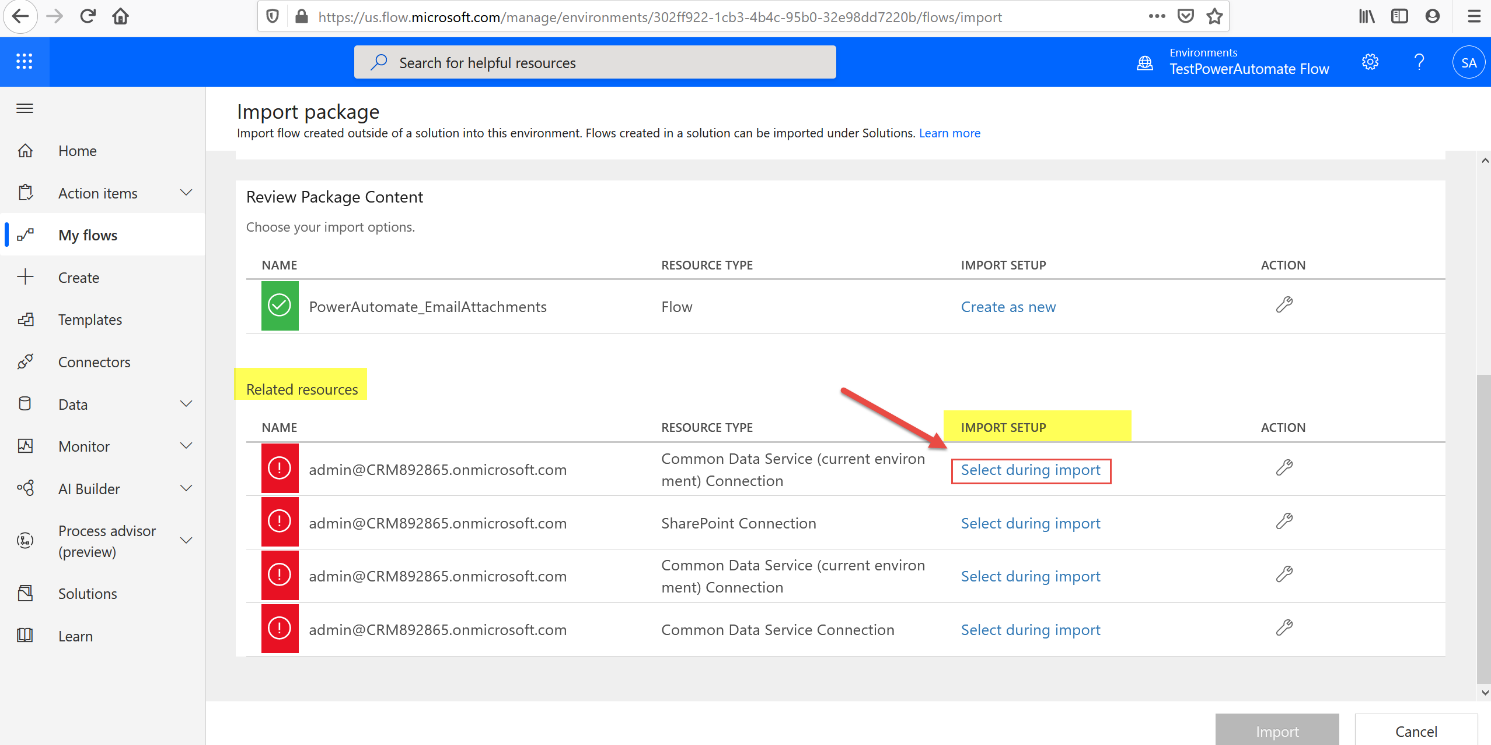
4. Click Create new.
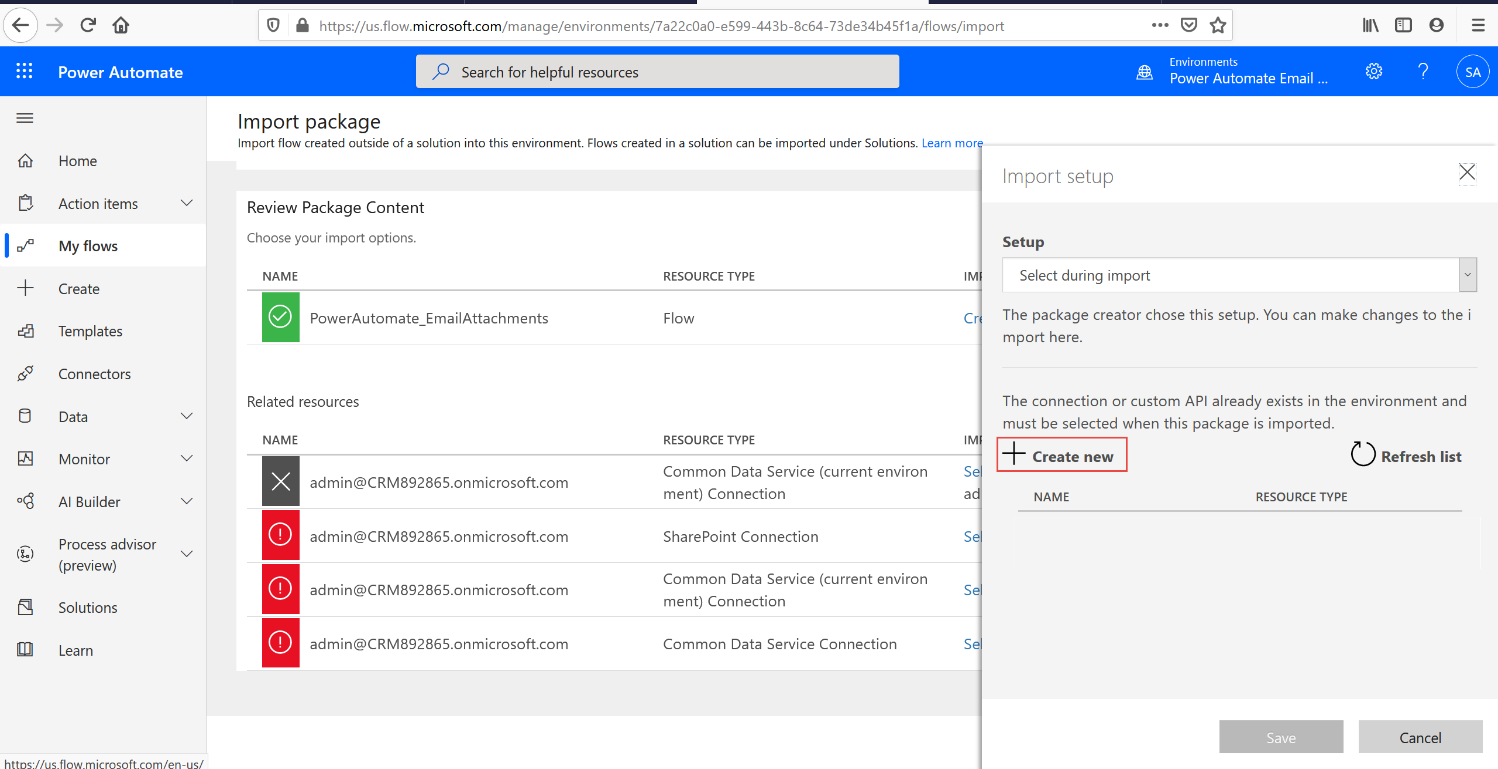
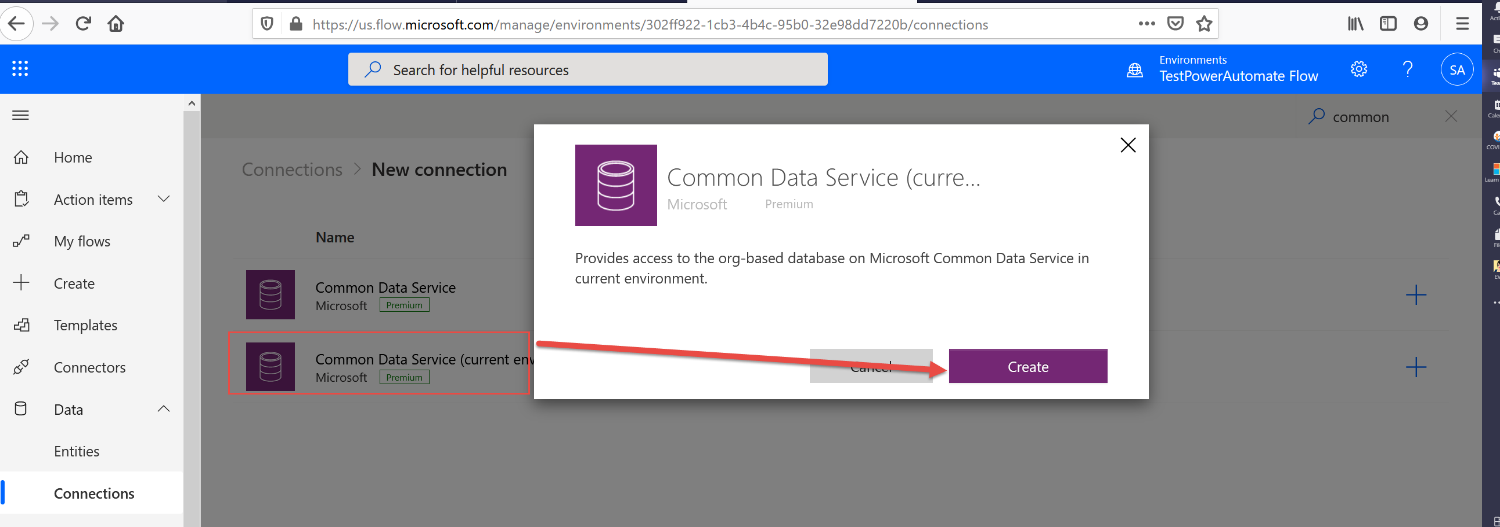
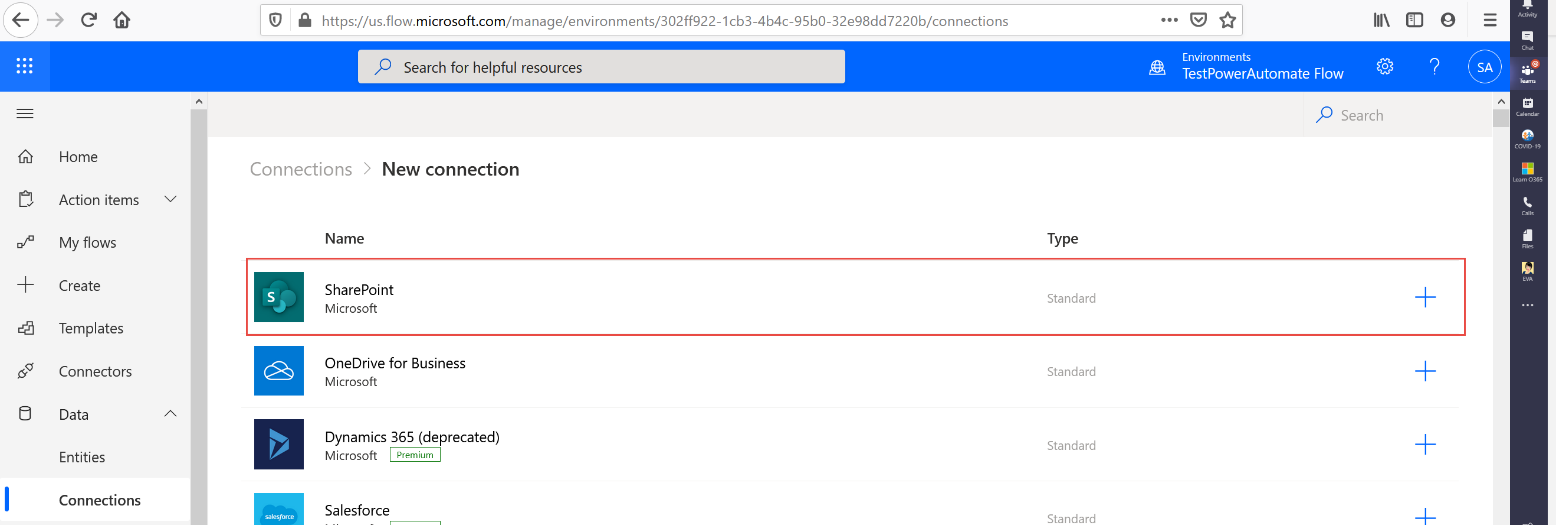
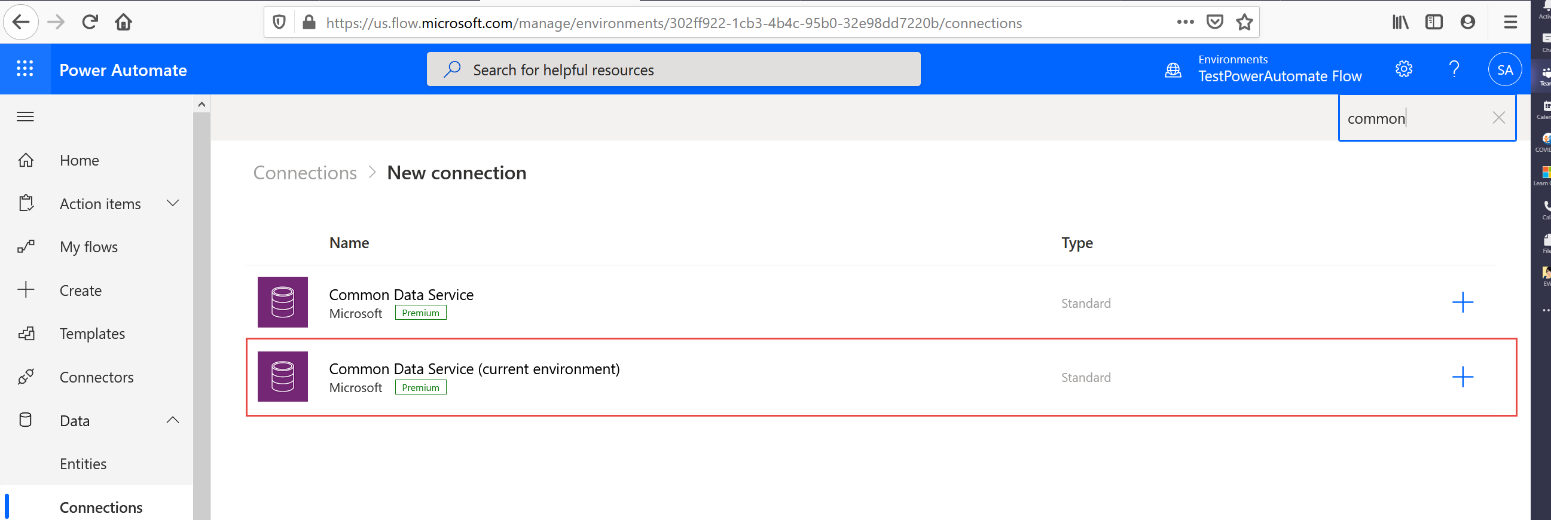
5. Click on New connection and search for “Common Data Service (current environment).” Then click on Create to create this connection.

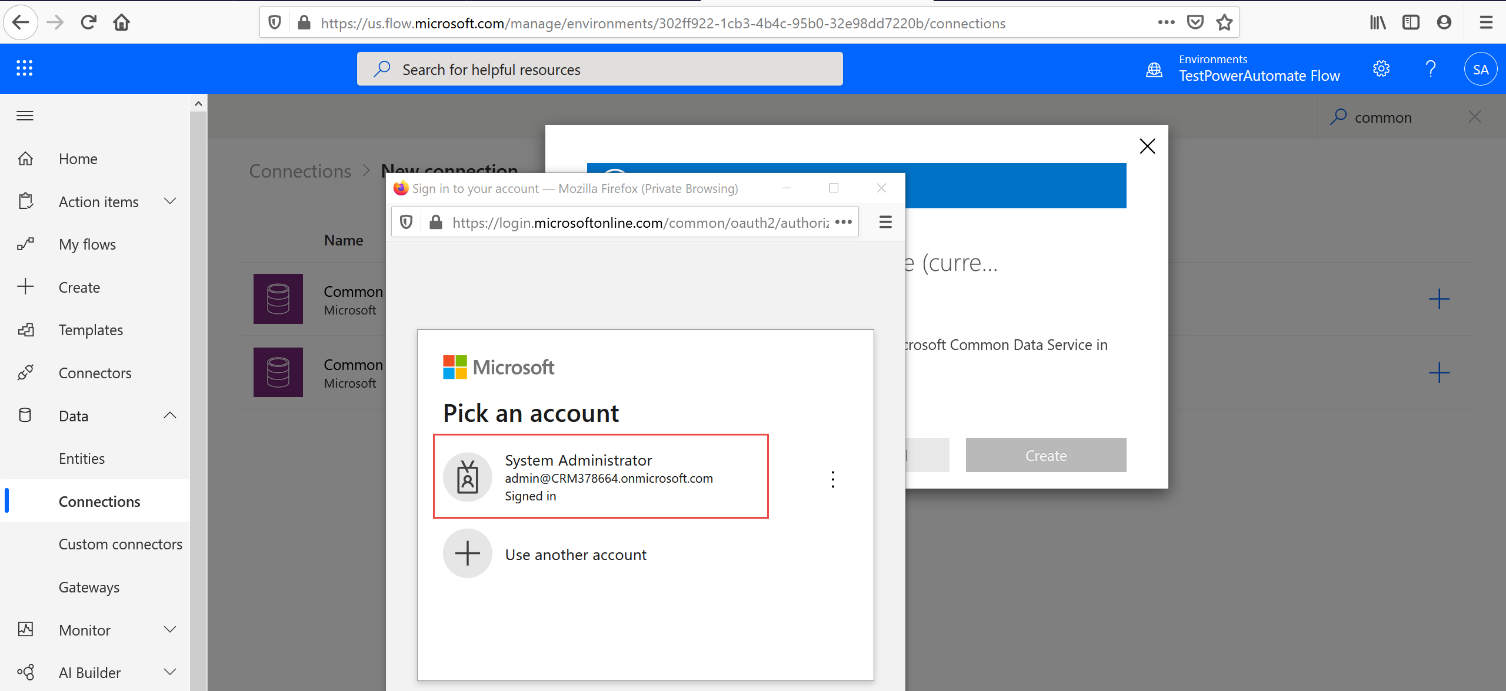
6. You will be prompted to pick an account to sign in with.
7. Navigate back to your Import Package and select and save the connection you just created.

Follow the same steps one by one for the next three connections, by clicking on select during import > +Create new > Search for the connection > Saving the connection

8. Once you have all 4 connections established, the screen will appear like the below, and the Import Button will now be Enabled. Click on Import to import flow.
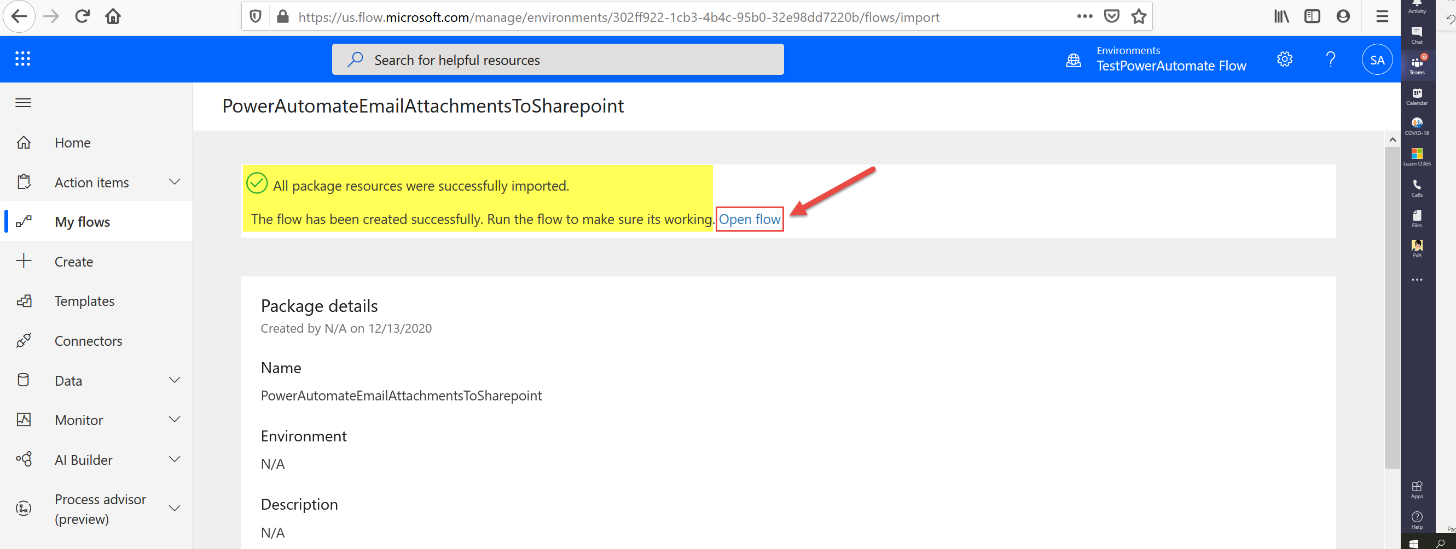
9. After Importing, the page will look like the below image. Click on Open Flow.
10. When you click on Open Flow the flow will open in a new tab. From here, you will need to edit your flow. To begin, click on the Condition tab.

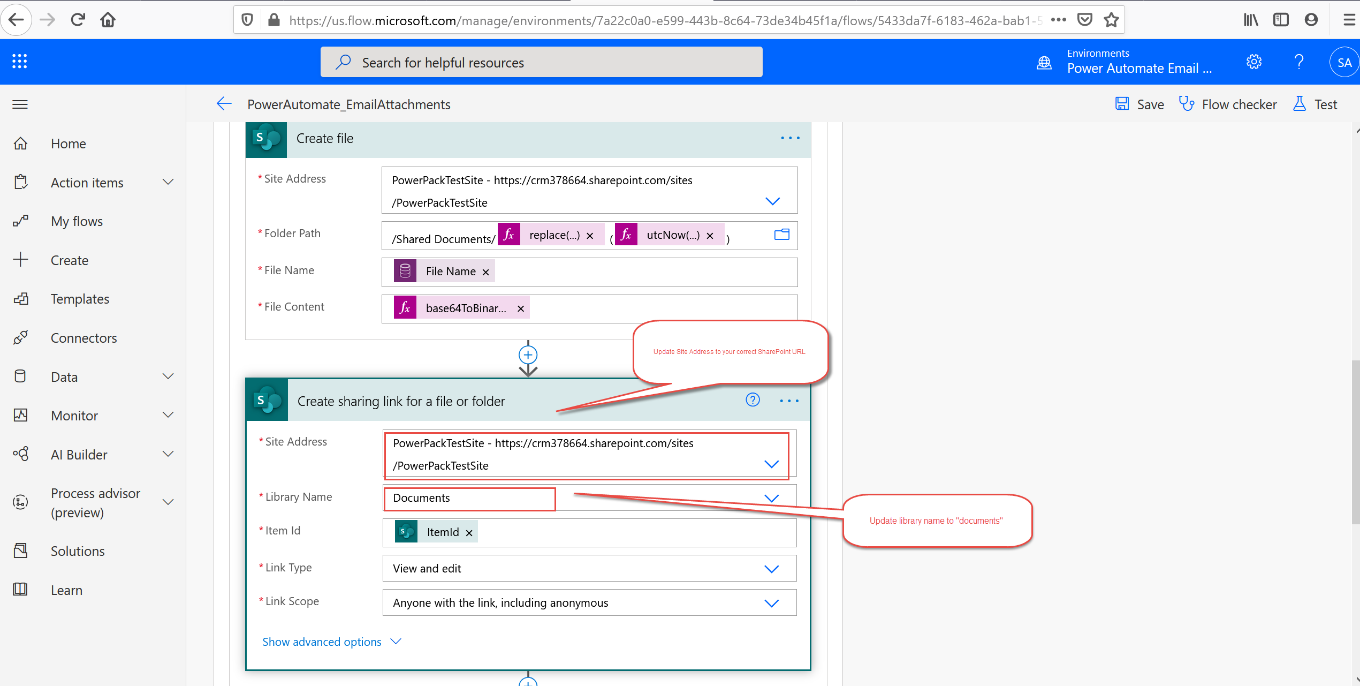
11. Click on Apply to each > Create File and change the site Address to your SharePoint URL.

12. Click on Create sharing link for a file or folder. Update the site address to your SharePoint URL and the Library name to “Documents”
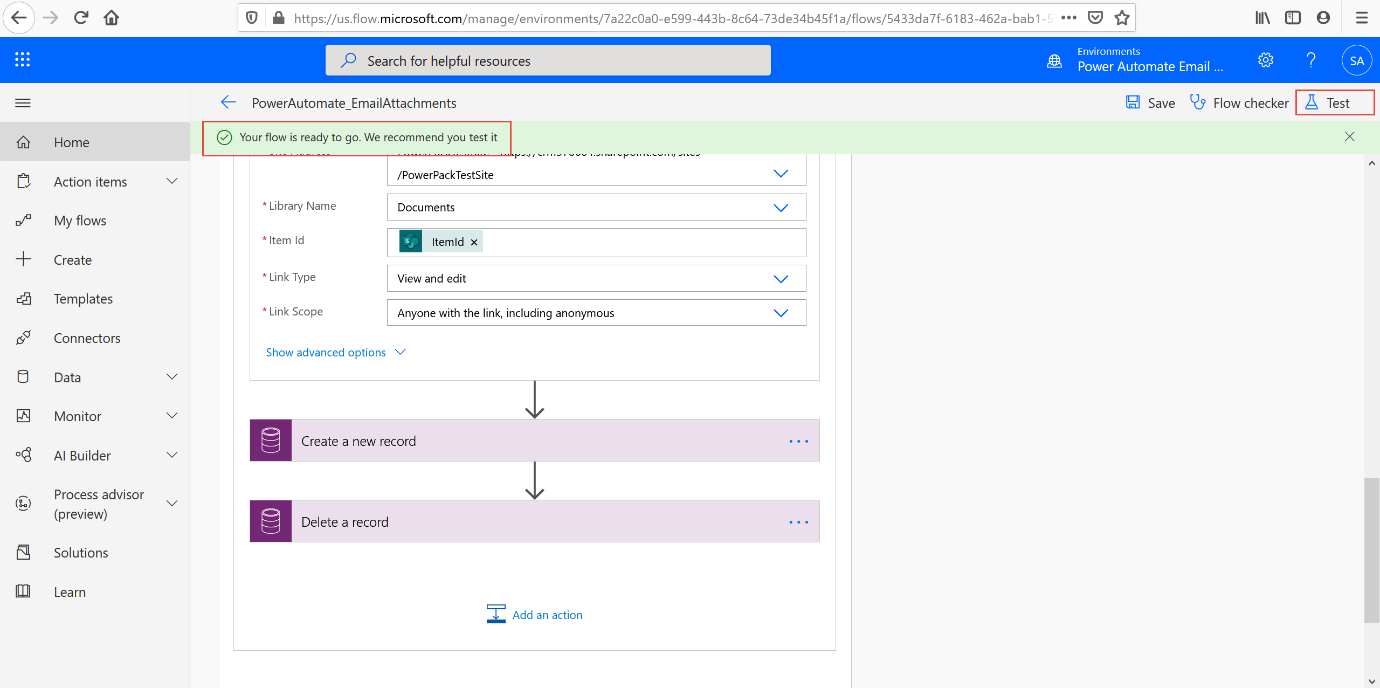
13. Then click on Save to save flow. Now your Power Automate flow is ready.
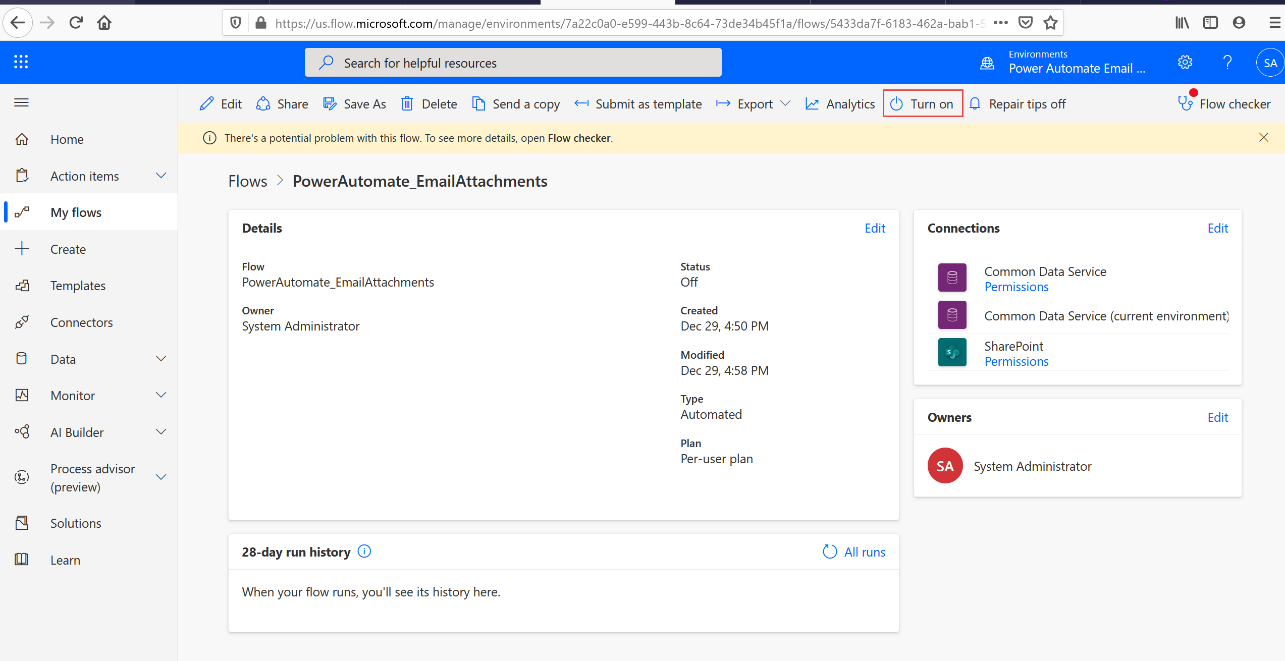
You may need to enable your flow before testing. To do so, navigate back to your flows, open up this newly created flow, and select “turn on”
You can test your flow manually or automatically:
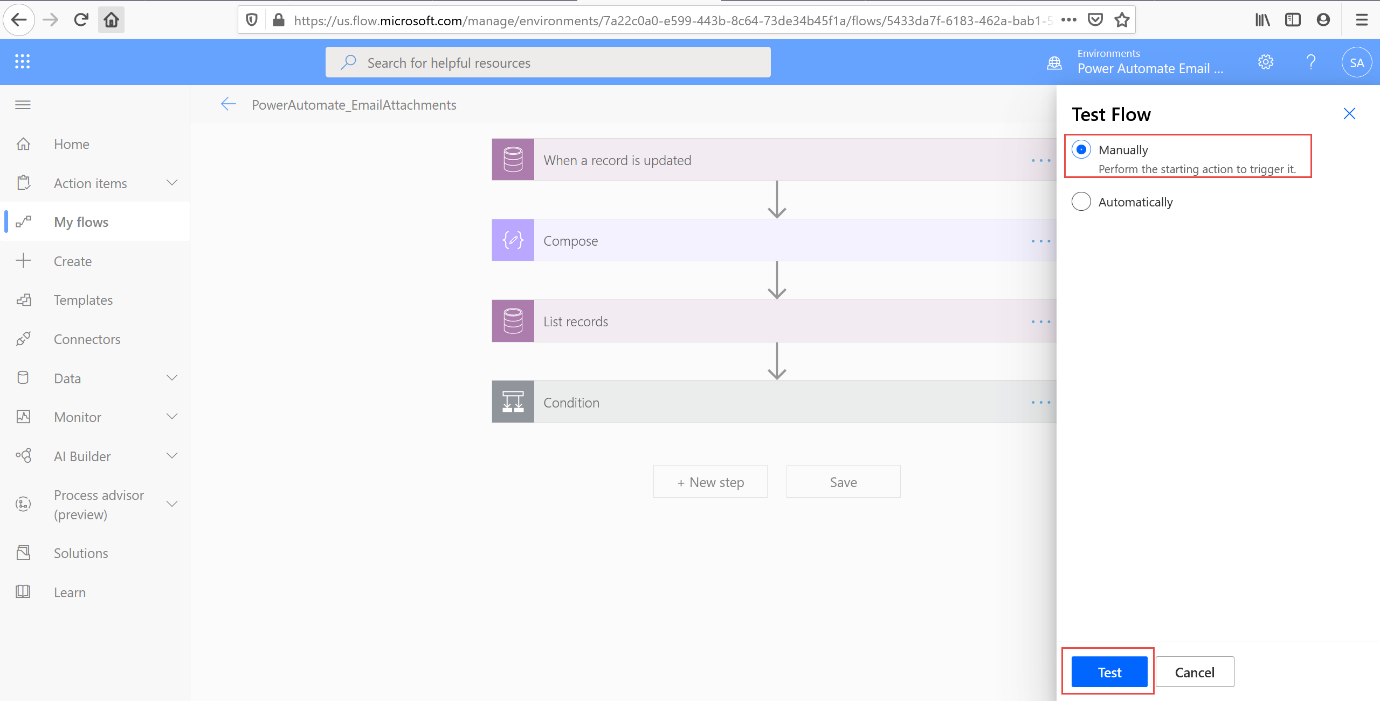
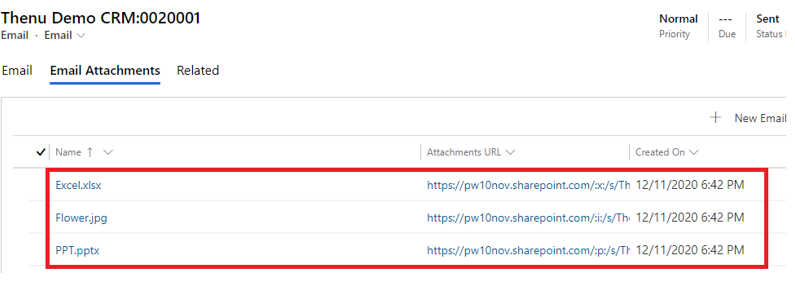
Select your testing options, and then go ahead and create an Email in any entity, add an attachment, and send the email. Refresh the page and see the attachment is deleted and SharePoint link is added in Custom Entity.
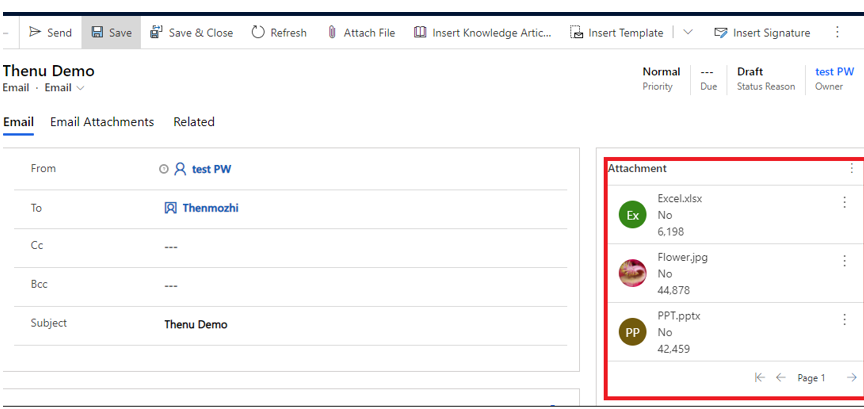
Screenshot of Draft Email with Attachments:
Screenshot of Sent Email:
If you were using our deprecated PowerAttachment add-on to move attachments over to SharePoint (see this blog) and have existing email attachments that are either Waiting Process or Failed in the PowerAttachment Queue, you can download and use this flow here that we have created to help you move your existing email attachments stuck in the PowerAttachment email queue over to SharePoint. Once you import this flow, the below changes need to be made:
1. Add a connection for each step (Current Environment)
2. In ‘Create File’ step:
3. In ‘Create sharing link’ for a file or folder:
Now you know how to import our preconfigured flow to automatically move email attachments from your Dynamics 365 system to SharePoint! You also have a flow you can import if you are trying to clean up attachments stuck in the deprecated PowerAttachment queue. We hope this helps you to manage your storage space. For our pre-configured flow and instructions on how to move notes attachments over to SharePoint, see this blog.