How Microsoft Power Platform is helping to modernize and enable...
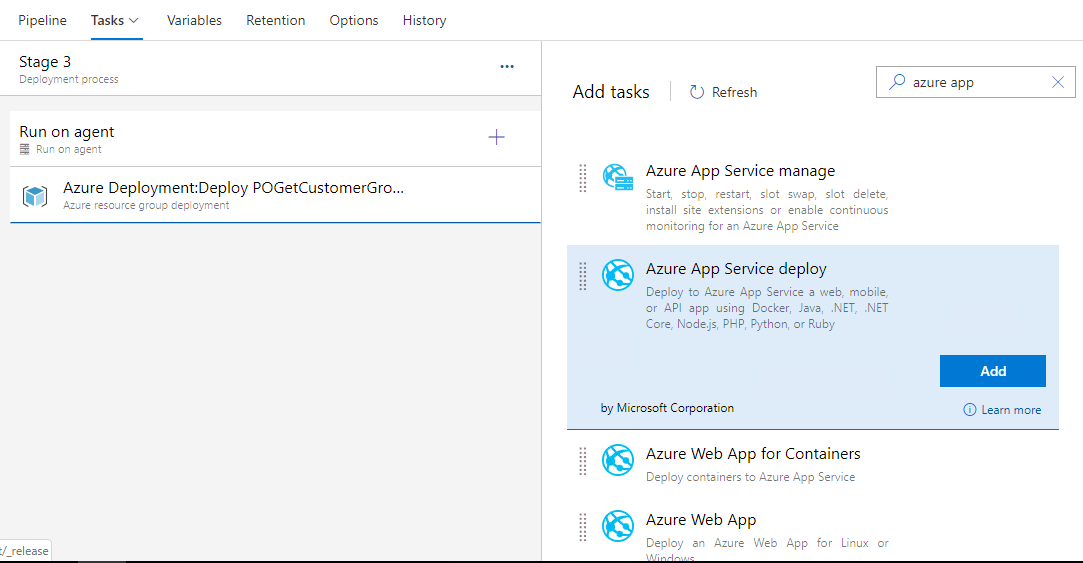
In this webinar, our experts showcase a variety of demo use cases of how different components of the...
Today’s blogpost is lengthy but should serve as a fantastic resource going forward. We will explore Build and Release Pipelines for Azure Resources as follows:
Enjoy (and bookmark!)
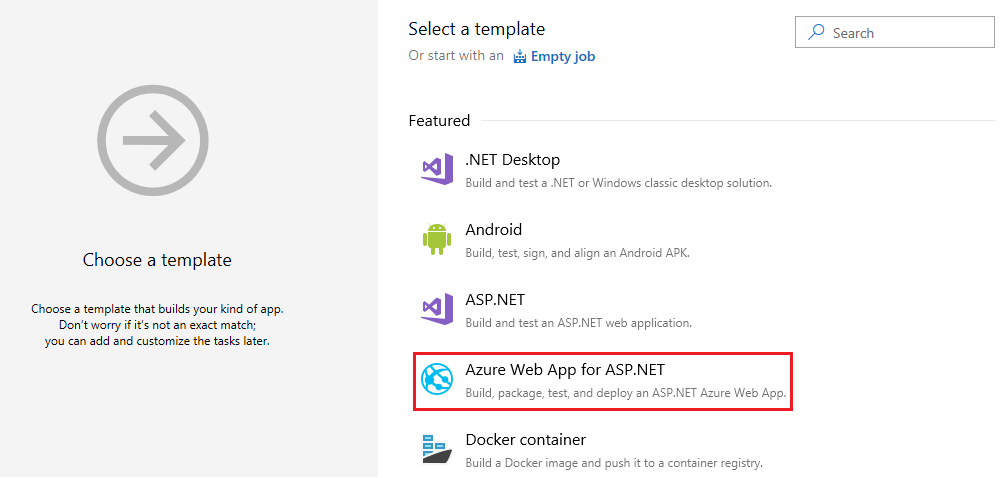
Azure Pipelines is a fully featured continuous integration (CI) and continuous delivery (CD) service. Azure Pipelines helps you implement a build, test, and deployment pipeline for any software stack.
In the scenario below, we will be creating a build and a release pipeline in Azure DevOps that use one parameterized task group for deploying Azure Logic Apps and Functions to different environments.
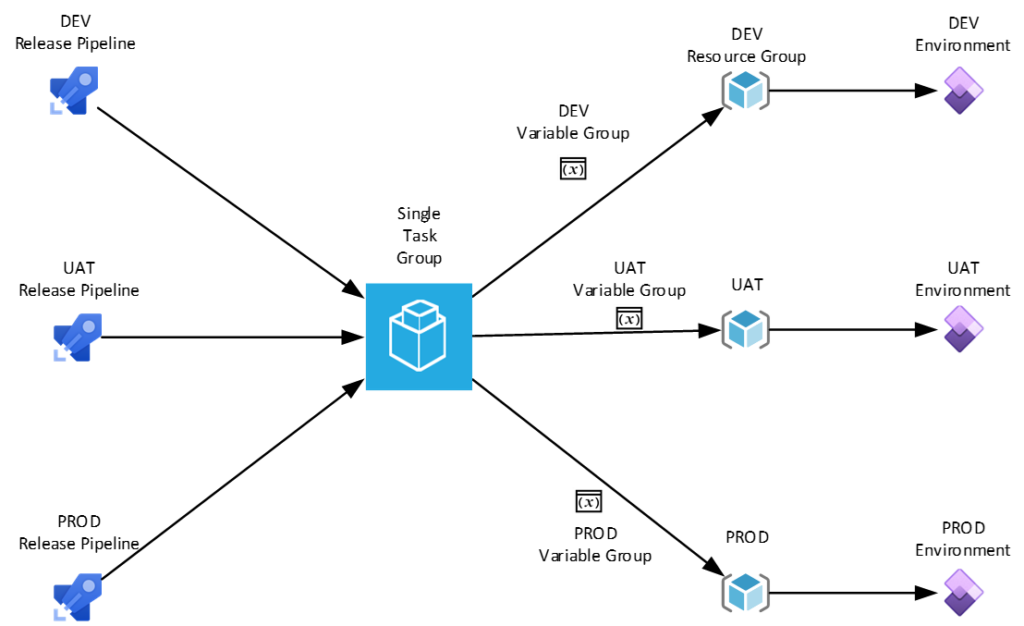
The key benefit of using the approach we are describing below is that we are able to support deployment to multiple environments using a single list of tasks by leveraging task groups and variable groups from Azure DevOps. In other words, if we need to include one additional task (e.g. a new Logic App or a new Azure Function), we only need to change one thing – the task group. The high-level workflow is shown in the following diagram:

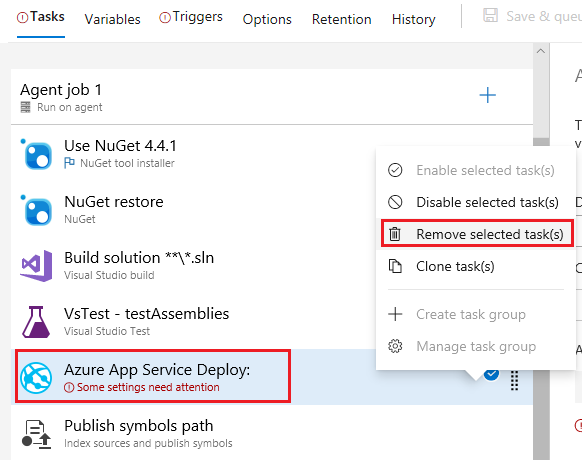

Note: In case, if your node has Azure functions. Add a Build Solution task for each Azure Function App.
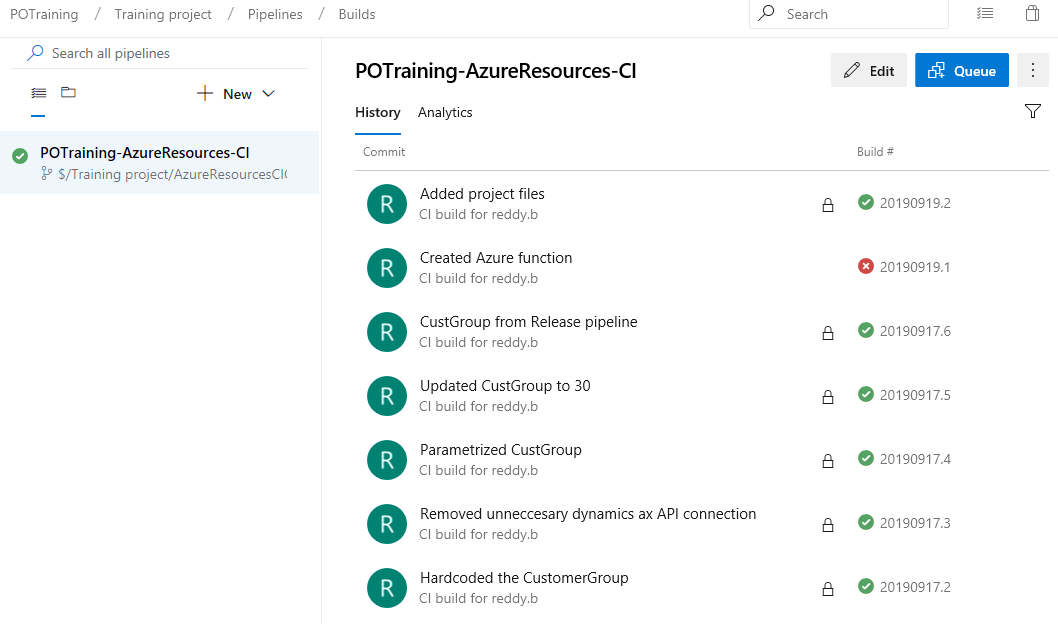
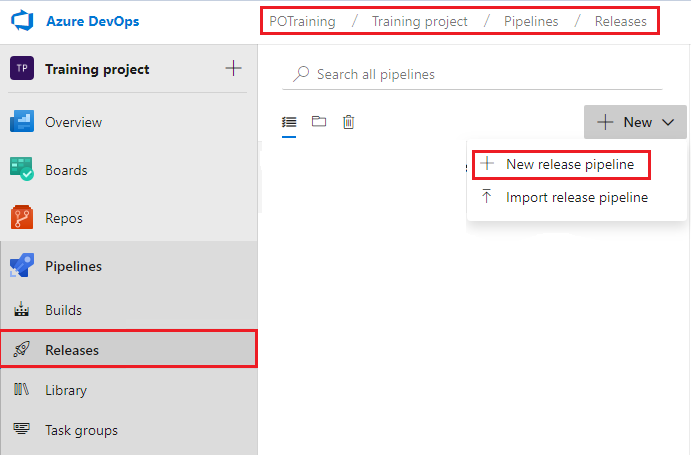
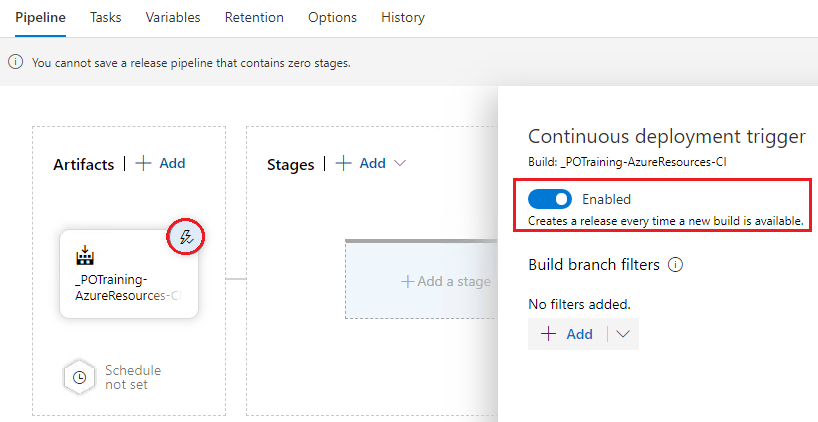
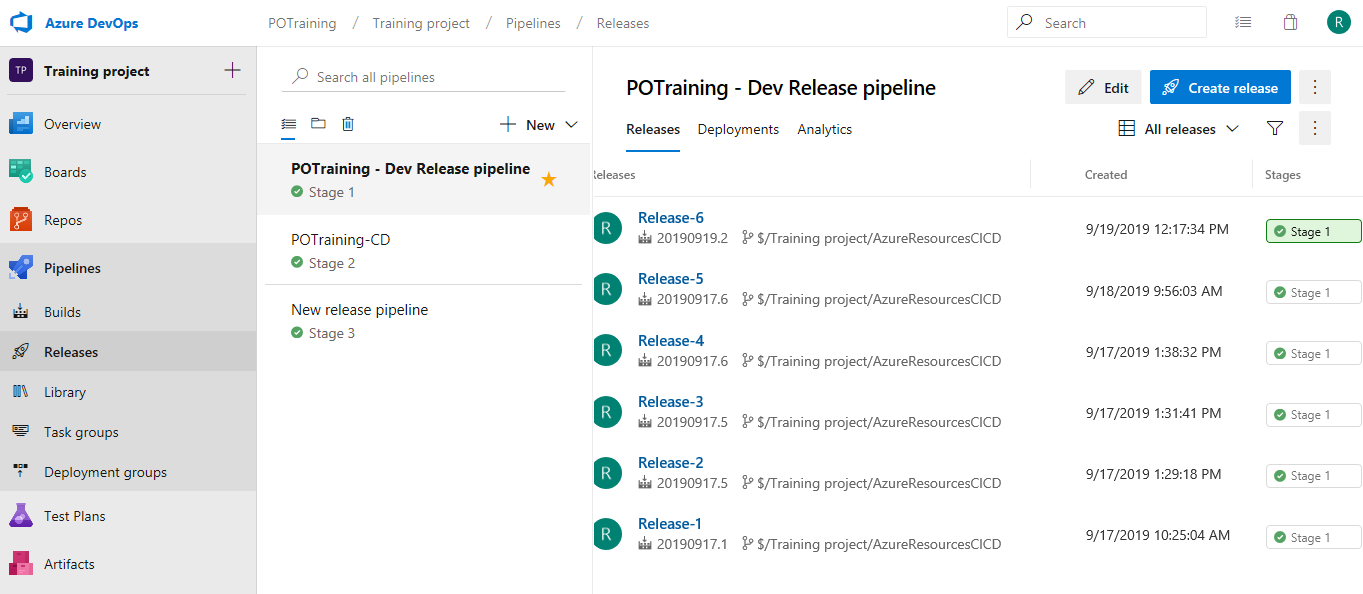
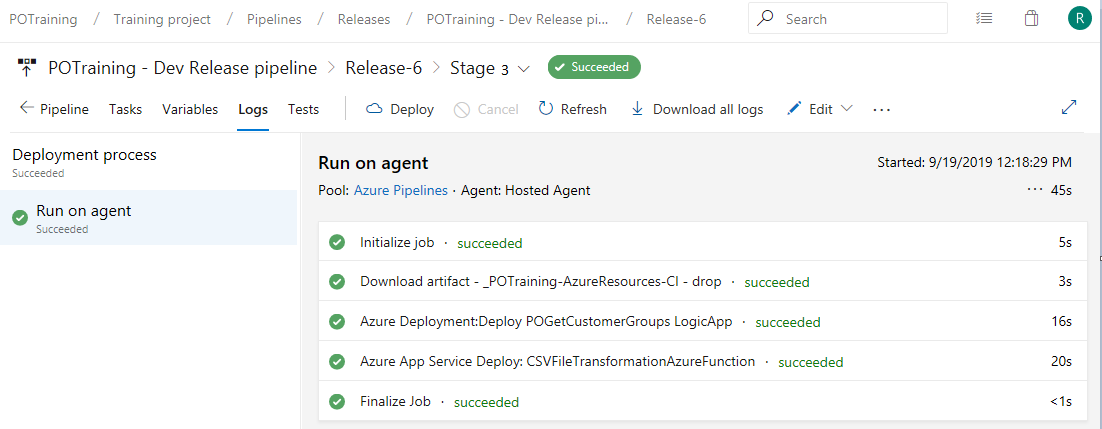
Release Pipeline enables to deploy the resources to target.
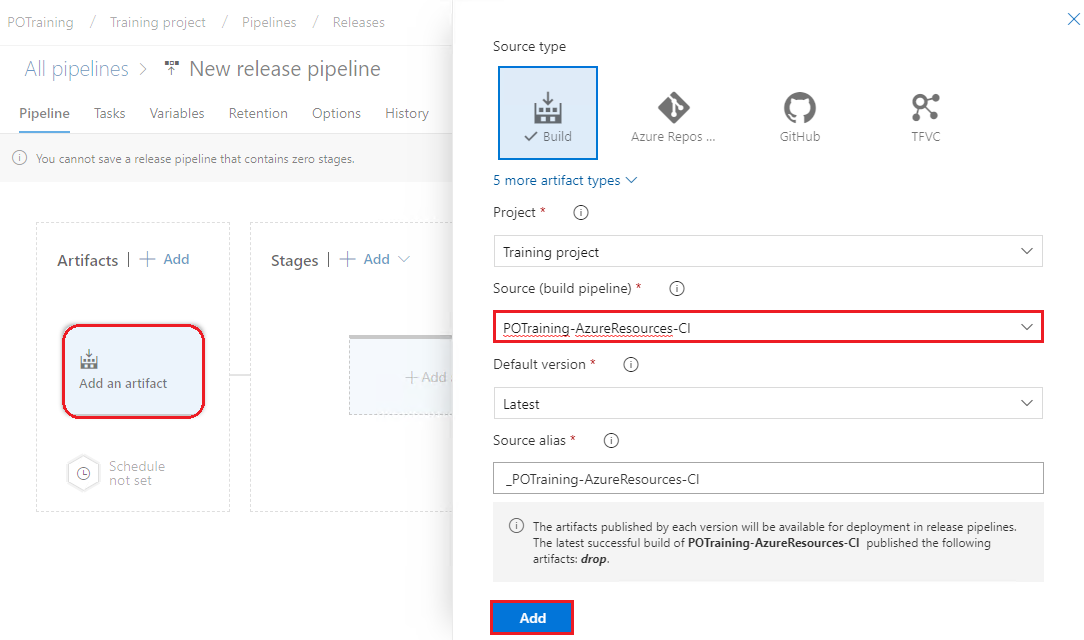
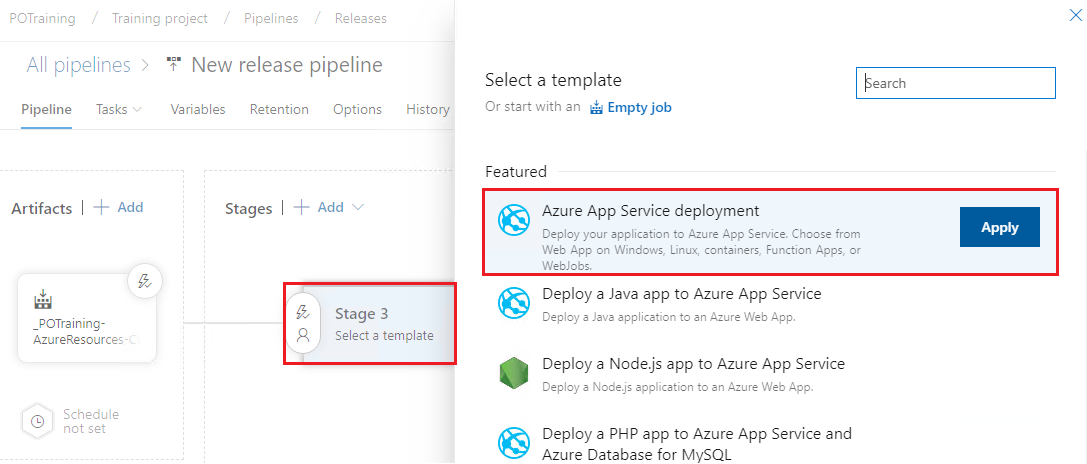
Navigate to Pipelines > Release > New > New Release Pipeline

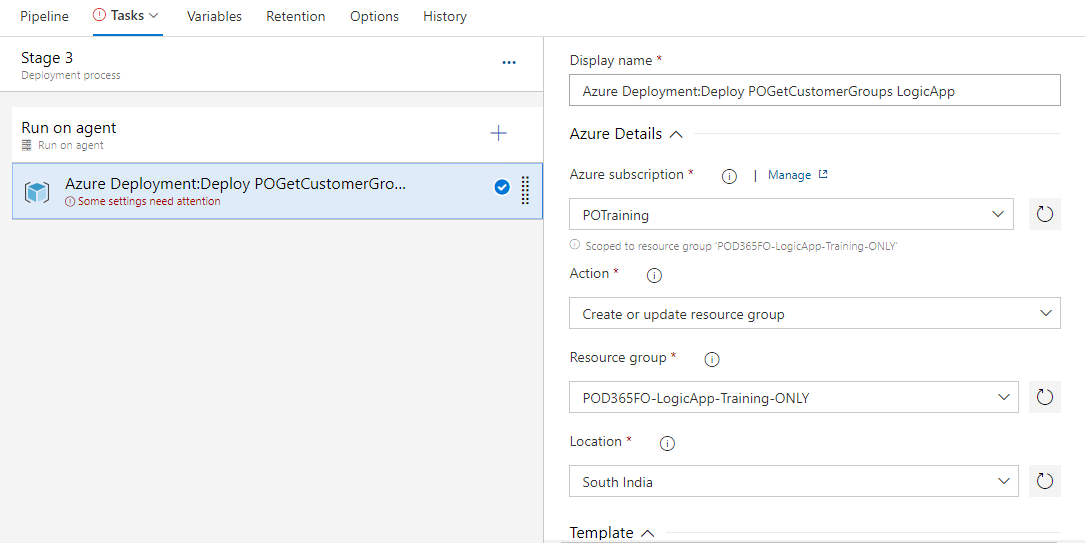
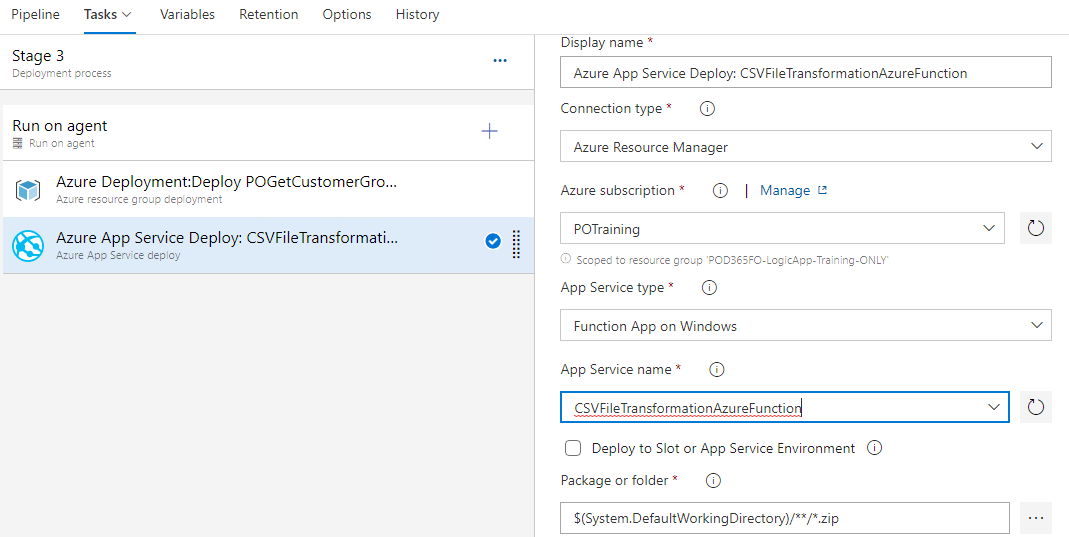
1. Display name: Azure Deployment:Deploy POGetCustomerGroups LogicApp
2. Azure subscription: Select your subscription and authenticate. A Service Principle will be created. As I have already authenticated earlier, a Service Principle was created. So, I have used the existing Service Principle.
3. Action: Create or update resource group
4. Resource group: Select the resource group you want to deploy the Logic App.
5. Location: Select the Resource group location.
6. Template location: linked artifact
7. Template: $(System.DefaultWorkingDirectory)/_POTraining-AzureResources-CI/drop/POGetCustomerGroups/LogicApp.json
8. Template parameters: $(System.DefaultWorkingDirectory)/_POTraining-AzureResources-CI/drop/POGetCustomerGroups/LogicApp.parameters.json
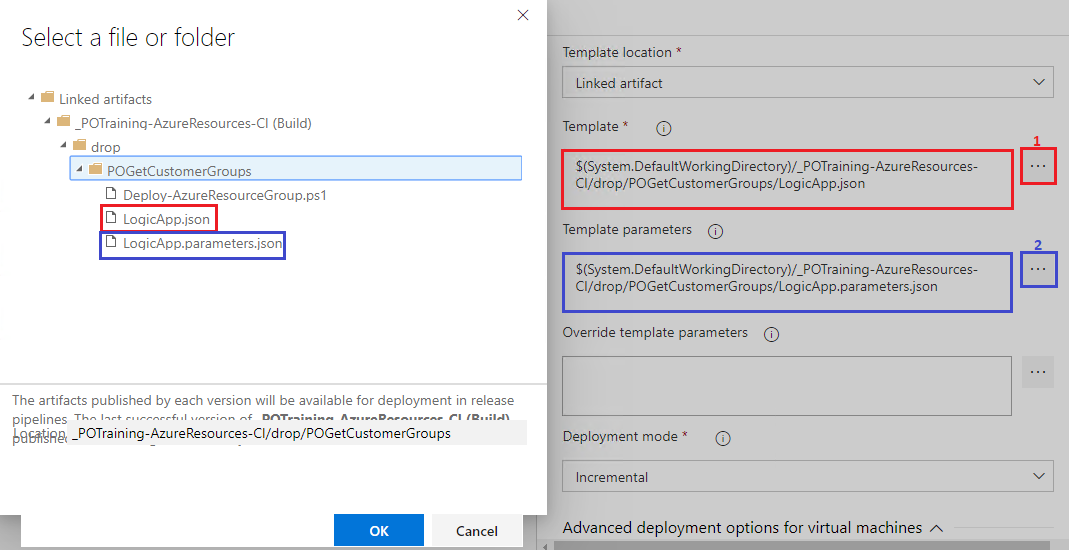
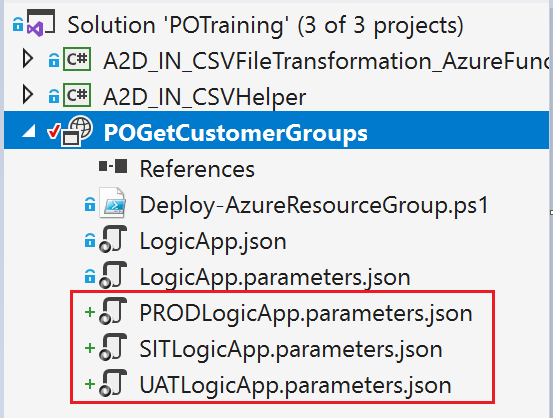
9. We can define environment specific parameter files and select right one deploy to respective environment or else we can do achieve this using the Variable groups. Please refer section 5 (Libraries).
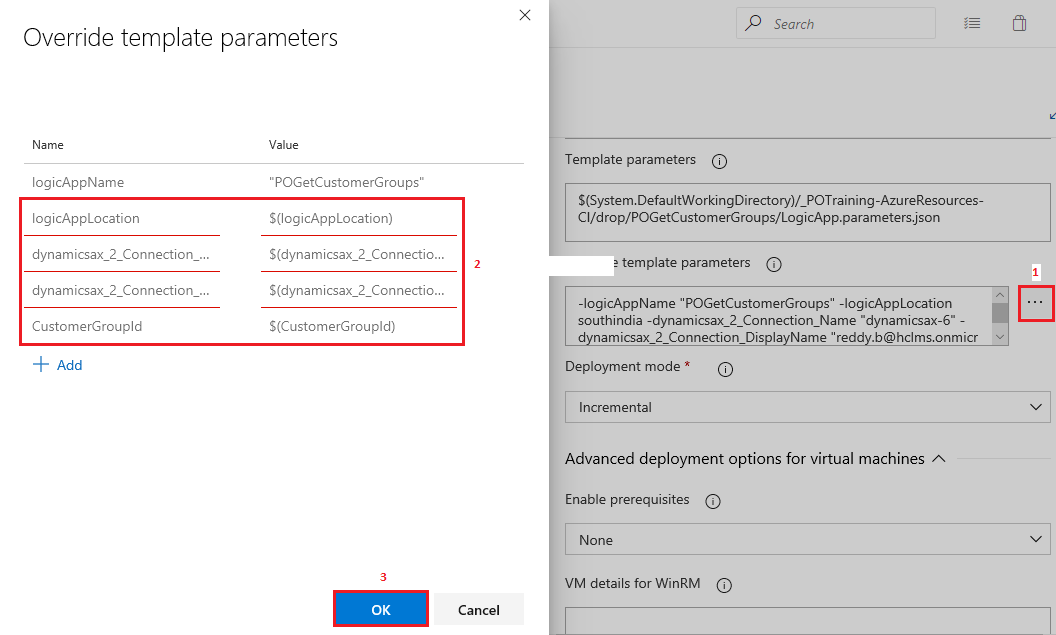
10. Click on Ellipse to Override template parameters. You can modify the default values provided in the Logic App. Click Ok to save the changes.
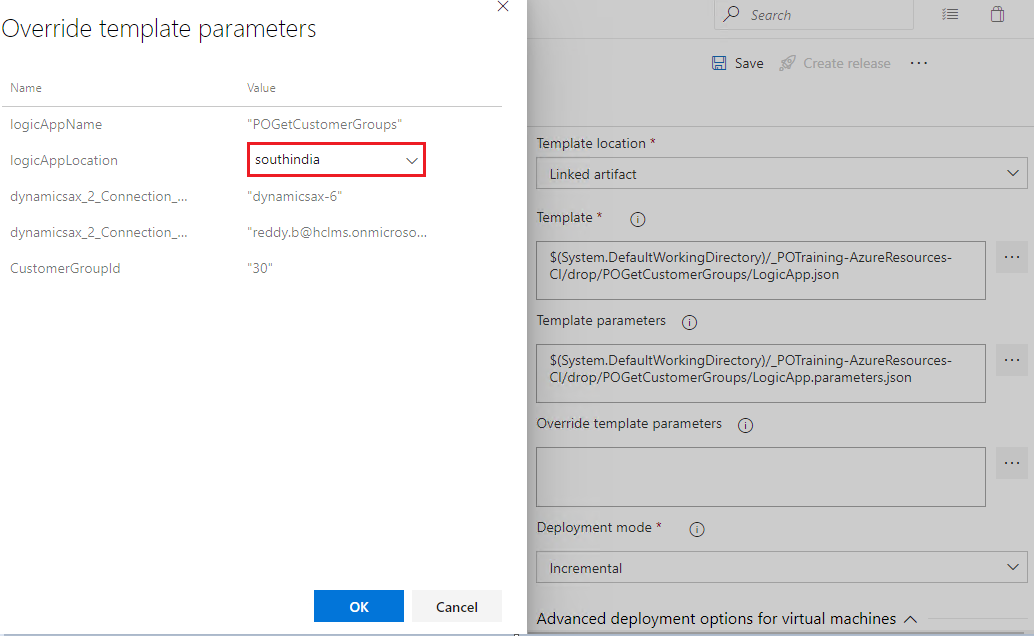
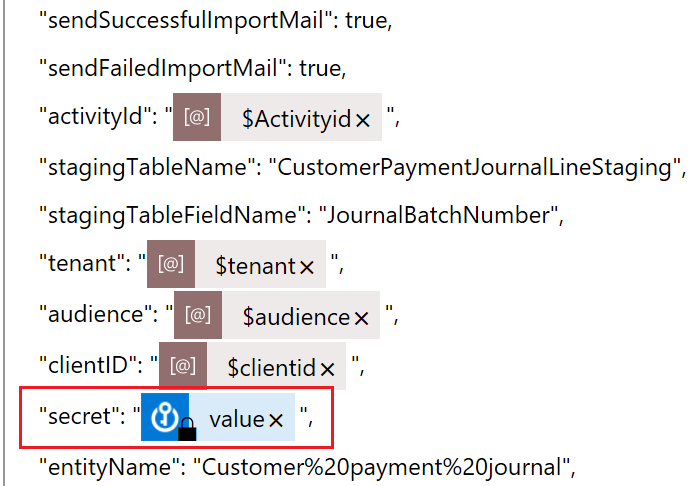
11. Make sure to use Key vault secret wherever possible. In our case we need Application Id and Secret to authenticate D365FO application. Instead of providing the hard coded value, we can provide the Key vault name which holds the actual ‘Secret’ required for authentication.
12. Deployment mode: Incremental
Note: Service Principals are specific to Resource group. We need create one for Resource group.
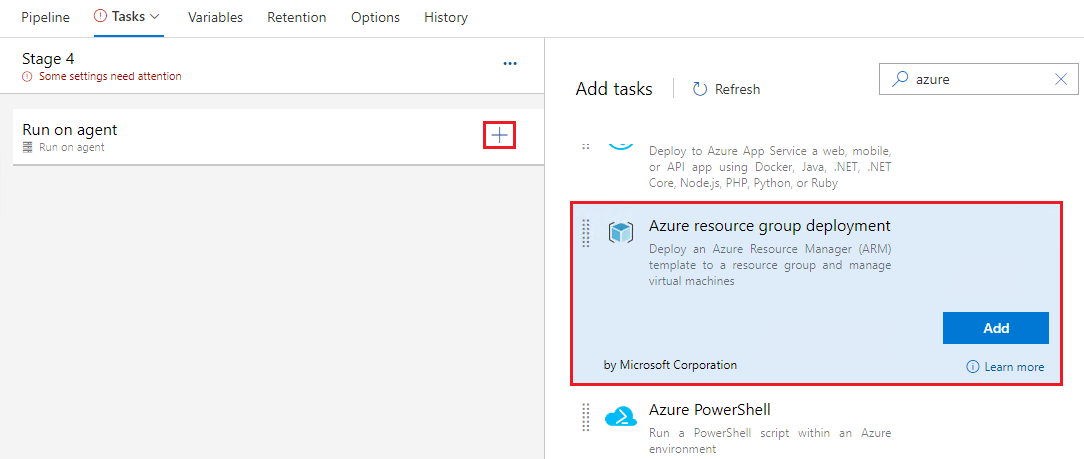
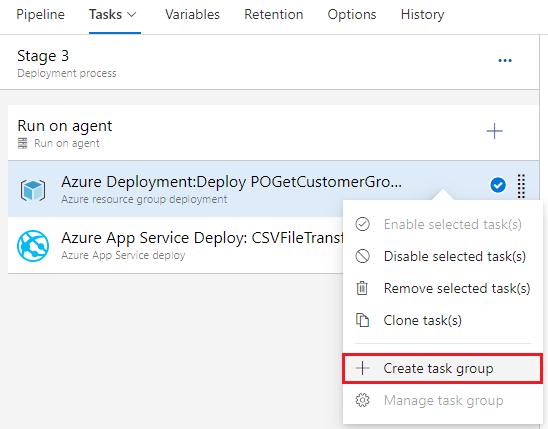
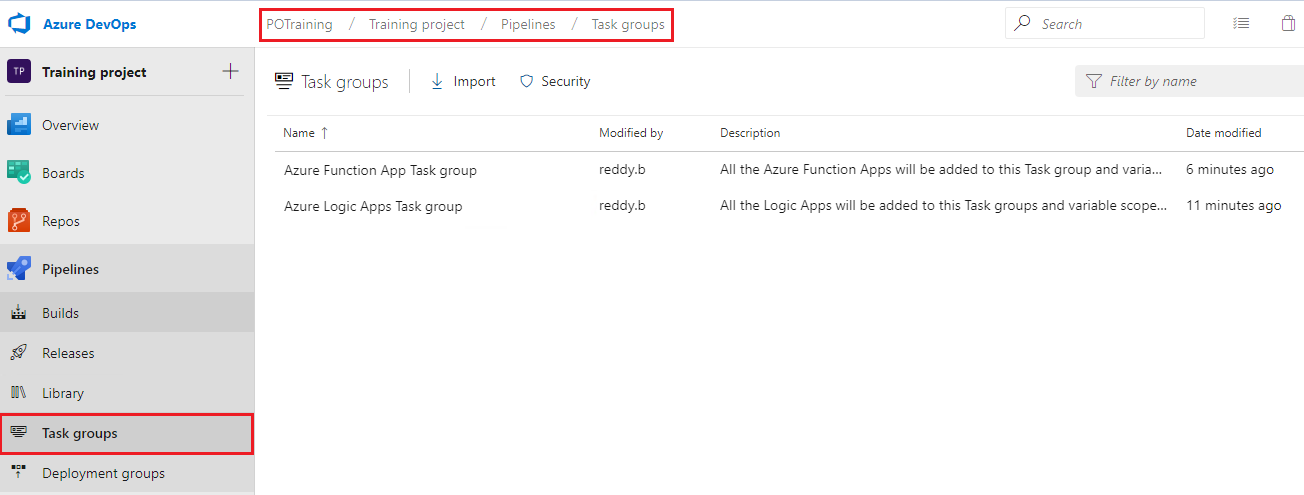
Based on our topology, we might have different resource groups. Each Resource group should have a Release Pipelines (or Stages). So, in case a Logic App or Azure Function App is developed. We need to add the resource as Task in the Pipeline. In order to avoid this redundancy work for all the resource groups. For better reusability, we can make use of Task groups.
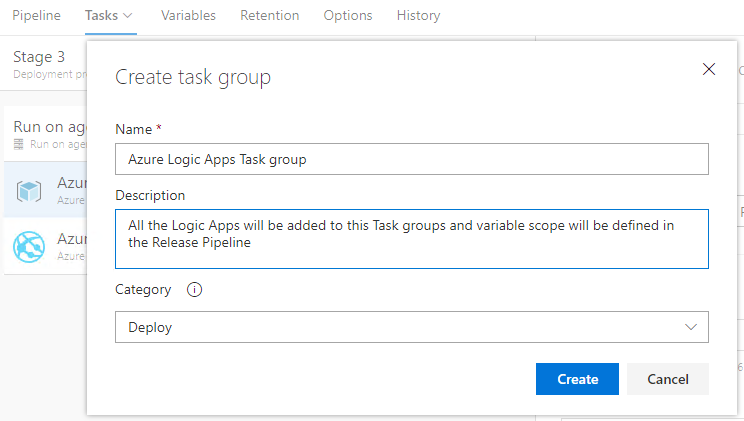
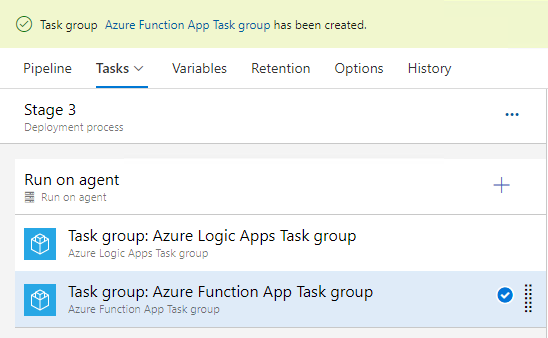
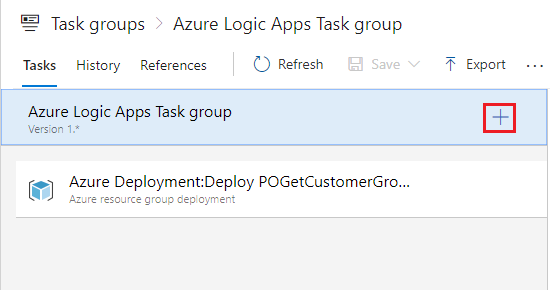
We will Create Task groups, one for each Logic Apps and Azure functions and define the scope of the Variables in Release Pipeline. Let us create Task Group.
Note: we could put all Logic Apps and Functions together in one task group, but the list looks better organised if they are split when having 20+ of each resource type.
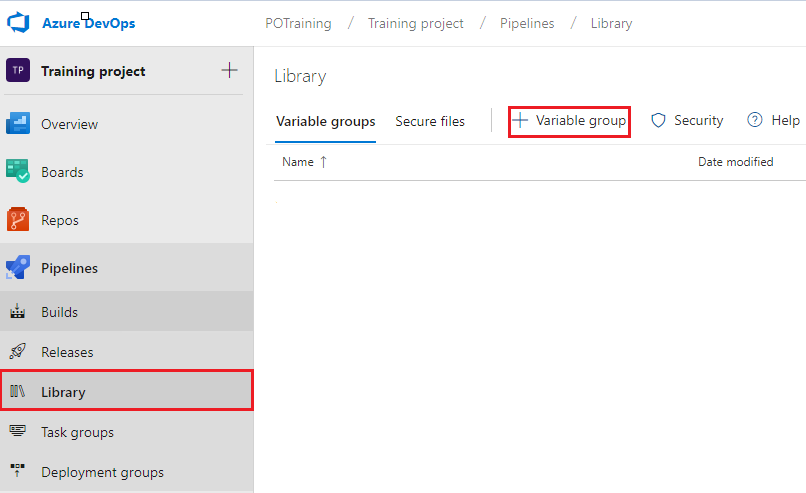
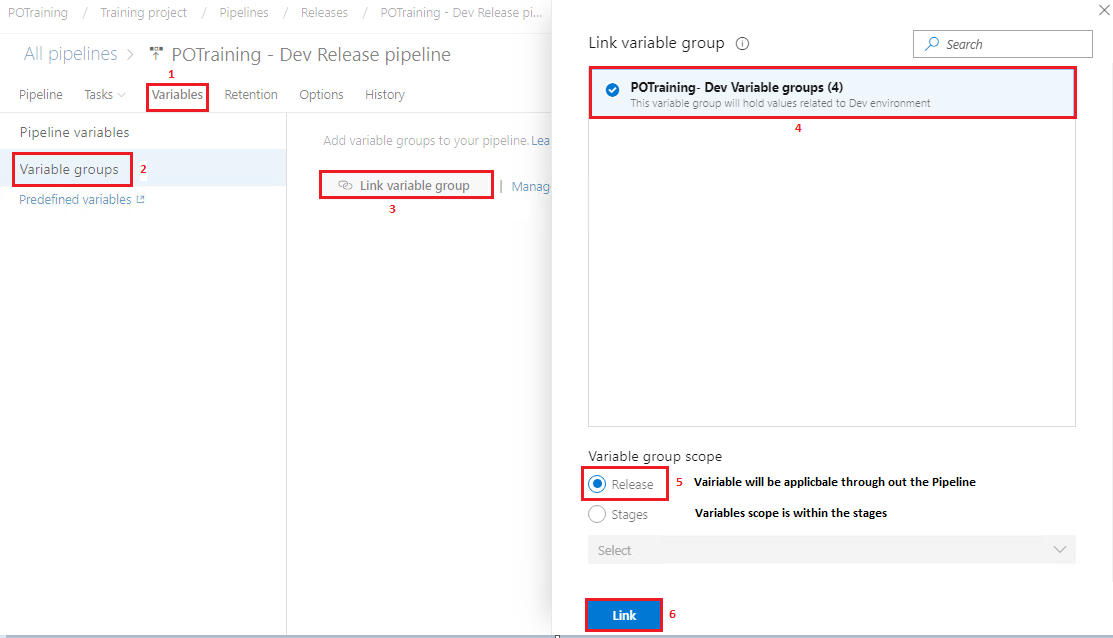
The values might differ from environment to environment (here I am referring to AX application and Resource groups). To differ the values from RG to RG (Resource group). We need to define variable groups and define the scope of the variable in Release Pipeline (Please refer Release Pipeline section, we define scope (resource group) while creating Release Pipeline.

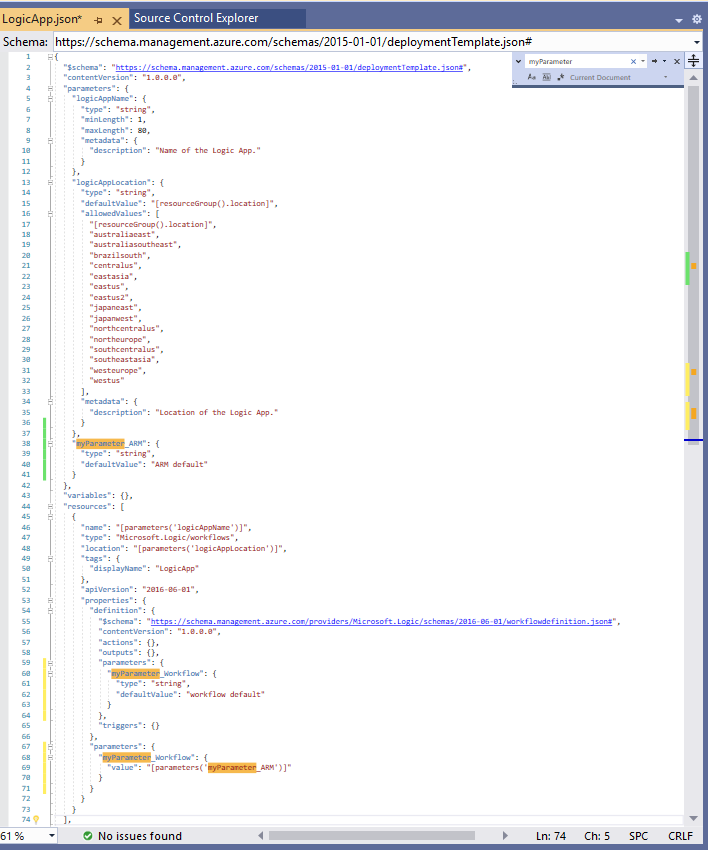
Be aware of the three different places where parameters are stored in the ARM template that holds the code behind a Logic App. There are three places in the JSON where parameters are specified:
1. The ARM template parameter definition (child of the root node) – Line 38 below
2. The workflow parameter definition (child of node resources > properties) – Line 60 below
3. The workflow parameter initialisation (child of node resources) – Line 68 below
The first two parameters are just definitions, so they do not specify values, just the type, default value and a few others are valid fields. The value of a parameter will be specified in the third place, the initialisation under node resources. The normal practice is to initialise the value of the workflow parameters from the ARM template parameter values.
The ARM template parameter values can be specified in the separate parameter file (LogicApp.parameters.json) and can be overridden from the release pipeline.