
How Microsoft Power Platform is helping to modernize and enable...
In this webinar, our experts showcase a variety of demo use cases of how different components of the...
You may be wondering, how are creating dialogs in Dynamics CRM 2013 different from creating a dialog in Dynamics CRM 2011? The short answer: it really isn’t very different; the basic functionality is the same – however, CRM 2013’s freshly redesigned UI modifies the navigation process.
Dialogs are a feature introduced in Dynamics CRM 2011. They provide a great way to standardize processes and ensure specific information is routinely captured.
Here is an example:
A sales lead’s contact information is out of date. We will create a simple dialog that will prompt a CRM user to update the lead’s Business Phone, Mobile Phone, Email and Preferred Contact Method. The CRM database will be a standard install with only the out-of-the box features displayed.
Navigation
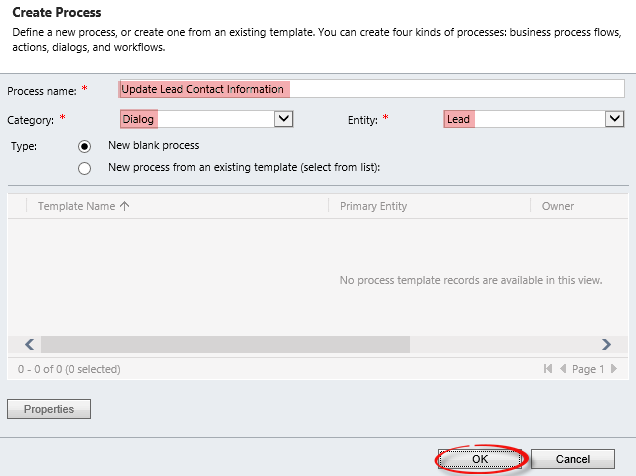
1. From the navigation menu, select Microsoft Dynamics CRM > Settings > Processes.

2. Once the default My Processes view is displayed, click the New button from the menu.

Creating the Dialog
The Create Process window closes and a new Information window appears with the General tab selected.
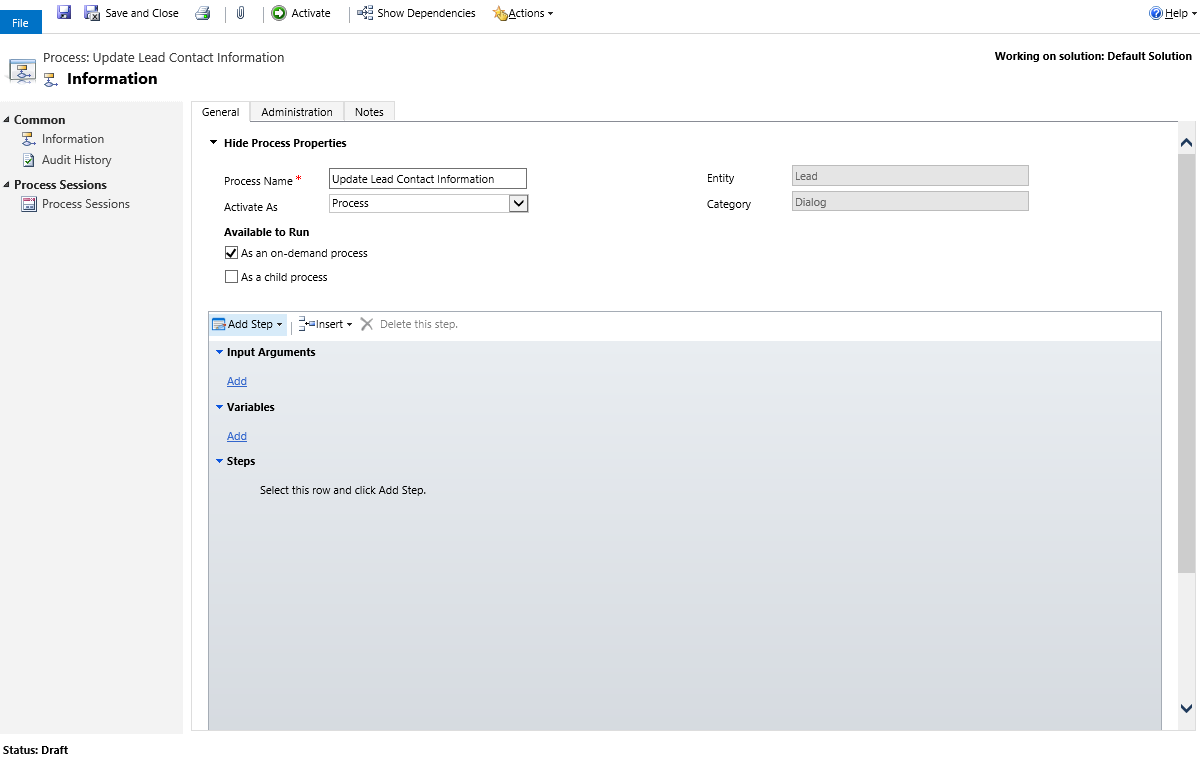
[NOTE: In this example, we will leave the As an on-demand process box checked. It is possible to build complex dialogs that are initiated programmatically. It is also possible to relate dialogs to each other, but both of these functions are outside the scope of this tutorial.]
Creating the Prompts
Dialogs operate as a series of pages, much like a common setup wizard. Each page should contain specific functions that flow to subsequent pages.
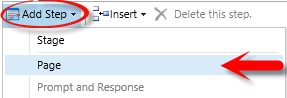
1. Click Add Step.
2. Select Page.
3. Choose a unique name for the page (Page 1).
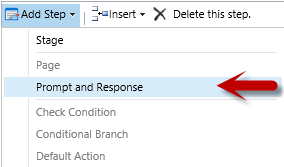
4. Select the row beneath the Page description and click Add Step.
5. Choose Prompt and Response from the drop down list.
6. In the new available field, provide a description for the Step.
7. Click Set Properties.
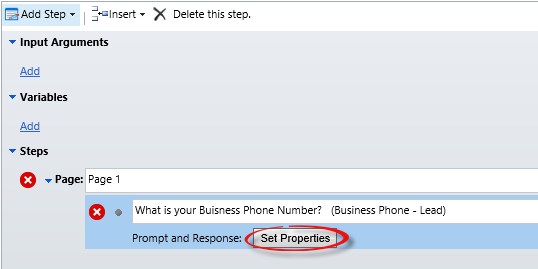
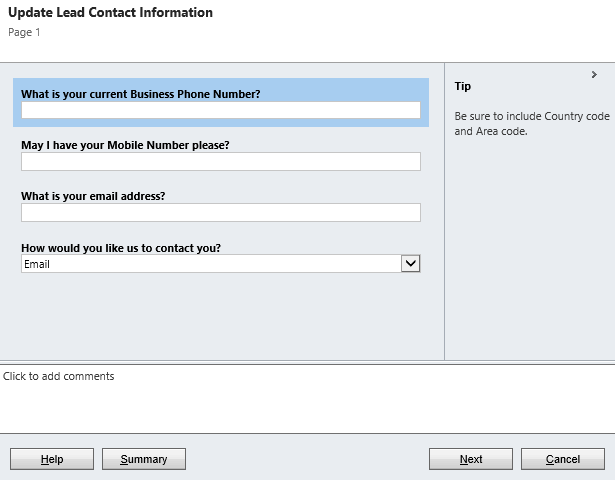
8. Provide the Prompt Text in the text area. This will be the text displayed to the CRM user.
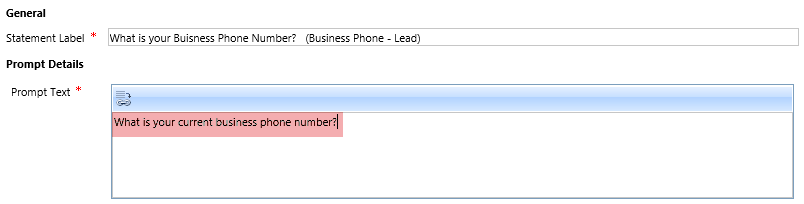
9. Provide a Tip Text in the text area. Tip Text provides additional information for the selected prompt.

10. In the Response Details section, choose Single Line as the Response Type for the prompt. The Response Type correlates to the type of information being captured. A phone number is a single line of text, so Single Line is the appropriate choice.
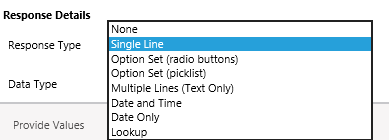
11. Choose Text as the Data Type for the prompt. While business phone is a number, it is not considered a numeric value (you wouldn’t perform arithmetic on it), so it is stored as text.
![]()
12. Leave Log Response checked as Yes.
13. Leave Default Value blank.

14. Click Save and Close.

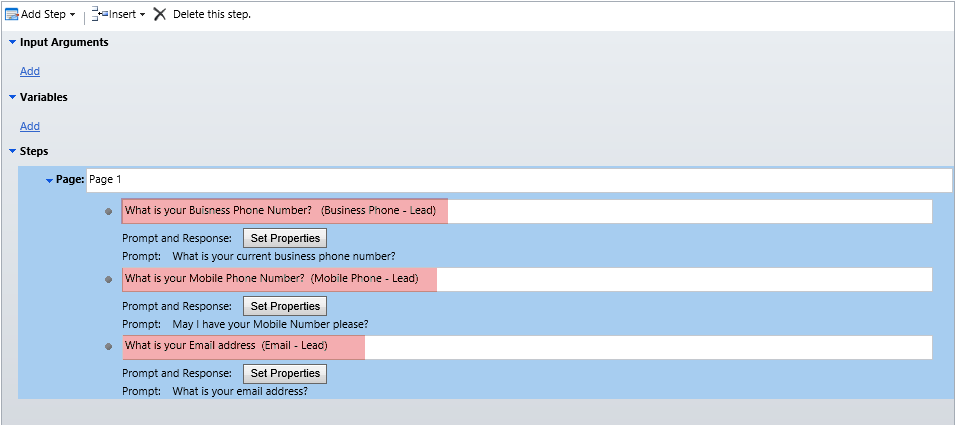
15. Repeat steps 11-21 for Mobile Phone and Email.
Now that we’ve captured some data, let’s create a prompt for the lead’s preferences.
16. Create a new preferences prompt with Prompt Text.
17. In the Response Details choose Option Set from the Response Type list
18. In Data Type select Integer.
19. Leave Log Response checked as Yes.
20. Leave Default Value blank.
Creating Prompt Responses
Now we need to set up the preference options. Since this is an actual field within CRM the response options will need to relate to the CRM options. Here are the available CRM preference fields:
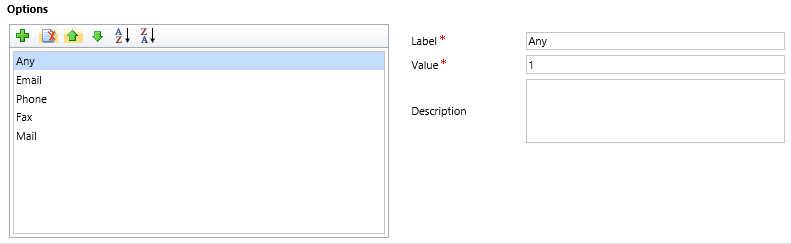
In our example, we do not want the CRM user to choose the Any option, so we will omit that as an option. It is important to remember that the values in the prompt must match the CRM values.

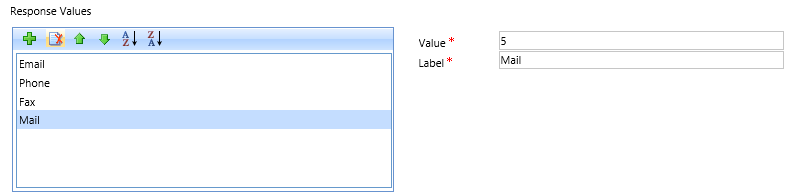
4. Repeat steps 28-30 for Phone, Fax and Mail incrementing the value by 1 each time.
5. Click Save and Close.

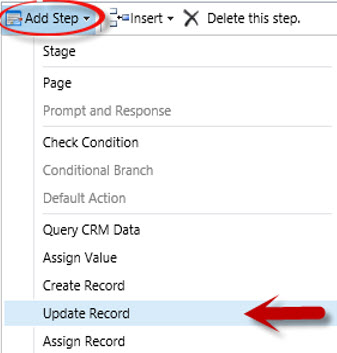
Update the Lead Record
At this point, we have created the prompts for the CRM user. Next we need to create a step to update the lead record.
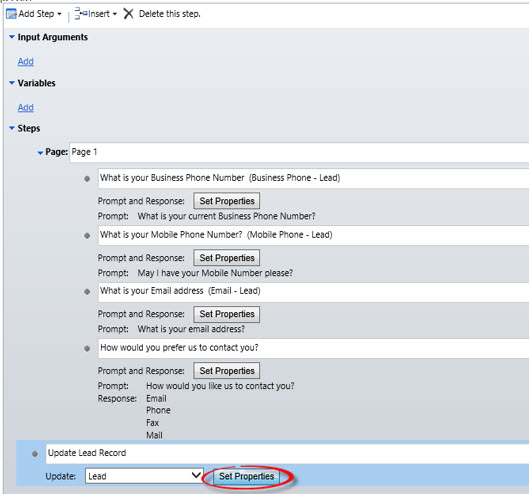
The Update Lead page is displayed, showing the lead entity properties. Here we will map the CRM user responses to the lead record fields.
5. Click in the Business Phone field.
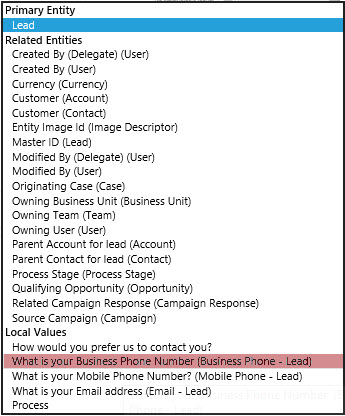
6. In the Form Assistant select Look For > What is your Business Phone Number.
7. Click Add.
8. Click OK.
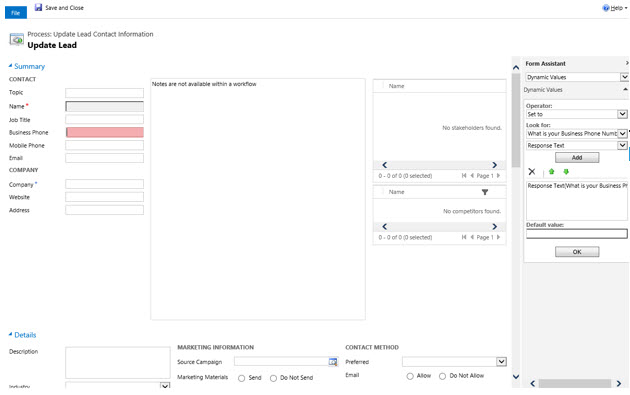
9. Repeat steps 37-40 for Mobile and Email.

10. Under Contact Method click on Preferences.
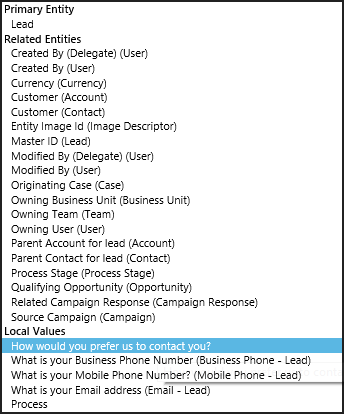
11. In the Form Assistant select Look For > How would you prefer us to contact you.
12. Click Add.
13. Click OK.

14. Click Save and Close.
Activate and Run Dialog
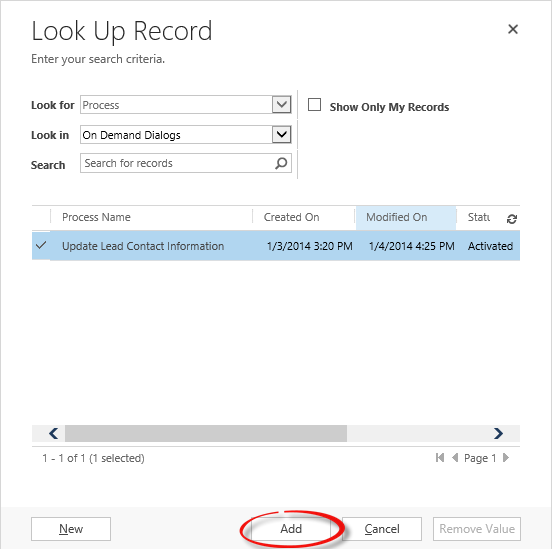
Once a dialog is finished, it will need to be activated. A dialog cannot be run until it has been active.
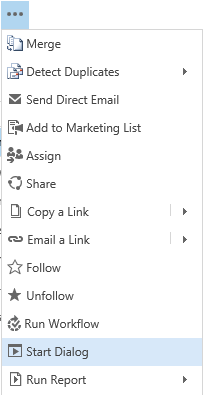
5. Select the dialog that was just created.
6. Click Add.
That’s it! Creating dialogs in Dynamics CRM 2013 is simple if you follow these steps. If you thought this was cool, try your hand at creating workflows.
Keeping checking our blog for more helpful guides, tips, and tricks!
Happy CRM'ing!


One think I am not loving about the new interface is when you click on the name of what you are looking for in the Look Up window (like the dialog name) it opens the entity itself instead of selecting it. So the user used to click on the dialog name to run it, now if they do that it opens the process and not the dialog. Users do not like it at all.
Can you also set a Business Process Flow for the Lead via dialog? I would like to have a dialog to create a new opportunity from an account for inactive accounts that we would like to win back. So the process would start with a phone call to the account and then qualifying steps in the dialog to determine the starting point of the opportunity. Then the remainder of the the sales process would be handled by the Business Process Flow.
Is there way to create dialog question with more answer choices. Optional set can give me more type of answer, but what if I want to select more then one answer. Like: "In what provinces do you operate in? - 1;2;3;4;5" and I would like to answer: 2;5. Not just to pick one of them.
Thank you Joe for the good work you have been doing in respect of CRM....
thank you sir...hats off to u....
Can we remove the unwanted text area "Click to add comments" , which we didn't designed in the process
Can we remove the unwanted text area "Click to add comments" , which we didn't designed in the process.