
How Microsoft Power Platform is helping to modernize and enable...
In this webinar, our experts showcase a variety of demo use cases of how different components of the...
One of the great features of Dynamics CRM 2013 is the inclusion of Bing Maps on the account, contact, and lead entities. Plug in the respective address, save the record, and the plot point gets mapped automatically in the embedded map. How great would it be, then, to add Bing Maps to other entities? Out-of-the-box CRM 2013 limits us to only these three.
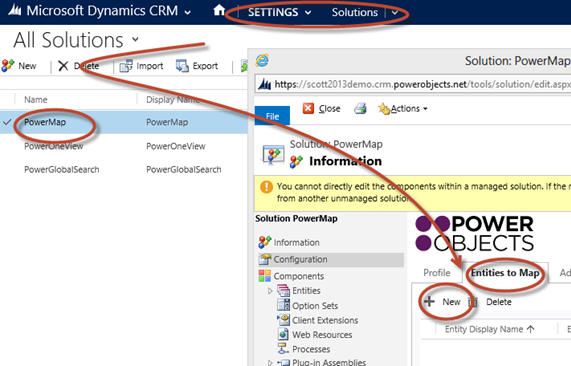
We have a solution using PowerObjects' PowerPack solution, PowerMap! PowerMap is robust point plotting tool that utilizes Bing Maps. It gives the user the ability, for example, to plot out all leads owned by that user in a given metro region, and plan the day's driving route accordingly. It allows the user to plot out opportunities and give weight to the plot points using the opportunity estimated revenue. It is a great tool to visually and geographically represent your CRM records.
Another major benefit of PowerMap is it can be added to any out-of-the- box entity that you choose! You can install and try PowerMap free for thirty days following the instructions found on our website.
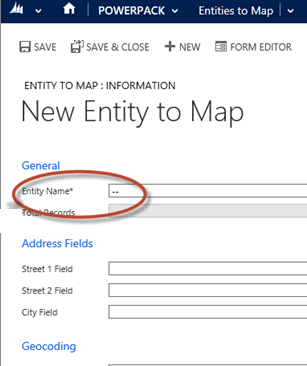
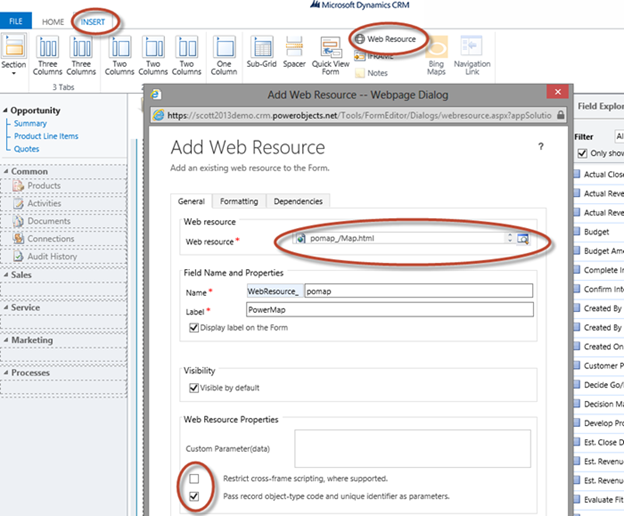
2. Once PowerMap is configured correctly for the chosen entity, it's time to embed PowerMap to the entity form. Open the form editor and select the Insert tab at the top, and select Web Resource. Next, click the lookup icon for Web Resource and find "pomap_/Map.html." Make sure "Restrict cross-frame scripting" is unchecked, and select "Pass record object-type code" if you would like multiple plot points in the map:
3. Now all that's left to do is find the location of the form you want to embed the map, Save and Publish, and you are ready to use! Maps on any entity is that easy!
Make sure to come back often for more tips and tricks on using Dynamics CRM, and happy CRM'ing!


