
How Microsoft Power Platform is helping to modernize and enable...
In this webinar, our experts showcase a variety of demo use cases of how different components of the...
With Microsoft enforcing modern authentication, you may have been wondering how your PowerPack add-ons will authenticate moving forward.
As you may have heard from us before, automated data processing is not compatible with user accounts where multi-factor authentication (MFA) is enabled, as MFA is designed to be used where the user is directly interacting with an application while it is running. Due to the automated nature of the cloud components of our PowerPack add-ons, the authentication for these applications will happen often and at times when a user may not be available to respond to a prompt.
We realize this is not practical, and our team has been working hard to develop and test updates to our cloud infrastructure that will support more advanced authentication mechanisms that do not require MFA as a security measure.
And with that, we are pleased to bring you ServertoServer authentication for our PowerPack add-ons!
From November 9th onwards, PowerPack add-ons will be supporting ServertoServer authentication (recommended and supported for CRM online) along with IFD authentication (supported for on-premises) for these add-ons:
If you are on version 9.1.0.23474 or above of Dynamics 365, you will not be able to authenticate using username and password at all. Instead, you will be required to use ServertoServer authentication, as Microsoft turned off authentication using App password starting with this version.
To use ServertoServer authentication in your add-on, an online CRM deployment is required, and you will need to upgrade to the latest version of the add-on released to the website. These solutions will start to be released on November 9, 2020. Check the add-ons “change log” on the respective webpage to confirm that the version supports ServertoServer authentication. If you have any questions, please reach out to powerpackpro@hcl-powerobjects.com.
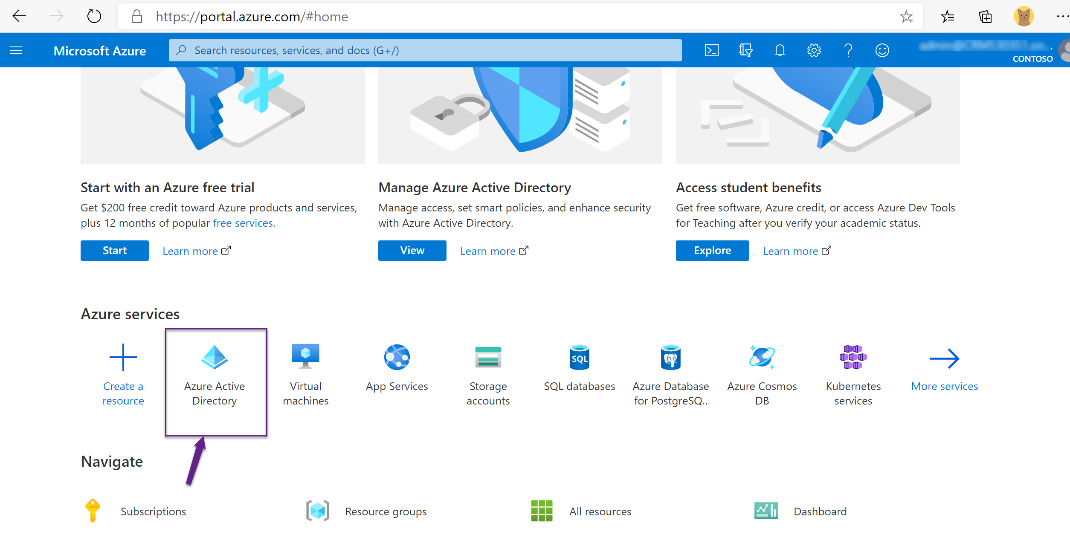
Login to https://www.portal.azure.com with the same credentials as your Dynamics 365 tenant.
Note: Make sure you have access to create Active Directory app registration in Azure Portal.
1. Navigate to Azure Active Directory
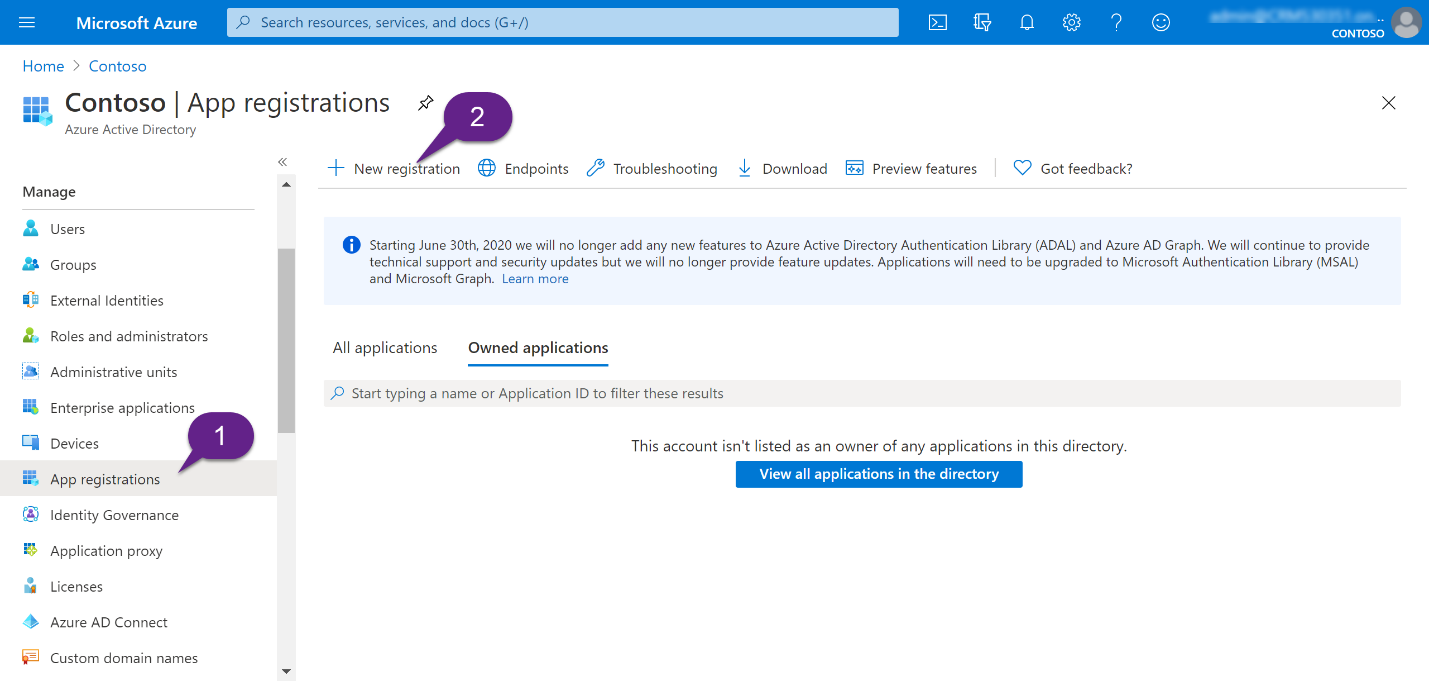
2. Navigate to App registrations à New registration
3. Fill in the values for a, b, and c as shown below:
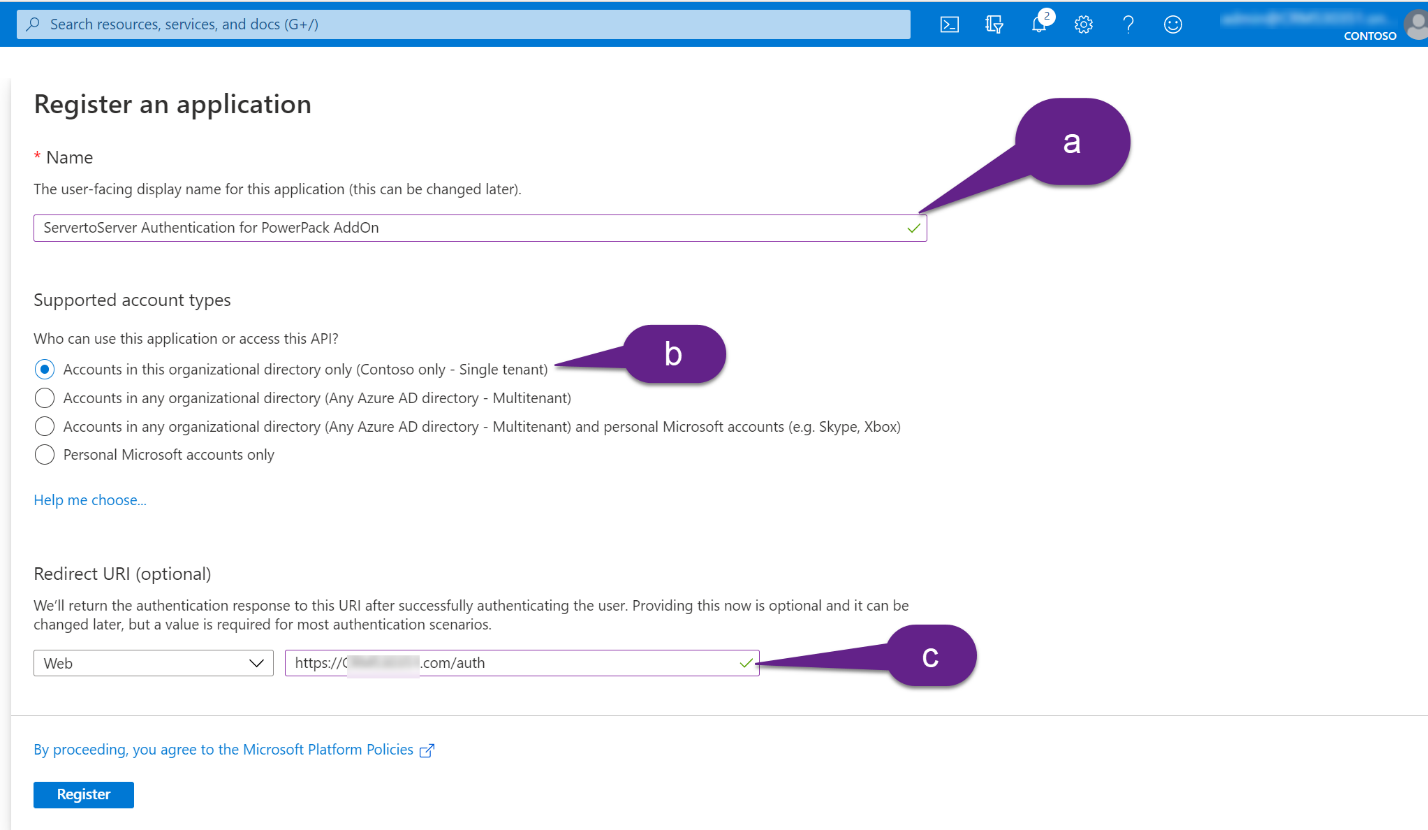
4. Click on Register.
Once the registration is successful, you will be redirected to it.
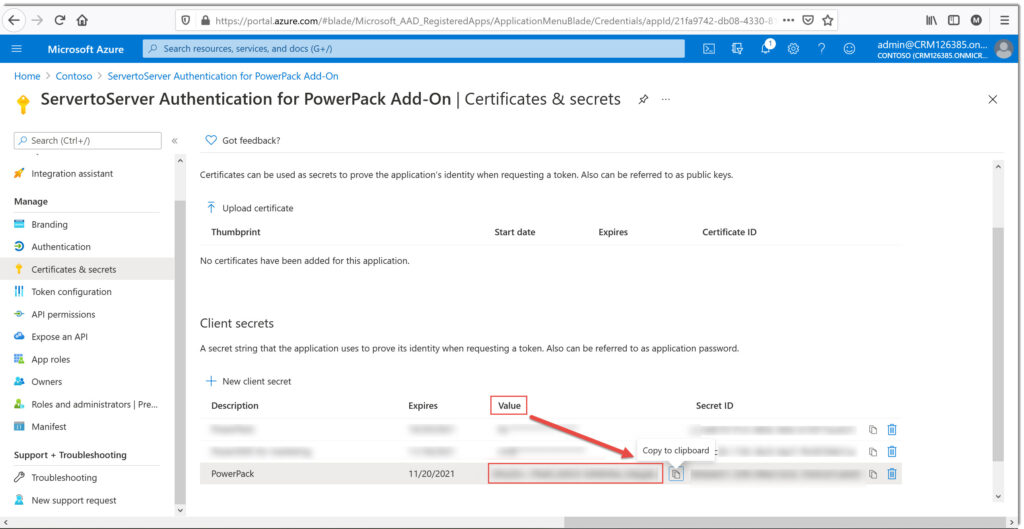
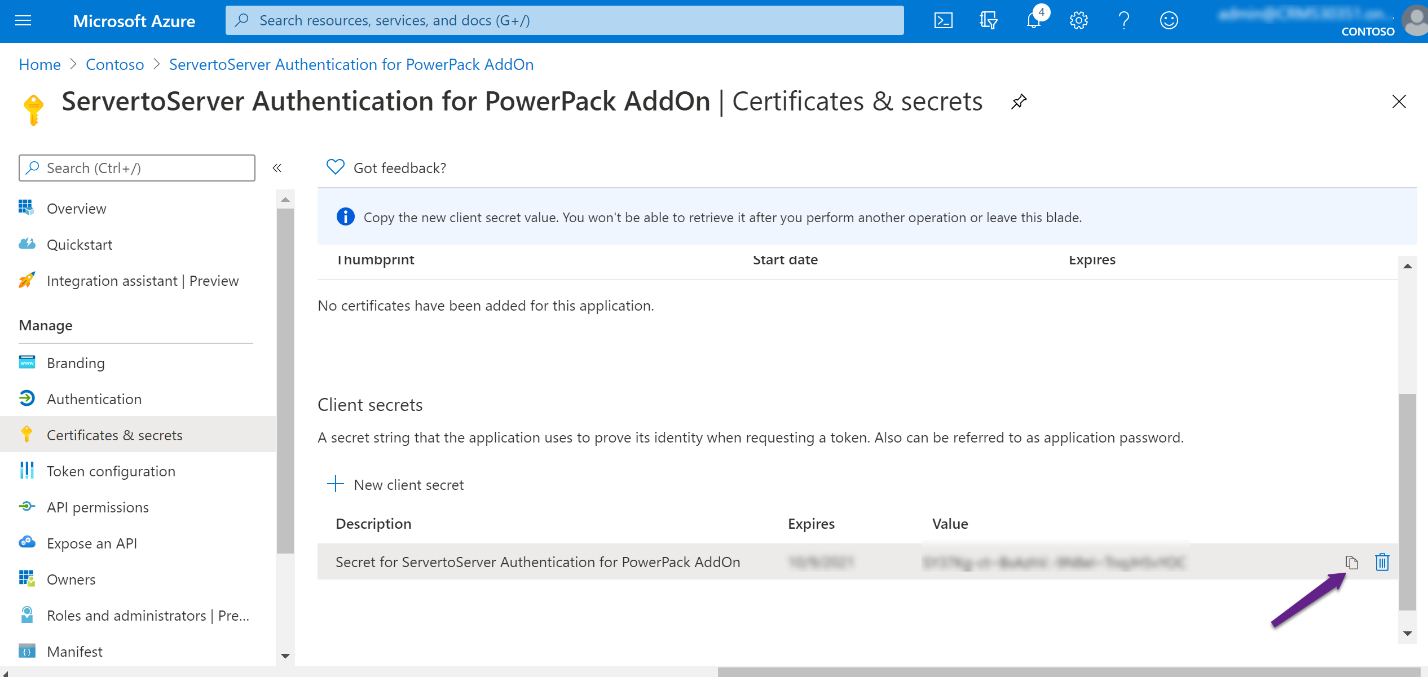
5. Create the app Secret by navigating to Certificates & secrets à New client secret
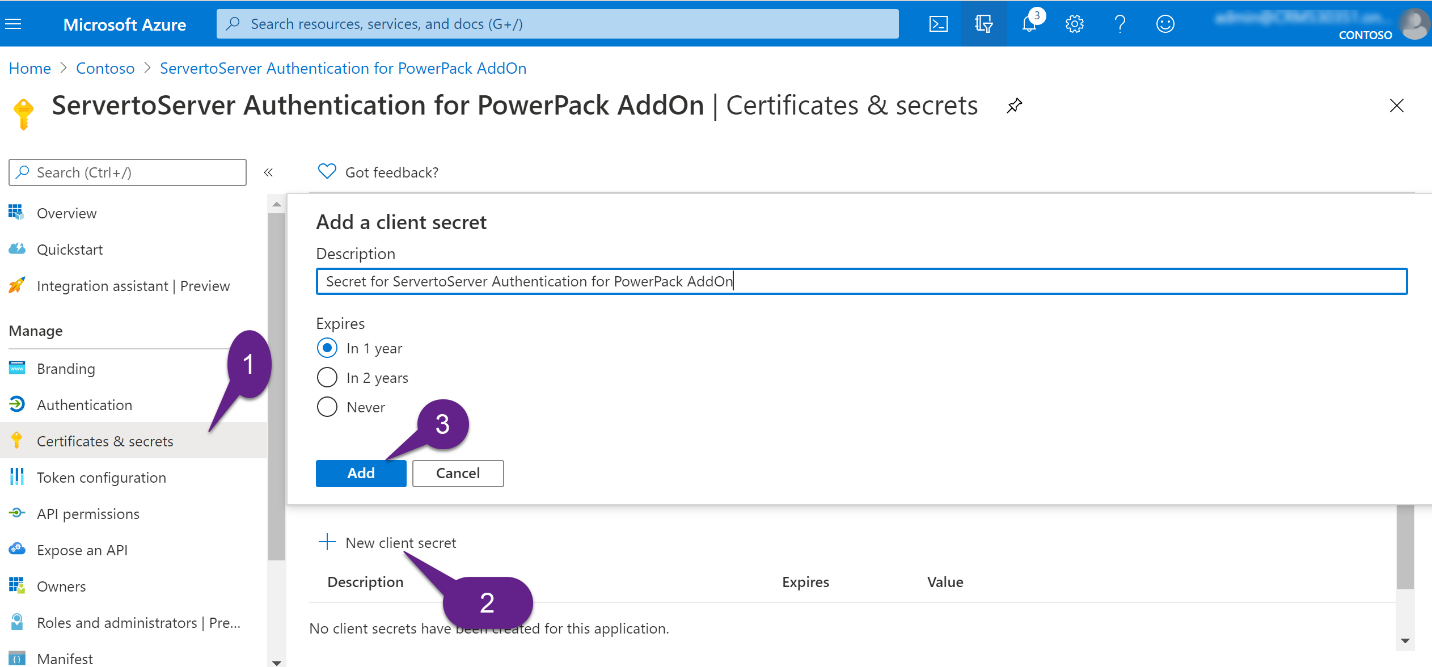
6. Once the secret is added, it can be copied as follows:
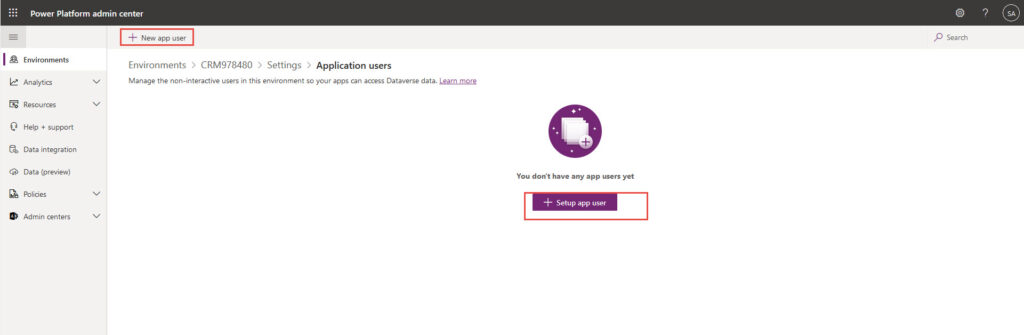
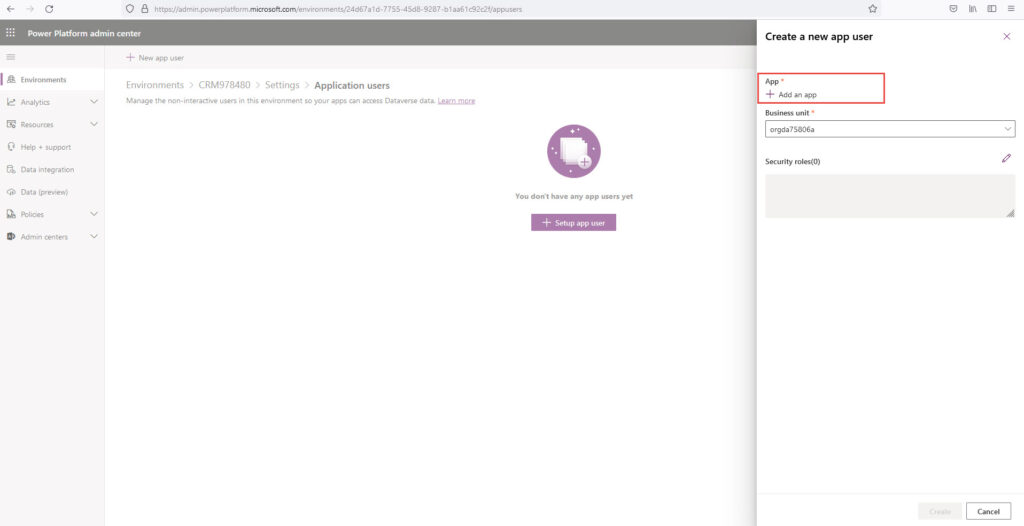
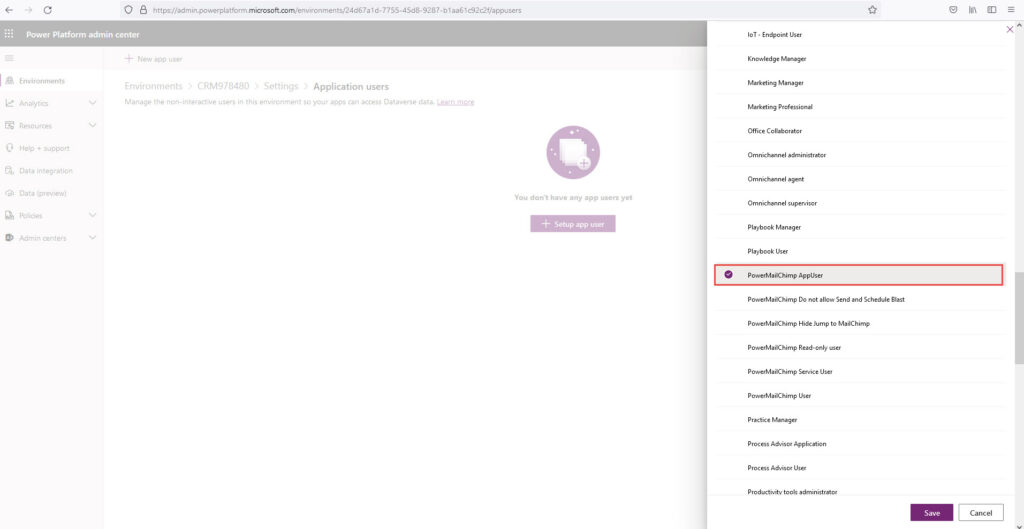
1. Create a new Application User as follows:


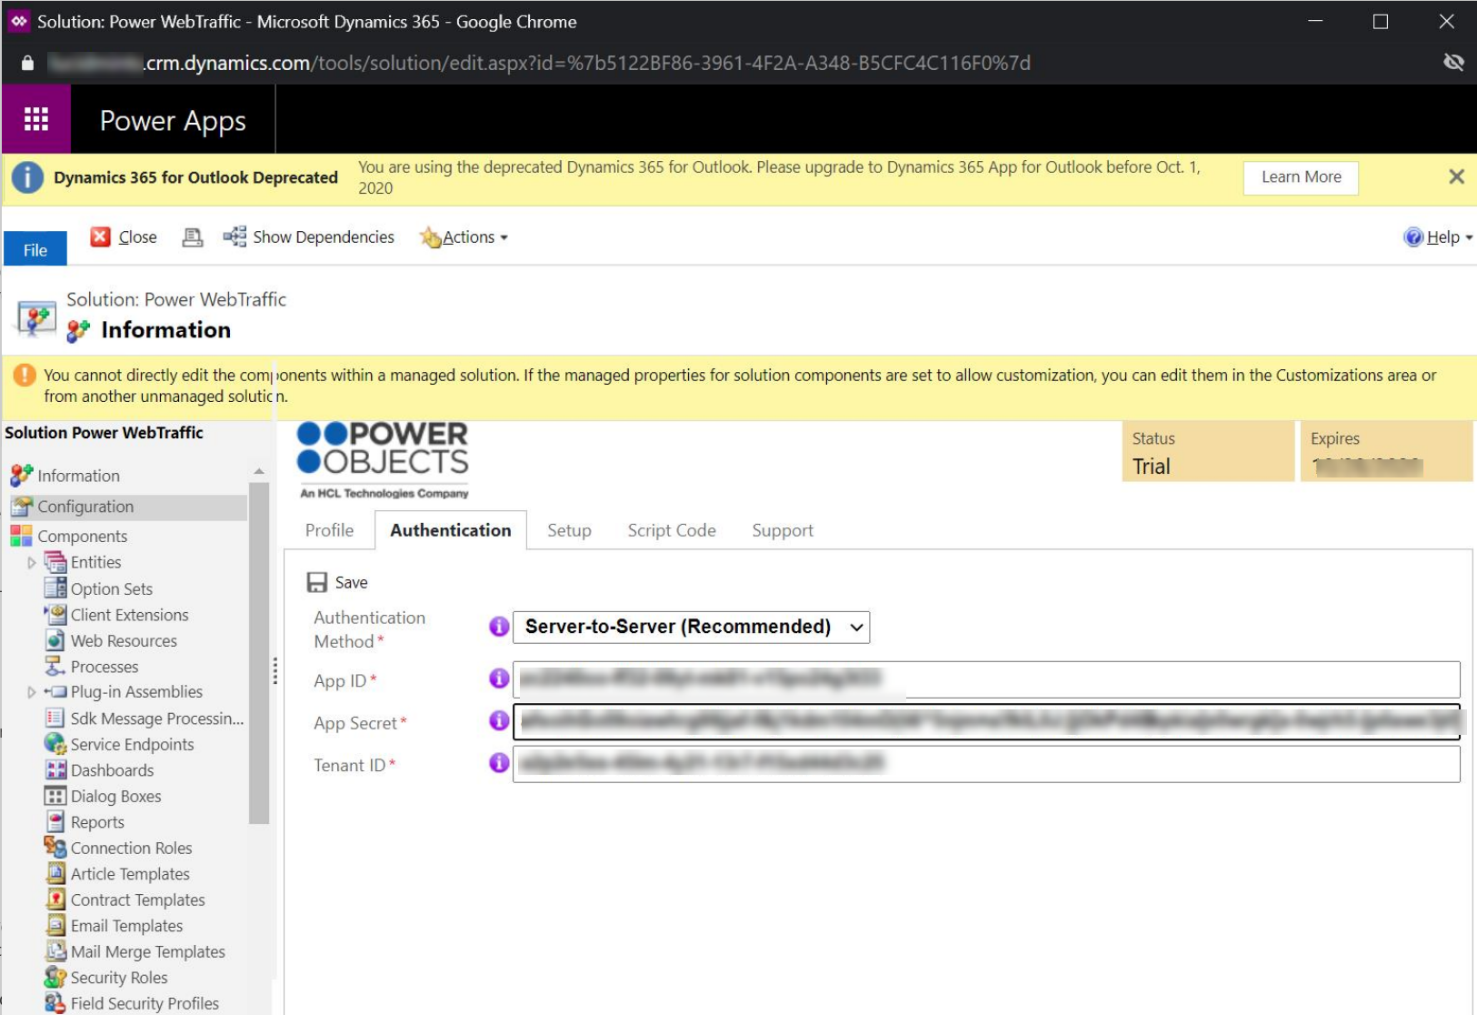
1. Navigate to the configuration Page of the PowerPack
2. Click on Authentication tab
3. For Authentication Method, select ServertoServer (Recommended)
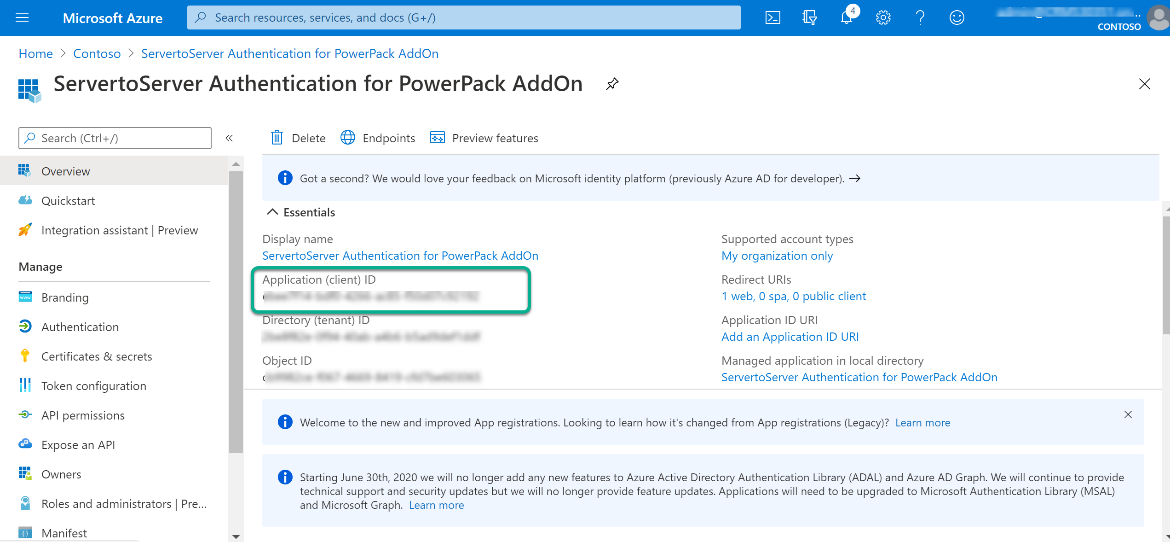
4. Application Id: Navigate to the App Registration created in Part 1and copy Application (client) ID
Reference:
5. App Secret: This is the ‘Value’ of the Secret created in Part 1:
Example:
6. Tenant Id: Directory (tenant) ID
Reference:

7. Click Save.
You are all set! Happy Power Packing!


