
How Microsoft Power Platform is helping to modernize and enable...
In this webinar, our experts showcase a variety of demo use cases of how different components of the...
Over the last few years, we’ve heard quite a bit about chat bots. Chat bots are basically an IM type service where anyone can ask questions that are promptly responded to by an automated service. The idea is that by automating the process of providing responses, the person doesn't have to wait to get connected to a "live" support person (which can sometimes take a long time) just to get answers to basic questions. Also, there are times when the same types of questions are asked repeatedly, often by the same person! This can also be addressed by a chat bot.
If you work with customers or employees who typically ask questions that have standard responses, you can quickly set up a chat bot using the QnaMaker service to automate the process of answering questions. Let us show you how:
Go to https://www.qnamaker.ai/ and log in with your Office 365 credentials. If this is the first time you are logging in, you will not see anything under My knowledge bases. If you've created knowledge bases before, you will see all of them listed in this area.
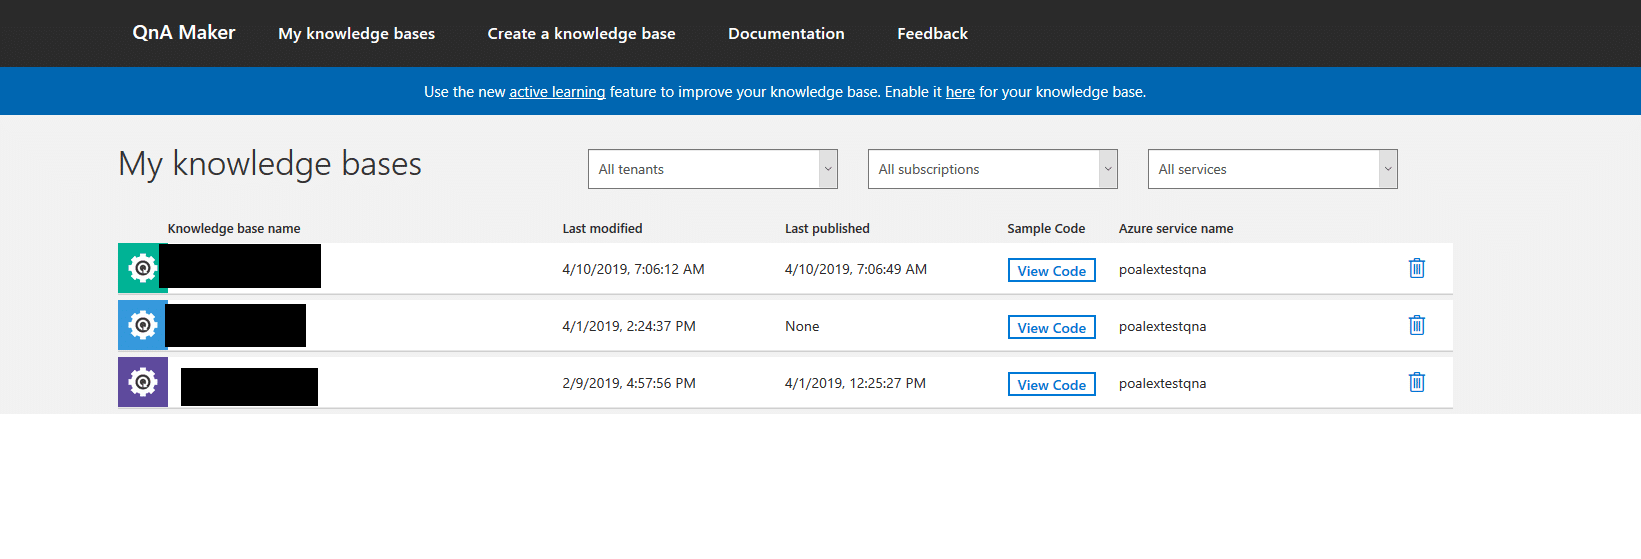
These "knowledge bases" consist of questions and responses that are surfaced in the form of a chat bot. On the top of the screen, click Create a knowledge base to create a new one. This should take you to the screen below:

You will notice that this is a 5-step wizard-like process. Start with step 1 by clicking the Create a QnA service button, which takes you to the Azure portal.
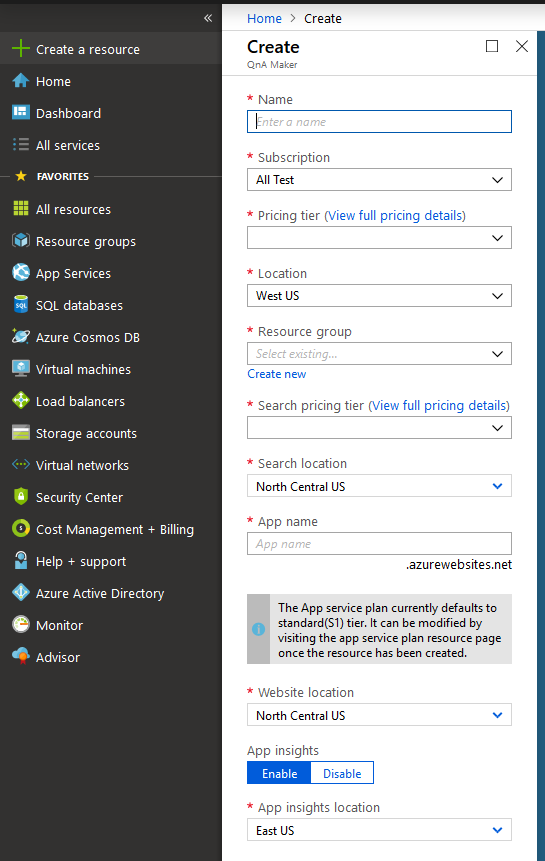
Notice that now you are creating a Qna Maker service. Complete all required fields and click Create.
Note: Make sure to get familiar with the pricing! Just so you know, F0 is the free tier and all the rest are paid.
Now go back to your Qnamaker.ai portal.
Step 2: Choose your Microsoft Azure Directory ID, Azure subscription name, and the Qna service that you just created.
Step 3: Give your knowledge base (kb) a name.
Step 4: This is where you populate your kb. Typically, you will take an Excel file and have two columns in it – one for questions and the other for responses. You can also choose pdf, doc, and a few other formats, too. We have seen it work extremely well with .xlsx files. Alternatively, you can just specify a URL if you have your FAQ-style kb in an online location.
Step 5: Click Create your KB!
Knowledge Base
The kb you just created should look something like this:
![十 ま 0 ッ ま - ー 号 を -
十 に ユ ・ ー ヨ ! ー を -3
、 、 ー 「 02 = 0 コ 物 、 、 323
十 ト よ 「 - ー き 0 を 0 は 「
- 第 13 b 第 01 、 2 & と 0
] 3 っ 3 第 ョ ! 「 黛 ぐ 滝 3 ま 05u3 3 「 0 っ ・ 望 30 -0 3 : 3 & 、 第 2 0 「 - E02 三](https://powerobjects.com/wp-content/uploads/2019/06/0-3.png)
Notice how for each question there is a response available. If you'd like, you can add alternative phrasing for your questions to make sure the bot gets the most accurate responses to questions worded in different ways.
Note: we will address "follow up prompt" for responses in another blogpost in the near future.
On this screen, you can add more question-and-answer pairs manually by clicking the Add Qna pair on the top.
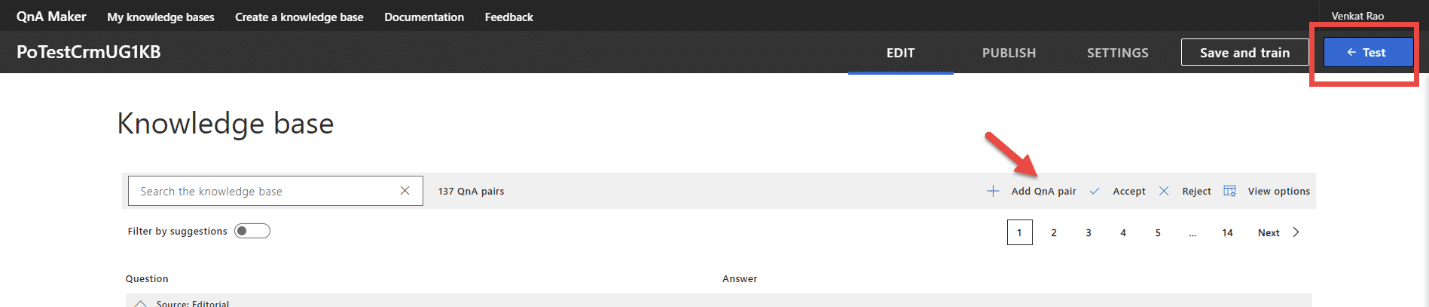
You can also test this kb right here! Click the Test button in the top-right corner. A new window opens up on the right where you can type your question.
https://powerobjects.wistia.com/medias/bkb8u7fu49?embedType=async&videoWidth=350
Note: Clicking Inspect will show you how confidently QnA Maker understands the question and is able to get the right response for it.
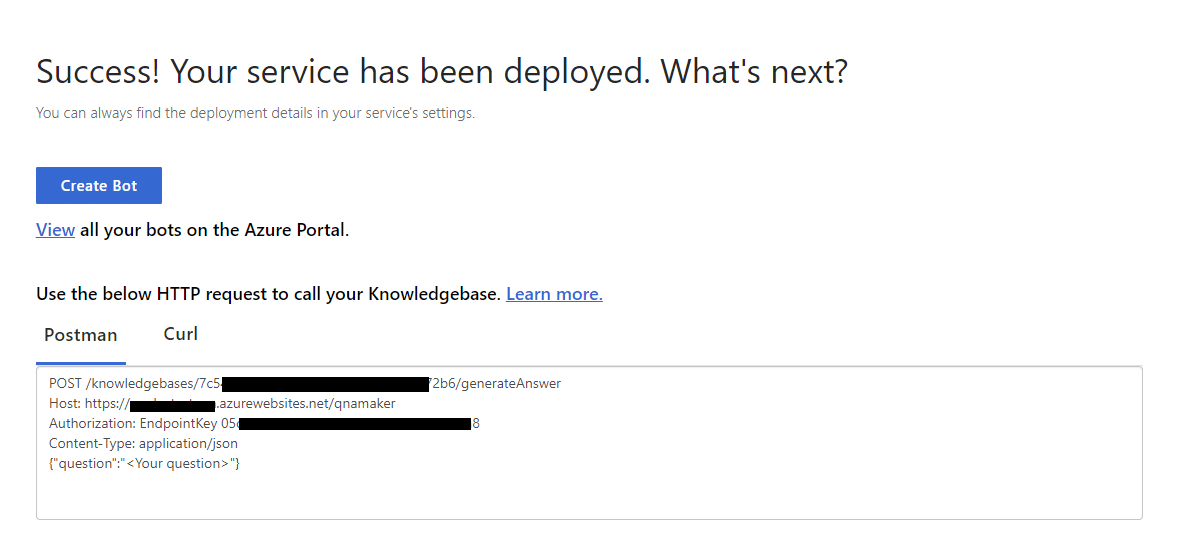
Once you are ready to start using it, Click Publish on the top and then the Publish button.
Your Qna Maker chat bot is now ready!
After you click Publish, you will see some information displayed under Postman. We will use this information to surface this bot in Power Apps and to get answers to our questions.
 rtal,
rtal,
use the HTTP request to call your Knmvledgebase, Learn.more,
Postman ">
Qna Maker in PowerApps
We will use a collection to store all the questions that a user asks and the responses they get back from QnA Maker. In order to do that, let's create a collection in OnStart of the app using the following formula:
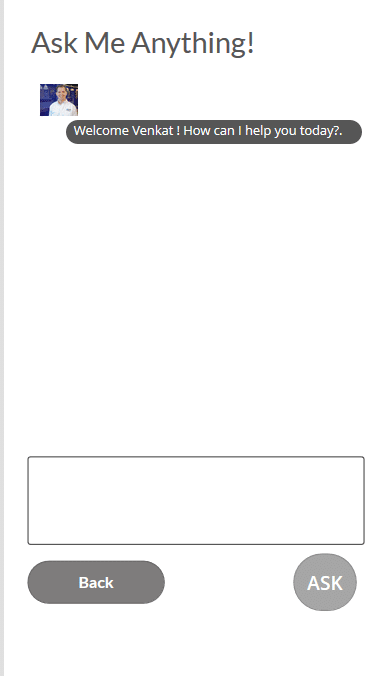
ClearCollect(chat,{id:0,name:"Alex",text:"Welcome "&Left(User().FullName,Find(" ",User().FullName))&"! How can I help you today?.",chattime:Now()})
Basically, we are calling our bot "Alex," and we are giving it an id = 0. Whenever we get to the bot screen in our app, we want Alex to welcome the user by saying "Welcome, [user's first name]! How can I help you today?"
Chattime is for tracking when a question or response is posted.
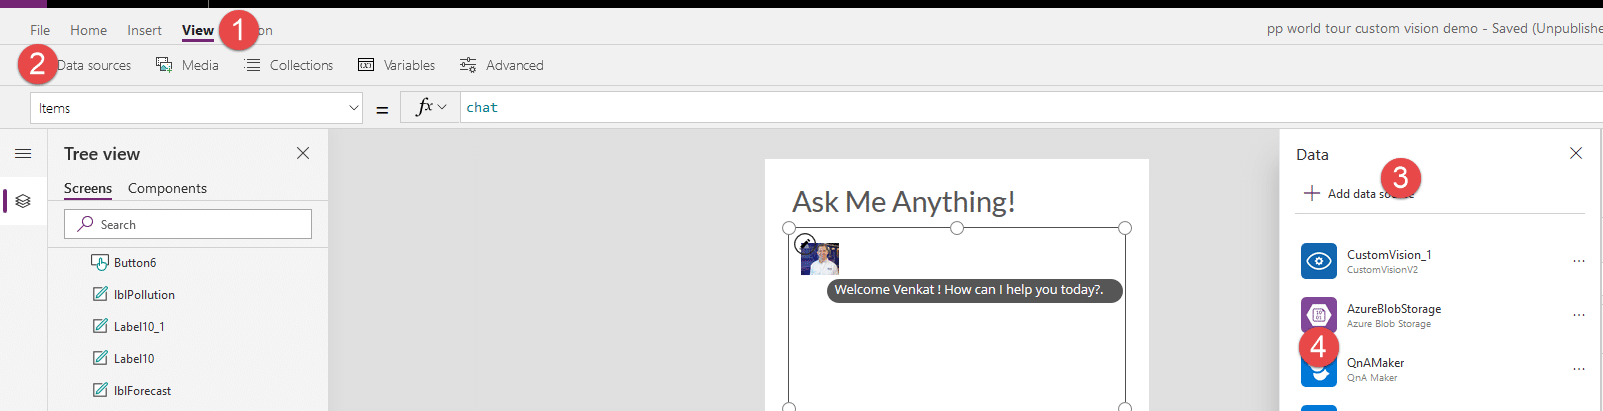
Create a new screen called Bot. Add a Gallery to it and set its Items property to the chat collection we just created.
Add a textbox to the same screen that will be used to input questions.
Finally add a button that will submit the question to QnA Maker and get responses back.
Your screen will look something like this:
Next, from View > Data sources, click Add data source and add the QnA Maker data source to your app:
On OnSelect property of the Ask button, enter the following formulas:
Collect(chat, {id: 1, name: User().FullName, text: txtQuestion.Text);
Collect(chat, {id: 0, name: "Alex", text: First(QnAMaker.GenerateAnswer("","https://qnamakerservicename.azurewebsites.net/knowledgebaseidfromqnamaker","EndpointKey 05cgetthisfromqnamaker too",txtQuestion.Text).answers).answer}); Reset(txtQuestion)
And that's pretty much it! When you run this app, you can easily ask any question to the bot and get responses back in a matter of seconds!
https://powerobjects.wistia.com/medias/asnoxs1gtq?embedType=async&videoWidth=350
Conclusion
If you work with employees or customers who repeatedly come to you with the same questions that typically have the same responses, you can easily set up a QnA Maker bot and surface it in Power Apps!
In our next blog, we will also show you how to surface the same bot in MS Teams, Skype for Business, on your website, and through SMS/text messaging!
Be sure to subscribe to our blog and happy Power Apps'ing!


